<?xml version="1.0" encoding="utf-8"?>
<feed xmlns="http://www.w3.org/2005/Atom" xmlns:media="http://search.yahoo.com/mrss/" xml:lang="en-US">
  <title>BigBinary Blog: JavaScript</title>
  <subtitle>Deep technical writing on Ruby on Rails, performance, scaling, monitoring and engineering.</subtitle>
  <link rel="self" type="application/atom+xml" href="https://www.bigbinary.com/blog/categories/javascript/feed.xml"/>
  <link rel="alternate" type="text/html" href="https://www.bigbinary.com/blog/categories/javascript"/>
  <id>https://www.bigbinary.com/blog/categories/javascript</id>
  <updated>2026-06-10T00:00:00.000Z</updated>
  <author>
    <name>BigBinary</name>
    <uri>https://www.bigbinary.com/</uri>
  </author>
  <icon>https://www.bigbinary.com/favicon.ico</icon>
  <logo>https://www.bigbinary.com/images/bigbinary_square_big_logo.png</logo>
  <rights>Copyright 2026 Big Binary LLC</rights>
  <generator uri="https://nextjs.org">Next.js</generator>
  <entry>
      <title type="text"><![CDATA[Debugging frontend crash and handling circular dependency]]></title>
      <link rel="alternate" type="text/html" href="https://www.bigbinary.com/blog/debugging-frontend-crash-and-handling-circular-dependency"/>
      <link rel="enclosure" type="image/jpeg" href="https://www.bigbinary.com/blog/images/social_preview_images/debugging_frontend_crash_and_circular_dependency.jpg"/>
      <id>https://www.bigbinary.com/blog/debugging-frontend-crash-and-handling-circular-dependency</id>
      <published>2026-06-10T00:00:00.000Z</published>
      <updated>2026-06-10T00:00:00.000Z</updated>
      <author>
        <name>Joseph Mathew</name>
        <uri>https://www.bigbinary.com/blog/authors/josephmathew900</uri>
      </author>
      <category term="JavaScript"/>
      <category term="ReactJS"/>
      <media:thumbnail url="https://www.bigbinary.com/blog/images/social_preview_images/debugging_frontend_crash_and_circular_dependency.jpg" width="1200" height="627"/>
      <summary type="text"><![CDATA[Recently, we had a crash in our NeetoCRM application. As we can see in the screenshot, it looks like the error happened in neeto-widget-replay.js file. At Neeto we have built an internal tool called...]]></summary>
      <content type="html" xml:base="https://www.bigbinary.com/blog/debugging-frontend-crash-and-handling-circular-dependency"><![CDATA[<p>Recently, we had a crash in our <a href="https://www.neeto.com/neetocrm">NeetoCRM</a>
application.</p>
<p><img src="https://www.bigbinary.com/blog/images/images_used_in_blog/2026/investigating-frontend-crash/crash-screenshot.png" alt="crash screenshot"></p>
<p>As we can see in the screenshot, it looks like the error happened in
<code>neeto-widget-replay.js</code> file.</p>
<p>At <a href="https://neeto.com">Neeto</a> we have built an internal tool called NeetoReplay
which captures users' activities in the browser. This helps us in debugging when
users contact us for support or in investigating bugs. This is built on top of
<a href="https://github.com/rrweb-io/rrweb">rrweb</a>. <em>Just want to add that admins of the
workspace can completely opt out of NeetoReplay.</em></p>
<p>We had not changed anything in NeetoReplay for a while, so the error happening
in NeetoReplay was perplexing. Upon investigation, I found that the console
indeed pointed to the <code>neeto-widget-replay.js</code> file. But I also knew that the
filename only tells us which function called <code>console.error</code>, not where the
error originated.</p>
<p>The replay widget wraps <code>console.log</code>, <code>console.warn</code>, and <code>console.error</code> so it
can capture console output for session replay. Once the page loads, every
console message passes through the widget's wrapper, causing DevTools to
associate those messages with the widget file. As a result, when the NeetoCRM
app throws an error during startup, the console makes it look like the error
came from the replay widget even though the actual exception was thrown inside
the NeetoCRM bundle.</p>
<p>The way rrweb's console plugin works, it replaces <code>console.log</code>, <code>console.warn</code>,
and <code>console.error</code> so console output can be captured for session replay. I
checked whether rrweb provides a way to preserve the original caller
information, but it doesn't. Removing the wrapper would also mean losing console
capture from replays.</p>
<p>This isn't specific to rrweb either. Honeybadger, Sentry, PostHog, and React
DevTools use similar wrapping and have the same behavior. React DevTools has an
identical issue documented in
<a href="https://github.com/facebook/react/issues/22257">facebook/react#22257</a>.</p>
<p>The only known mitigation is Chrome's <code>x_google_ignoreList</code> source map feature,
which allows DevTools to hide library frames and show the host application frame
instead. However, it only works when source maps are available. Since we don't
ship source maps with the production minified bundle, this isn't available in
production. As a result, the console attribution is an unavoidable side effect
of session replay tooling, but the actual error information remains intact.</p>
<p>The video mentioned below is the one I created for the internal Neeto folks. The
video is being published <strong>as-is</strong> without any modifications.</p>
<p><a href="https://www.youtube.com/watch?v=cBZvoN5HQKo"><img src="https://img.youtube.com/vi/cBZvoN5HQKo/hqdefault.jpg" alt="Watch on YouTube" width="480" height="360"></a><br><a href="https://www.youtube.com/watch?v=cBZvoN5HQKo">Watch on YouTube</a></p>
<h2>Back to the error</h2>
<p>The real error is:</p>
<pre><code>TypeError: I is not a function at chunk-CL4SWXVJ.digested.js
</code></pre>
<p><code>I</code> is the minified name for <code>createColumn</code>, a helper defined in
<code>commons/utils.jsx</code>.</p>
<p>The failure occurs because code in <code>commons/constants.js</code> calls
<code>createColumn(...)</code> before the function has been initialized. At runtime,
<code>createColumn</code> is still <code>undefined</code>, causing the call to fail and preventing the
React application from starting. The subsequent <code>Failed to load component App</code>
message is simply the mount code reporting that application initialization
failed.</p>
<p>Tracing this back further shows that <code>commons/constants.js</code> and
<code>commons/utils.jsx</code> have a circular dependency. <code>constants.js</code> imports
<code>createColumn</code> from <code>utils.jsx</code> while <code>utils.jsx</code> imports values from
<code>constants.js</code>.</p>
<p>In development, Vite serves modules as native ES modules and the browser
evaluates them depth-first. When <code>constants.js</code> imports <code>createColumn</code> from
<code>utils.jsx</code>, the browser evaluates <code>utils.jsx</code> first, which initializes
<code>createColumn</code> before control returns to <code>constants.js</code>. By the time
<code>constants.js</code> calls <code>createColumn</code>, the function is already defined.</p>
<p>In production, builds are generated using esbuild, which bundles everything into
a single file and has to choose a linear execution order. This can introduce
subtle differences in behavior, particularly around module evaluation order and
circular dependencies. In the generated bundle, code from <code>constants.js</code> ends up
running before <code>createColumn</code> is initialized, which causes the crash.</p>
<p>The reason this surfaced now is that a recent change introduced the following
import in the Deals, Leads, and Contacts <code>Show/index.jsx</code> files:</p>
<pre><code>import { buildHeaderMoreMenu } from &quot;components/commons/utils&quot;;
</code></pre>
<p>Those files did not previously import from <code>commons/utils</code>. The circular
dependency already existed, but this additional import changed esbuild's
bundling order and exposed the issue. The change did not introduce the circular
dependency itself; it only made the existing problem surface in production.</p>
<h2>The fix</h2>
<p>The fix is to break the circular dependency by moving <code>createColumn</code> into a
small standalone module that has no dependency on <code>commons/constants.js</code>. Once
the circular import is removed, esbuild can no longer generate an execution
order where <code>createColumn</code> is referenced before initialization.</p>
<h2>How to replicate this behavior in the development environment</h2>
<p>To help catch these issues earlier, we provide an esbuild-based development
server that mirrors production bundling behavior while still supporting
automatic rebuilds during development.</p>
<p>Start the Rails server with the <code>ESBUILD_DEVSERVER</code> flag enabled.</p>
<pre><code>ESBUILD_DEVSERVER=true bundle exec rails server
</code></pre>
<p>In a separate terminal, start esbuild in watch mode.</p>
<pre><code>yarn build --watch
</code></pre>
<p>With <code>ESBUILD_DEVSERVER=true</code>, Rails serves the assets generated by esbuild
instead of the assets served by Vite. Running <code>yarn build --watch</code> ensures the
bundles are rebuilt automatically whenever files change, allowing you to test
the application using the same bundling behavior as production.</p>
<h2>Why Honeybadger didn't catch this error</h2>
<p>If JavaScript execution fails before the React tree mounts, Honeybadger never
receives the error. This includes chunk load failures, syntax errors in the
entry chunk, runtime errors during module evaluation, and bundling issues caused
by incorrect module ordering.</p>
<p>The error was thrown while evaluating the <code>App</code> chunk and was visible in the
browser console for every affected user. However, no Honeybadger issue was
created.</p>
<p>The initialization flow looked like this:</p>
<pre><code>application.js
└─ mount({ App: () =&gt; import(&quot;src/App&quot;) })
     └─ dynamic import(&quot;src/App&quot;)
          └─ &lt;App&gt;
               └─ &lt;AppContainer&gt;
                    └─ &lt;HoneybadgerErrorBoundary&gt;
</code></pre>
<p><code>Honeybadger.configure()</code> is called inside <code>HoneybadgerErrorBoundary</code>. Since
that component is rendered as a descendant of <code>&lt;App&gt;</code>, Honeybadger is
initialized only after the <code>App</code> chunk has been successfully loaded and
rendered.</p>
<p>When a startup failure occurs, <code>import(&quot;src/App&quot;)</code> rejects, <code>mount.js</code> catches
the error and logs it using <code>console.error(...)</code>, and the execution stops before
<code>&lt;App&gt;</code> is mounted. Because the error has already been handled, <code>window.onerror</code>
is never triggered. Since <code>&lt;HoneybadgerErrorBoundary&gt;</code> never renders,
<code>Honeybadger.configure()</code> is never called, which means no API key is configured,
no global handlers are registered, and no error is reported.</p>
<p>As a result, startup failures that completely prevent the application from
loading are invisible to Honeybadger.</p>
<p>Honeybadger should be initialized before loading the <code>App</code> chunk so that
failures during application bootstrap, chunk loading, and module evaluation are
captured and reported.</p>
<h2>The Honeybadger fix</h2>
<p>Honeybadger is now configured in <code>application.js</code>, before <code>mount()</code> runs:</p>
<pre><code>application.js
├─ Honeybadger.configure({ enableUncaught: true, ... })   // configured before mount
└─ mount({ App: () =&gt; import(&quot;src/App&quot;) })
     ├─ dynamic import(&quot;src/App&quot;) succeeds
     │    └─ &lt;App&gt;
     │         └─ &lt;AppContainer&gt;
     │              └─ &lt;HoneybadgerErrorBoundary&gt;   // uses pre-configured client
     │
     └─ dynamic import(&quot;src/App&quot;) fails
          └─ Honeybadger.notify(error, { name: &quot;AppMountError&quot; })
</code></pre>
<p>With <code>enableUncaught: true</code>, <code>window.onerror</code> is armed before any dynamic import
runs, so failures during module evaluation are captured. And if the <code>App</code> chunk
itself fails to load, <code>mount()</code> reports it explicitly via
<code>Honeybadger.notify(...)</code> instead of only logging to the console.</p>
]]></content>
    </entry>
  <entry>
      <title type="text"><![CDATA[Remotely EV code-signing a Windows app with ssl.com]]></title>
      <link rel="alternate" type="text/html" href="https://www.bigbinary.com/blog/ev-code-sign-windows-application-ssl-com"/>
      <link rel="enclosure" type="image/jpeg" href="https://www.bigbinary.com/blog/images/social_preview_images/ev_code_sign_a_windows_application.jpg"/>
      <id>https://www.bigbinary.com/blog/ev-code-sign-windows-application-ssl-com</id>
      <published>2024-12-17T00:00:00.000Z</published>
      <updated>2024-12-17T00:00:00.000Z</updated>
      <author>
        <name>Farhan CK</name>
        <uri>https://www.bigbinary.com/blog/authors/farhanlatheef</uri>
      </author>
      <category term="JavaScript"/>
      <category term="ReactJS"/>
      <category term="Electron"/>
      <media:thumbnail url="https://www.bigbinary.com/blog/images/social_preview_images/ev_code_sign_a_windows_application.jpg" width="1200" height="627"/>
      <summary type="text"><![CDATA[EV code-sign a Windows application using ssl.com]]></summary>
      <content type="html" xml:base="https://www.bigbinary.com/blog/ev-code-sign-windows-application-ssl-com"><![CDATA[<p><em>Recently, we built <a href="https://neetorecord.com/neetorecord/">NeetoRecord</a>, a loom
alternative. The desktop application was built using Electron. In a series of
blogs, we capture how we built the desktop application and the challenges we ran
into. This blog is part 9 of the blog series. You can also read about
<a href="https://www.bigbinary.com/blog/sync-store-main-renderer-electron">part 1</a>,
<a href="https://www.bigbinary.com/blog/publish-electron-application">part 2</a>,
<a href="https://www.bigbinary.com/blog/video-background-removal">part 3</a>,
<a href="https://www.bigbinary.com/blog/electron-multiple-browser-windows">part 4</a>,
<a href="https://www.bigbinary.com/blog/code-sign-notorize-mac-desktop-app">part 5</a>,
<a href="https://www.bigbinary.com/blog/deep-link-electron-app">part 6</a>,
<a href="https://www.bigbinary.com/blog/request-camera-micophone-permission-electron">part 7</a>
and <a href="https://www.bigbinary.com/blog/native-modules-electron">part 8</a>.</em></p>
<p>Code-signing allows Windows to verify the identity of an application's
publisher, making it authentic and trustworthy. Additionally, code-signing helps
applications comply with Windows security policies, avoiding warnings and
installation blocks, ultimately building user confidence and providing a
smoother, safer experience.</p>
<h3>What is code-signing?</h3>
<p>At its core, code-signing involves using a cryptographic hash function to create
a unique digital fingerprint of the code. This fingerprint and a certificate
from a trusted Certificate Authority (CA) form the digital signature. When users
download and run the software, their operating system or browser checks the
digital signature to verify its authenticity.</p>
<p>There are two types of certificates we can use to sign a Windows application:</p>
<ul>
<li>Code-signing Certificate</li>
<li>EV Code-signing Certificate</li>
</ul>
<p>A <strong>Standard Code-signing Certificate</strong> provides our application a baseline
level of security and trust. While it verifies the software publisher's identity
and ensures that the code has not been tampered with since it was signed, the
validation process is less rigorous than EV certificates. It shows a warning
during installation that goes away once enough users have installed our
application and we've built up trust.</p>
<p><strong>Extended Validation (EV) Code-signing Certificates</strong>, on the other hand, offer
the highest level of security and trust. These certificates require a more
rigorous vetting process by the Certificate Authority (CA) before they are
issued, ensuring that the entity requesting the certificate is thoroughly
verified. This process involves verifying the legal, physical, and operational
existence of the entity, as well as confirming the identity of the individual
requesting the certificate.</p>
<p>Unlike Apple, Microsoft allows developers to purchase these certificates on the
open market. They are typically sold by the same companies that offer HTTPS
certificates. Prices can vary, so it's worth shopping around. Some popular
resellers include:</p>
<ul>
<li><a href="https://www.digicert.com/signing/code-signing-certificates">DigiCert code-signing certificate</a></li>
<li><a href="https://shop.certum.eu/data-security/code-signing-certificates/certum-ev-code-sigining.html">Certum EV code-signing certificate</a></li>
<li><a href="https://www.entrust.com/products/digital-signing/code-signing-certificates">Entrust code-signing certificate</a></li>
<li><a href="https://www.ssl.com/certificates/ev-code-signing/">SSL.com EV code-signing certificate</a></li>
</ul>
<h3>Why choose EV code-signing?</h3>
<p>Even though EV code-signing certificates are comparatively pricier than standard
code-signing certificates and have a rigorous vetting process. It is important
to note that, effective June 2023, the
<a href="https://cabforum.org/wp-content/uploads/Baseline-Requirements-for-the-Issuance-and-Management-of-Code-Signing.v3.2.pdf">new CA/Browser Forum code-signing requirements</a>
is in effect. As a result, publicly trusted Certificate Authorities (CA) will
require that certificate requestors use an appropriately certified (FIPS 140-2
level 2 or Common Criteria EAL 4+) hardware security module (HSM) to protect
their code-signing private keys. This requirement applies to the issuance of
both extended validation (EV) certificates and non-EV certificates.</p>
<p>In simple words, what this means is that standard code-signing certificates no
longer provides benefits they provided in the past. Windows will treat our
application as completely unsigned and display the equivalent warning dialogs.
Another thing to note here is that since certificates are required to be stored
on an HSM, the certificate cannot be simply downloaded onto a CI infrastructure.</p>
<h3>Cloud-based EV code-signing</h3>
<p>In the past, EV code-signing could only be performed using a physical USB
dongle. Upon purchasing an EV certificate, the provider would send a physical
USB device containing the certificate. This method required code-signing to be
executed from a local machine, which posed flexibility challenges, especially
for team environments. Additionally, physical USB dongles are prone to loss or
damage.</p>
<p>As a solution to this, many certificate providers now offer &quot;cloud-based EV
signing,&quot; where the signing hardware is housed in their data centers, allowing
us to remotely sign code.</p>
<p>In this blog, we will look into how we can remotely EV code-sign a Windows
application built using Electron, using SSL.com's
<a href="https://www.ssl.com/guide/esigner-codesigntool-command-guide/">eSigner CodeSignTool</a></p>
<h3>Purchase and validate EV certificate from SSL.com</h3>
<p>For the NeetoRecord desktop application, we used EV certificate from ssl.com and
hence we will use ssl.com as an example in this blog.</p>
<p>Once we sign into <a href="http://ssl.com/">SSL.com</a> and purchase the
<a href="https://www.ssl.com/certificates/ev-code-signing/buy/">EV code-signing certificate</a>,
We need to validate the certificate. For this, we need to fill out the <strong>EV
subscriber agreement</strong> and <strong>EV authorization form</strong>. Both of them can be
downloaded from
<a href="https://www.ssl.com/faqs/what-are-the-requirements-for-ssl-com-ev-certificates/">here</a>.
Also, make sure we have <a href="http://www.dnb.com/get-a-duns-number.html">D-U-N-S</a>
number or equivalent ready before starting the validation process. To know about
all the requirements in detail, follow
<a href="https://www.ssl.com/faqs/what-are-the-requirements-for-ssl-com-ev-certificates/">this article</a>
or watch this <a href="https://www.youtube.com/watch?v=y9rhsL7jZnc">Youtube video</a>.</p>
<h3>eSigner and CodeSignTool</h3>
<p><a href="https://www.ssl.com/esigner/">eSigner</a> is SSL.com's cloud signing service that
allows remote access to its HSM hardware from anywhere. We can use our SSL.com
signing credentials to access it.</p>
<p><a href="https://www.ssl.com/guide/esigner-codesigntool-command-guide/">CodeSignTool</a> is
a command-line tool for remotely signing various types of scripts like MSI
installers, Microsoft Authenticode etc., with eSigner EV code-signing
certificates. Hashes of the files are sent to SSL.com for signing so that the
code itself is not sent. This is ideal where sensitive files need to be signed
but should not be sent over the wire for signing. CodeSignTool is also ideal for
automated batch processes for high-volume signings or integration into existing
CI/CD pipeline workflows.</p>
<h3>Enroll in eSigner</h3>
<p>To be able to code-sign the application using eSigner, we need to first enroll
in eSigner. To do so,</p>
<ul>
<li>Navigate to an issued Code-signing order in our SSL.com account. Note that the
order is labeled eSigner Ready.
<img src="https://www.bigbinary.com/blog/images/images_used_in_blog/2024/ev-code-sign-windows-application-ssl-com/esigner-code-signing-01.png" alt="esigner ready"></li>
<li>Click one of the download links.
<img src="https://www.bigbinary.com/blog/images/images_used_in_blog/2024/ev-code-sign-windows-application-ssl-com/esigner-code-signing-02.png" alt="download link"></li>
<li>Create and confirm a 4-digit PIN and click the create PIN button.
<img src="https://www.bigbinary.com/blog/images/images_used_in_blog/2024/ev-code-sign-windows-application-ssl-com/esigner-code-signing-03.png" alt="set pin"></li>
<li>Our certificate will be generated, and after a few moments, a QR code will
appear above the certificate downloads table.
<img src="https://www.bigbinary.com/blog/images/images_used_in_blog/2024/ev-code-sign-windows-application-ssl-com/esigner-totp-secret.png" alt="QR code"></li>
</ul>
<p>When the eSigner QR code is displayed for our certificate, copy and save the
secret code value shown in a safe location. This is the TOTP (time-based
one-time password) secret associated with our eSigner certificate. Just as 2FA
authentication software like Authy can scan this value from the QR code to
generate valid OTPs for code-signing, CodeSignTool can also use it to generate
OTPs are automatically generated during the signing process. In the next
section, we will use this secret code as <code>totp_secret</code> while integrating with
CodeSignTool.</p>
<p>For more information, check out these articles:
<a href="https://www.ssl.com/guide/remote-ev-code-signing-with-esigner/">How to Enroll in eSigner</a>
and
<a href="https://www.ssl.com/how-to/automate-esigner-ev-code-signing/">Automate eSigner EV Code-signing</a>.</p>
<h3>Obtain Required Credentials</h3>
<p>We need to provide the following credentials to the CodeSignTool for it to
successfully connect with eSigner and code-sign the application.</p>
<p>If we haven't purchased a certificate yet and want to try out how it works,
SSL.com offers
<a href="https://www.ssl.com/guide/esigner-demo-credentials-and-certificates/">eSigner Demo Credentials and Certificates</a>.</p>
<ul>
<li>username</li>
<li>password</li>
<li>totp_secret</li>
<li>credential_id</li>
</ul>
<p>For <code>username</code> and <code>password</code>, use the same credentials we used to sign in to
SSL.com. If needed, we can also add additional users to the same account. For
the <code>totp_secret</code>, use the secret code we saved during the eSigner enrollment
process.</p>
<p><img src="https://www.bigbinary.com/blog/images/images_used_in_blog/2024/ev-code-sign-windows-application-ssl-com/esigner-totp-secret.png" alt="QR code"></p>
<p>To obtain the <code>credential_id</code>, navigate to the certificate details section on
the SSL.com dashboard. The <code>credential_id</code> will be listed under
<code>SIGNING CREDENTIALS</code>.</p>
<p><img src="https://www.bigbinary.com/blog/images/images_used_in_blog/2024/ev-code-sign-windows-application-ssl-com/ssl-com-credential-id.png" alt="credential id"></p>
<p>After acquiring all the credentials, add them to GitHub Secrets with the
following names:</p>
<ul>
<li><code>username</code> -&gt; <code>WINDOWS_SIGN_USER_NAME</code></li>
<li><code>password</code> -&gt; <code>WINDOWS_SIGN_USER_PASSWORD</code></li>
<li><code>totp_secret</code> -&gt; <code>WINDOWS_SIGN_USER_TOTP</code></li>
<li><code>credential_id</code> -&gt; <code>WINDOWS_SIGN_CREDENTIAL_ID</code></li>
</ul>
<p>Load up these secrets as environment variables in our Github Action workflow.</p>
<pre><code class="language-yml">- name: Publish releases
    env:
      AWS_ACCESS_KEY_ID: ${{secrets.AWS_ACCESS_KEY}}
      AWS_SECRET_ACCESS_KEY: ${{secrets.AWS_SECRET}}
      WINDOWS_SIGN_USER_NAME: ${{ secrets.WINDOWS_SIGN_USER_NAME }}
      WINDOWS_SIGN_USER_PASSWORD: ${{ secrets.WINDOWS_SIGN_USER_PASSWORD }}
      WINDOWS_SIGN_USER_TOTP: ${{ secrets.WINDOWS_SIGN_USER_TOTP }}
      WINDOWS_SIGN_CREDENTIAL_ID: ${{ secrets.WINDOWS_SIGN_CREDENTIAL_ID }}
    run: npm exec electron-builder -- --publish always -mwl
</code></pre>
<h3>Integrate CodeSignTool</h3>
<p>The Windows version of CodeSignTool is provided as a batch file
(<code>CodeSignTool.bat</code>), while the Linux/macOS version is available as a shell
script (<code>CodeSignTool.sh</code>). We can find the download links and more details
about CodeSignTool in
<a href="https://www.ssl.com/guide/esigner-codesigntool-command-guide/">this article</a></p>
<p>For our purposes, we'll be using the shell script. Download the Linux/macOS
version, unzip it, and place it in the root directory of our Electron project.</p>
<p>To integrate the <code>CodeSignTool</code> into the Electron build process, create a script
(<code>./scripts/windows-sign.mjs</code>) that runs the <code>CodeSignTool</code> shell script.</p>
<pre><code class="language-js">import path from &quot;path&quot;;
import fs from &quot;fs&quot;;
import childProcess from &quot;child_process&quot;;

const TEMP_DIR = path.join(__dirname, &quot;../release&quot;, &quot;temp&quot;);

if (!fs.existsSync(TEMP_DIR)) {
  fs.mkdirSync(TEMP_DIR);
}

const sign = file =&gt; {
  const USER_NAME = process.env.WINDOWS_SIGN_USER_NAME;
  const USER_PASSWORD = process.env.WINDOWS_SIGN_USER_PASSWORD;
  const CREDENTIAL_ID = process.env.WINDOWS_SIGN_CREDENTIAL_ID;
  const USER_TOTP = process.env.WINDOWS_SIGN_USER_TOTP;

  if (USER_NAME &amp;&amp; USER_PASSWORD &amp;&amp; USER_TOTP &amp;&amp; CREDENTIAL_ID) {
    console.log(`Windows code-signing ${file.path}`);
    const { name, dir } = path.parse(file.path);
    const tempFile = path.join(TEMP_DIR, name);

    const setDir = `cd ./CodeSignTool-v1.3.0`;
    const signFile = `./CodeSignTool.sh sign -input_file_path=&quot;${file.path}&quot; -output_dir_path=&quot;${TEMP_DIR}&quot; -credential_id=${CREDENTIAL_ID}   -username=&quot;${USER_NAME}&quot; -password=&quot;${USER_PASSWORD}&quot; -totp_secret=&quot;${USER_TOTP}&quot;`;
    const moveFile = `mv &quot;${tempFile}.exe&quot; &quot;${dir}&quot;`;
    childProcess.execSync(`${setDir} &amp;&amp; ${signFile} &amp;&amp; ${moveFile}`, {
      stdio: &quot;inherit&quot;,
    });
  } else {
    console.warn(`windows-sign.js - Can't sign file, credentials are missing`);
    process.exit(1);
  }
};

export default sign;
</code></pre>
<p>The script exports a <code>sign</code> function that accepts an object containing the path
to the file that needs to be signed. It reads all the necessary credentials from
environment variables and then passes these credentials along with the file
path.</p>
<p>To finish up, pass this script to the <code>electron-builder</code> configuration.</p>
<pre><code class="language-json">
 &quot;build&quot;: {
    &quot;productName&quot;: &quot;MyProduct&quot;,
     &quot;win&quot;: {
      &quot;target&quot;: {
        &quot;target&quot;: &quot;nsis&quot;,
        &quot;arch&quot;: [
          &quot;x64&quot;
        ]
      },
      &quot;signingHashAlgorithms&quot;: [
        &quot;sha256&quot;
      ],
      &quot;sign&quot;: &quot;./scripts/windows-sign.mjs&quot;,
      &quot;publisherName&quot;: &quot;Neeto LLC&quot;,
      &quot;artifactName&quot;: &quot;${productName}-Setup-${version}.${ext}&quot;
    },
 }

</code></pre>
<p>Here, we pass the script path to the <code>win.sign</code> field in the <code>electron-builder</code>
configuration. Once added, <code>electron-builder</code> will call this script for each
file that needs to be signed.</p>
<p>Great! With this, we've completed the EV code-signing process for our Windows
application. Now, when we run the GitHub Action workflow, it will successfully
code-sign our Windows application.</p>
<h3>SSL.com pricing</h3>
<p>As mentioned earlier, EV code signing certificates are expensive. SSL.com
charges $349 per year for an EV code signing certificate, with discounts
available for multi-year purchases. For more information, visit:
https://www.ssl.com/certificates/ev-code-signing/buy/.</p>
<p>In addition to the certificate cost, we must also subscribe to the eSigner cloud
signing service, which is a subscription-based service. The Tier 1 plan costs
$100 per month and allows a maximum of 10 files to be signed, equating to a
minimum of $10 per signing. An Electron application requires four files to be
signed per build. This means we can only build an Electron application twice per
month under the Tier 1 plan.</p>
<p>If we need to build the application more than twice per month, we recommend
upgrading to Tier 2. This plan costs $300 per month and allows up to 100 file
signings, reducing the cost to $3 per signing. For more information, visit:
https://www.ssl.com/guide/esigner-pricing-for-code-signing/</p>
<p><img src="https://www.bigbinary.com/blog/images/images_used_in_blog/2024/ev-code-sign-windows-application-ssl-com/esigner_pricing.png" alt="esigner pricing"></p>
]]></content>
    </entry>
  <entry>
      <title type="text"><![CDATA[Requesting camera and microphone access in Electron]]></title>
      <link rel="alternate" type="text/html" href="https://www.bigbinary.com/blog/request-camera-micophone-permission-electron"/>
      <link rel="enclosure" type="image/jpeg" href="https://www.bigbinary.com/blog/images/social_preview_images/requesting_camera_and_microphone_permission_in_electron.jpg"/>
      <id>https://www.bigbinary.com/blog/request-camera-micophone-permission-electron</id>
      <published>2024-12-03T00:00:00.000Z</published>
      <updated>2024-12-03T00:00:00.000Z</updated>
      <author>
        <name>Farhan CK</name>
        <uri>https://www.bigbinary.com/blog/authors/farhanlatheef</uri>
      </author>
      <category term="JavaScript"/>
      <category term="ReactJS"/>
      <media:thumbnail url="https://www.bigbinary.com/blog/images/social_preview_images/requesting_camera_and_microphone_permission_in_electron.jpg" width="1200" height="627"/>
      <summary type="text"><![CDATA[Requesting camera and microphone permission in an Electron app]]></summary>
      <content type="html" xml:base="https://www.bigbinary.com/blog/request-camera-micophone-permission-electron"><![CDATA[<p><em>Recently, we built <a href="https://neetorecord.com/neetorecord/">NeetoRecord</a>, a loom
alternative. The desktop application was built using Electron. In a series of
blogs, we capture how we built the desktop application and the challenges we ran
into. This blog is part 7 of the blog series. You can also read about
<a href="https://www.bigbinary.com/blog/sync-store-main-renderer-electron">part 1</a>,
<a href="https://www.bigbinary.com/blog/publish-electron-application">part 2</a>,
<a href="https://www.bigbinary.com/blog/video-background-removal">part 3</a>,
<a href="https://www.bigbinary.com/blog/electron-multiple-browser-windows">part 4</a>,
<a href="https://www.bigbinary.com/blog/code-sign-notorize-mac-desktop-app">part 5</a>,
<a href="https://www.bigbinary.com/blog/deep-link-electron-app">part 6</a>
<a href="https://www.bigbinary.com/blog/native-modules-electron">part 8</a> and
<a href="https://www.bigbinary.com/blog/ev-code-sign-windows-application-ssl-com">part 9</a>
.</em></p>
<p>When developing an Electron app, handling permissions for the camera and
microphone varies from platform to platform. On macOS, apps are denied access to
the camera and microphone by default. To gain access, we must explicitly request
these permissions from the user. On the other hand, Windows tends to grant these
permissions to apps by default, although users can manually revoke them through
the system settings.</p>
<h3>Updating entitlement file for Mac</h3>
<p>In macOS, applications are run with a limited set of permissions to limit
potential damage from malicious code. Depending on which Electron APIs our app
uses, we may need to add additional entitlements to our app's entitlements file.</p>
<p>In macOS applications, entitlements or permissions are specified using a file
with a format like property list (<code>.plist</code>) or XML.</p>
<pre><code class="language-xml">&lt;?xml version=&quot;1.0&quot; encoding=&quot;UTF-8&quot;?&gt;
&lt;!DOCTYPE plist PUBLIC &quot;-//Apple//DTD PLIST 1.0//EN&quot; &quot;http://www.apple.com/DTDs/PropertyList-1.0.dtd&quot;&gt;
&lt;plist version=&quot;1.0&quot;&gt;
  &lt;dict&gt;
    &lt;key&gt;com.apple.security.cs.allow-unsigned-executable-memory&lt;/key&gt;
    &lt;true/&gt;
    &lt;key&gt;com.apple.security.cs.allow-jit&lt;/key&gt;
    &lt;true/&gt;
    &lt;key&gt;com.apple.security.device.camera&lt;/key&gt;
    &lt;true/&gt;
    &lt;key&gt;com.apple.security.device.microphone&lt;/key&gt;
    &lt;true/&gt;
    &lt;key&gt;com.apple.security.device.audio-input&lt;/key&gt;
    &lt;true/&gt;
    &lt;key&gt;com.apple.security.cs.allow-dyld-environment-variables&lt;/key&gt;
    &lt;true/&gt;
  &lt;/dict&gt;
&lt;/plist&gt;
</code></pre>
<p>For our purpose, we need <code>com.apple.security.device.camera</code> for the camera and
<code>com.apple.security.device.microphone</code> and
<code>com.apple.security.device.audio-input</code> entitlements for the microphone.</p>
<h3>Configuring in electron-builder</h3>
<p><a href="https://www.electron.build/">electron-builder</a> is a popular alternative package
for building, packaging and distributing Electron applications.</p>
<p>We need to ensure that the path to <code>entitlements.plist</code> is correctly set in the
<code>electron-builder</code> configuration.</p>
<pre><code class="language-json"> &quot;build&quot;: {
    &quot;productName&quot;: &quot;AppName&quot;,
    &quot;appId&quot;: &quot;com.neeto.AppName&quot;,
     &quot;mac&quot;: {
      &quot;target&quot;: {
        &quot;target&quot;: &quot;default&quot;,
        &quot;arch&quot;: [
          &quot;arm64&quot;,
          &quot;x64&quot;
        ]
      },
      &quot;type&quot;: &quot;distribution&quot;,
      &quot;entitlements&quot;: &quot;assets/entitlements.mac.plist&quot;,
    },
 }
</code></pre>
<p>We also need to provide a description of the camera and microphone's usage in
the <code>Info.plist</code>. We don't have to create an <code>Info.plist</code> when using
<code>electron-builder</code>; it will create and handle it internally, and any additional
info can be passed using the <code>extendInfo</code> key.</p>
<pre><code class="language-json"> &quot;build&quot;: {
    &quot;productName&quot;: &quot;AppName&quot;,
    &quot;appId&quot;: &quot;com.neeto.AppName&quot;,
     &quot;mac&quot;: {
      &quot;target&quot;: {
        &quot;target&quot;: &quot;default&quot;,
        &quot;arch&quot;: [
          &quot;arm64&quot;,
          &quot;x64&quot;
        ]
      },
      &quot;type&quot;: &quot;distribution&quot;,
      &quot;entitlements&quot;: &quot;assets/entitlements.mac.plist&quot;,
      &quot;entitlementsInherit&quot;: &quot;assets/entitlements.mac.plist&quot;,
      &quot;extendInfo&quot;: {
        &quot;NSMicrophoneUsageDescription&quot;: &quot;Please give us access to your microphone&quot;,
        &quot;NSCameraUsageDescription&quot;: &quot;Please give us access to your camera&quot;,
      },
    },
 }
</code></pre>
<p>The above code will add <code>NSMicrophoneUsageDescription</code> and
<code>NSCameraUsageDescription</code> to the <code>Info.plist</code>.</p>
<h3>Requesting permission</h3>
<p>Electron's
<a href="https://www.electronjs.org/docs/latest/api/system-preferences">systemPreferences</a>
module exposes events and methods to access and alter system preferences.</p>
<p>Before requesting permission, we can use the
<code>systemPreferences.getMediaAccessStatus</code> method to check if we already have the
access.</p>
<pre><code class="language-js">import { systemPreferences } from &quot;electron&quot;;

const hasMicrophonePermission =
  systemPreferences.getMediaAccessStatus(&quot;microphone&quot;) === &quot;granted&quot;;
const hasCameraPermission =
  systemPreferences.getMediaAccessStatus(&quot;camera&quot;) === &quot;granted&quot;;
</code></pre>
<p>For the camera and microphone, if permission is granted, it will return
<code>granted</code>; otherwise, depending on the platform and permission settings, it will
return <code>not-determined</code>, <code>denied</code>, <code>restricted</code> or <code>unknown</code>.</p>
<p><strong>For Mac</strong>, we can use the <code>systemPreferences.askForMediaAccess</code> method to
request permission. This method will return a promise that resolves with <code>true</code>
if consent was granted and <code>false</code> if it was denied.</p>
<pre><code class="language-js">const cameraGranted = await systemPreferences.askForMediaAccess(&quot;camera&quot;);
const microPhoneGranted = await systemPreferences.askForMediaAccess(
  &quot;microphone&quot;
);
</code></pre>
<p>When we call this method, it will open a system alert asking the user to grant
permission.</p>
<p><img src="https://www.bigbinary.com/blog/images/images_used_in_blog/2024/request-camera-micophone-permission-electron/camera-permission-alert.png" alt="camera permission"></p>
<p>If the user denies the permission the very first time, this method call will not
open the system alert again. Now, we have to open the system preference pane and
ask the user to enable it from there.</p>
<pre><code class="language-js">import { shell } from &quot;electron&quot;;

const cameraGranted = await systemPreferences.askForMediaAccess(&quot;camera&quot;);
if (!cameraGranted) {
  shell.openExternal(
    &quot;x-apple.systempreferences:com.apple.preference.security?Privacy_Camera&quot;
  );
}

const microPhoneGranted = await systemPreferences.askForMediaAccess(
  &quot;microphone&quot;
);
if (!microPhoneGranted) {
  shell.openExternal(
    &quot;x-apple.systempreferences:com.apple.preference.security?Privacy_Microphone&quot;
  );
}
</code></pre>
<p>To open the preference pane, we can use the
<a href="https://www.electronjs.org/docs/latest/api/shell">shell</a> module.
<code>shell.openExternal</code> can be used to call any external protocol URL.</p>
<p>Here we are opening <code>System preference(x-apple.systempreferences)</code> -&gt;
<code>Privacy &amp; Security(com.apple.preference.security)</code> -&gt; <code>Camera(Privacy_Camera)</code>
or <code>Microphone(Privacy_Microphone)</code>.</p>
<p><img src="https://www.bigbinary.com/blog/images/images_used_in_blog/2024/request-camera-micophone-permission-electron/camera-settings-mac.png" alt="camera permission"></p>
<p>Since we asked the user to open the preference pane because the user initially
denied permission if they chose to enable it this time, we should ask them to
relaunch the application. Only then will the updated permission settings take
effect.</p>
<p><strong>Windows</strong> has global settings for controlling the camera and microphone. The
good thing is that it is enabled by default. But in case the user explicitly
disables it, one thing we can do is open the privacy settings page of the camera
and microphone and ask the user to re-enable it.</p>
<pre><code class="language-js">const hasMicrophonePermission =
  systemPreferences.getMediaAccessStatus(&quot;microphone&quot;) === &quot;granted&quot;;
if (!hasMicrophonePermission) {
  shell.openExternal(&quot;ms-settings:privacy-microphone&quot;);
}

const hasCameraPermission =
  systemPreferences.getMediaAccessStatus(&quot;camera&quot;) === &quot;granted&quot;;
if (!hasCameraPermission) {
  shell.openExternal(&quot;ms-settings:privacy-webcam&quot;);
}
</code></pre>
<p><img src="https://www.bigbinary.com/blog/images/images_used_in_blog/2024/request-camera-micophone-permission-electron/windows-camera.png" alt="windows camera permission"></p>
<p>Just like we did for Mac, we use the <code>shell.openExternal</code> method to open the
<code>Setting(ms-settings)</code> -&gt; <code>Privacy</code> -&gt; <code>Camera(privacy-webcam)</code> or
<code>Microphone(privacy-microphone)</code>.</p>
<p>And we are done! Here is everything put together.</p>
<pre><code class="language-js">const checkMicrophonePermission = async () =&gt; {
  const hasMicrophonePermission =
    systemPreferences.getMediaAccessStatus(&quot;microphone&quot;) === &quot;granted&quot;;
  if (hasMicrophonePermission) return;
  if (process.platform === &quot;darwin&quot;) {
    const microPhoneGranted = await systemPreferences.askForMediaAccess(
      &quot;microphone&quot;
    );
    if (!microPhoneGranted) {
      shell.openExternal(
        &quot;x-apple.systempreferences:com.apple.preference.security?Privacy_Microphone&quot;
      );
    }
  } else if (process.platform === &quot;win32&quot;) {
    shell.openExternal(&quot;ms-settings:privacy-microphone&quot;);
  }
};

const checkCameraPermission = async () =&gt; {
  const hasCameraPermission =
    systemPreferences.getMediaAccessStatus(&quot;camera&quot;) === &quot;granted&quot;;
  if (hasCameraPermission) return;
  if (process.platform === &quot;darwin&quot;) {
    const cameraGranted = await systemPreferences.askForMediaAccess(&quot;camera&quot;);
    if (!cameraGranted) {
      shell.openExternal(
        &quot;x-apple.systempreferences:com.apple.preference.security?Privacy_Camera&quot;
      );
    }
  } else if (process.platform === &quot;win32&quot;) {
    shell.openExternal(&quot;ms-settings:privacy-webcam&quot;);
  }
};
</code></pre>
]]></content>
    </entry>
  <entry>
      <title type="text"><![CDATA[Code-signing and notarizing an Electron app for macOS]]></title>
      <link rel="alternate" type="text/html" href="https://www.bigbinary.com/blog/code-sign-notorize-mac-desktop-app"/>
      <link rel="enclosure" type="image/jpeg" href="https://www.bigbinary.com/blog/images/social_preview_images/code_sign_and_notarize_electron_app_for_macOS.jpg"/>
      <id>https://www.bigbinary.com/blog/code-sign-notorize-mac-desktop-app</id>
      <published>2024-11-19T00:00:00.000Z</published>
      <updated>2024-11-19T00:00:00.000Z</updated>
      <author>
        <name>Farhan CK</name>
        <uri>https://www.bigbinary.com/blog/authors/farhanlatheef</uri>
      </author>
      <category term="JavaScript"/>
      <category term="ReactJS"/>
      <category term="Electron"/>
      <media:thumbnail url="https://www.bigbinary.com/blog/images/social_preview_images/code_sign_and_notarize_electron_app_for_macOS.jpg" width="1200" height="627"/>
      <summary type="text"><![CDATA[Code-sign and notarize an Electron application for macOS]]></summary>
      <content type="html" xml:base="https://www.bigbinary.com/blog/code-sign-notorize-mac-desktop-app"><![CDATA[<p><em>Recently, we built <a href="https://neetorecord.com/neetorecord/">NeetoRecord</a>, a loom
alternative. The desktop application was built using Electron. In a series of
blogs, we capture how we built the desktop application and the challenges we ran
into. This blog is part 5 of the blog series. You can also read about
<a href="https://www.bigbinary.com/blog/sync-store-main-renderer-electron">part 1</a>,
<a href="https://www.bigbinary.com/blog/publish-electron-application">part 2</a>,
<a href="https://www.bigbinary.com/blog/video-background-removal">part 3</a>,
<a href="https://www.bigbinary.com/blog/electron-multiple-browser-windows">part 4</a>,
<a href="https://www.bigbinary.com/blog/deep-link-electron-app">part 6</a>,
<a href="https://www.bigbinary.com/blog/request-camera-micophone-permission-electron">part 7</a>
<a href="https://www.bigbinary.com/blog/native-modules-electron">part 8</a> and
<a href="https://www.bigbinary.com/blog/ev-code-sign-windows-application-ssl-com">part 9</a>
.</em></p>
<p>macOS identifies applications that are not code-signed and notarized as being
from unknown publishers and blocks their installation. Code-signing allows macOS
to recognize the application's creator. Notarization, an additional step,
provides extra credibility and security, ensuring a safer experience for users.</p>
<h3>What is code-signing?</h3>
<p>Code-signing is the process of generating a unique digital fingerprint of the
code using a cryptographic hash function. This fingerprint is combined with a
certificate from a trusted Certificate Authority (CA) to create the digital
signature. When users download or execute the software, the operating system
verifies this signature to confirm its authenticity.</p>
<p>Apple prefers developers to use certificates issued through the Apple Developer
Program to sign macOS applications. This is because macOS verifies signatures
against Apple's own Certificate Authority. If a third-party certificate is used,
macOS might not recognize it as trusted, leading to warnings or blocking the
application from running due to
<a href="https://support.apple.com/en-in/guide/security/sec5599b66df/web">Gatekeeper</a>,
Apple's security feature.</p>
<h3>Enroll in the Apple developer program</h3>
<p>We should enroll in the Apple developer program (which costs $99 per year) to
create a certificate that we can use to code-sign our application. We can follow
<a href="https://developer.apple.com/programs/enroll/">this link</a> to know what we need
to enroll in the Apple developer program.</p>
<h3>Apple certificates</h3>
<p>Apple provides two main types of code-signing certificates:</p>
<ul>
<li><strong>Developer ID Certificate:</strong> Used to sign apps distributed outside the Mac
App Store. Apps signed with this can be gatekeeper-approved.</li>
<li><strong>Mac App Distribution Certificate:</strong> Required for submitting apps to the Mac
App Store. Apple will re-sign the application after review and approval for
distribution on the Mac App Store.</li>
</ul>
<p>In this blog, we will look into how to code-sign an
<a href="https://electronjs.org/">Electron</a> application using <strong>Developer ID
Certificate</strong>.</p>
<h3>Create a Developer ID certificate</h3>
<p>To create a Developer ID certificate, we can follow Apple's detailed guide on
<a href="https://developer.apple.com/help/account/create-certificates/create-developer-id-certificates/">how to create a Developer ID certificate</a>.</p>
<p>Once we've successfully created the certificate and downloaded the <code>.cer</code> file,
the next step is to convert this file into a <code>.p12</code> format.</p>
<p>First, we'll need to convert the <code>.cer</code> file into a <code>.pem</code> format. We can do
this using <code>openssl</code>.</p>
<pre><code class="language-bash">openssl x509 -in certificate.cer -inform DER -out certificate.pem -outform PEM
</code></pre>
<p>Then, use the <code>.pem</code> file and our private <code>.key</code> to generate the <code>.p12</code> file.</p>
<pre><code class="language-bash">openssl pkcs12 -export -out certificate.p12 -inkey certificate-private.key -in certificate.pem
</code></pre>
<p>When generating the <code>.p12</code> file, we'll be prompted to set a password. Save this
password in a secure location, as we'll need it later when code-signing the
application.</p>
<p>To use this certificate with our existing GitHub Action workflow to automate the
deployment process, we need to convert this <code>.p12</code> file into a base64 string.
This is necessary because GitHub doesn't allow uploading files as secrets, but
we can store the base64 string instead.</p>
<pre><code class="language-bash">openssl base64 -in certificate.p12 -out certificate.txt
</code></pre>
<p>The command will output the base64 version of the <code>.p12</code> file into a
<code>certificate.txt</code> file. We can then add the text contents of this file as a
secret in GitHub. Save the base64 string in GitHub secrets with the name
<code>CSC_CONTENT</code> and password as <code>CSC_KEY_PASSWORD</code></p>
<h3>Update Electron build process</h3>
<p>To code-sign a macOS app, we just need to pass the certificate and password to
the <a href="https://www.electron.build/">electron-builder</a> <code>publish</code> command. However,
since we saved our certificate as a base64 string, we need to convert it back to
a <code>.p12</code> file before publishing.</p>
<pre><code class="language-yml"> - name: Publish releases
    env:
      GH_TOKEN: ${{ secrets.GITHUB_TOKEN }}
      AWS_ACCESS_KEY_ID: ${{secrets.AWS_ACCESS_KEY}}
      AWS_SECRET_ACCESS_KEY: ${{secrets.AWS_SECRET}}
      CSC_CONTENT: ${{ secrets.CSC_CONTENT }}
      CSC_KEY_PASSWORD: ${{ secrets.CSC_KEY_PASSWORD }}
    run: |
      echo &quot;$CSC_CONTENT&quot; | base64 --decode &gt; certificate.p12
      export CSC_LINK=&quot;./certificate.p12&quot;
      npm exec electron-builder -- --publish always -mwl

</code></pre>
<p>As mentioned above, we first decoded the base64 string back to a
<code>certificate.p12</code> file. We then set the path to this file as <code>CSC_LINK,</code> which
<code>electron-builder</code> expects.</p>
<p>Great! With everything in place, running this workflow should successfully
code-sign our application.</p>
<h2>Notarize</h2>
<p>Code-signing allows macOS to recognize the application's creator, but this alone
is insufficient. Users will still see a warning stating, <strong>&quot;macOS cannot verify
if the app is free from malware.&quot;</strong></p>
<p>To eliminate this warning, we need to notarize our application.
<a href="https://developer.apple.com/documentation/security/notarizing-macos-software-before-distribution">Notarization</a>
is a security feature introduced by Apple to ensure that macOS applications are
safe and free of malicious content. It's an additional layer of security that
builds on code-signing. The notarization process involves submitting our app to
Apple for automated security checks. Once notarized, macOS will recognize the
app as trustworthy, ensuring smooth installation and execution on users'
systems, even when downloaded from outside the Mac App Store.</p>
<p>To notarize, we need to create an &quot;App-specific password&quot;. To create an
App-specific password:</p>
<ul>
<li>Sign in to <a href="https://appleid.apple.com/account/home">appleid.apple.com</a></li>
<li>In the Sign-In and Security section, select App-Specific Passwords.</li>
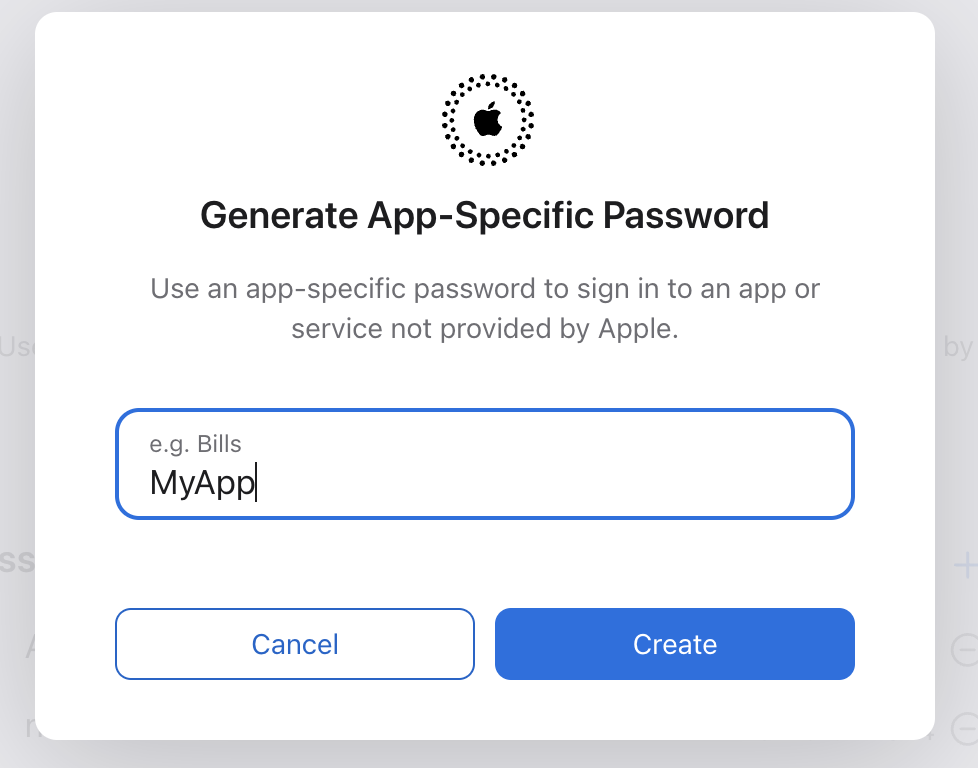
<li>Select Generate an app-specific password or select the Add button(+).
<img src="https://www.bigbinary.com/blog/images/images_used_in_blog/2024/code-sign-notorize-mac-desktop-app/app-specific-1.png" alt="app specific password 1"></li>
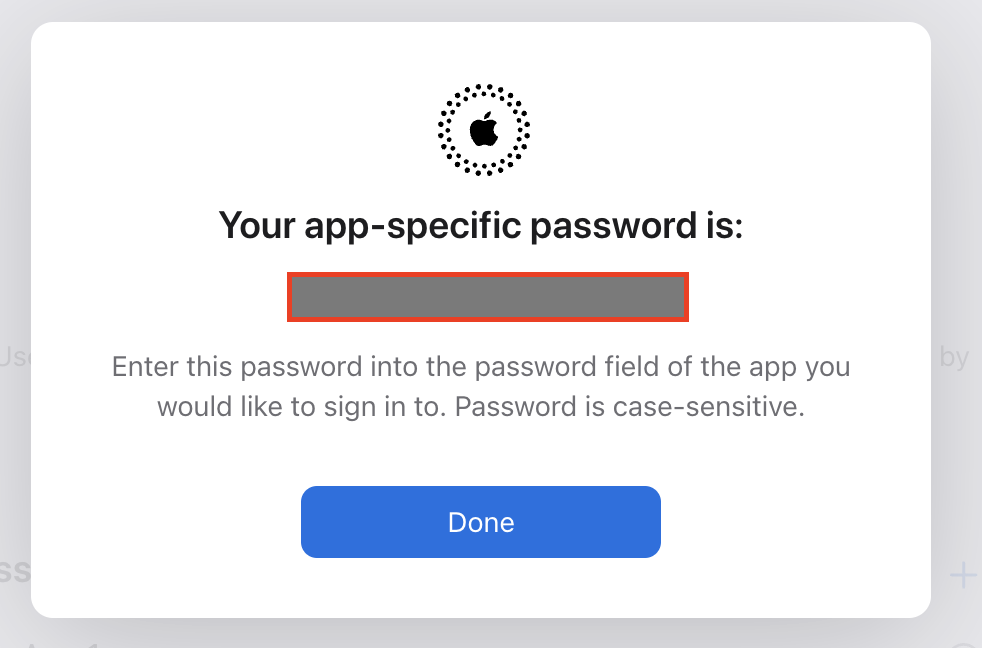
<li>Then give a name for the password and click <code>Create</code>.
<img src="https://www.bigbinary.com/blog/images/images_used_in_blog/2024/code-sign-notorize-mac-desktop-app/app-specific-2.png" alt="app specific password 2"></li>
</ul>
<p>A new App-Specific Password will be generated. Save it in a safe place. We will
use this password to notarize our macOS application.</p>
<h3>Update Electron build process</h3>
<p>Add <code>APPLE_APP_SPECIFIC_PASSWORD</code>, <code>TEAM_ID</code>, and <code>APPLE_ID</code> to GitHub secrets.
Then load up these secrets as environment variables along with others in our
Github Action workflow.</p>
<pre><code class="language-yml"> - name: Publish releases
    env:
      GH_TOKEN: ${{ secrets.GITHUB_TOKEN }}
      AWS_ACCESS_KEY_ID: ${{secrets.AWS_ACCESS_KEY}}
      AWS_SECRET_ACCESS_KEY: ${{secrets.AWS_SECRET}}
      CSC_CONTENT: ${{ secrets.CSC_CONTENT }}
      CSC_KEY_PASSWORD: ${{ secrets.CSC_KEY_PASSWORD }}
      TEAM_ID: ${{ secrets.TEAM_ID }}
      APPLE_ID: ${{ secrets.APPLE_ID }}
      APPLE_APP_SPECIFIC_PASSWORD: ${{ secrets.APPLE_APP_SPECIFIC_PASSWORD }}
    run: |
      echo &quot;$CSC_CONTENT&quot; | base64 --decode &gt; certificate.p12
      export CSC_LINK=&quot;./certificate.p12&quot;
      npm exec electron-builder -- --publish always -mwl

</code></pre>
<p>At the time of writing this, we encountered issues with the built-in notarize
feature of <code>electron-builder</code>, so we created a custom script to handle the
notarization process.</p>
<pre><code class="language-js">const { notarize } = require(&quot;@electron/notarize&quot;);
const { build } = require(&quot;../package.json&quot;);

const notarizeMacos = async context =&gt; {
  const { electronPlatformName, appOutDir } = context;
  if (electronPlatformName !== &quot;darwin&quot;) return;
  if (process.env.CI !== &quot;true&quot;) {
    console.warn(&quot;Skipping notarizing step. Packaging is not running in CI&quot;);
    return;
  }

  const appName = context.packager.appInfo.productFilename;
  await notarize({
    tool: &quot;notarytool&quot;,
    appBundleId: build.appId,
    appPath: `${appOutDir}/${appName}.app`,
    teamId: process.env.TEAM_ID,
    appleId: process.env.APPLE_ID,
    appleIdPassword: process.env.APPLE_APP_SPECIFIC_PASSWORD,
    verbose: true,
  });
  console.log(&quot;--- notarization completed ---&quot;);
};

exports.default = notarizeMacos;
</code></pre>
<p>The script uses the <code>notarize</code> function from the <code>@electron/notarize</code> package.
It passes the path to the generated <code>.app</code> file during the build process, along
with the required <code>TEAM_ID</code>, <code>APPLE_ID</code>, and <code>APPLE_APP_SPECIFIC_PASSWORD</code>,
which were obtained earlier.</p>
<p>To run the custom notarization script, disable the built-in notarization feature
in the <code>electron-builder</code> configuration. Then, call this script from the
<code>afterSign</code> callback to ensure it runs after the signing process is complete.</p>
<pre><code class="language-json">&quot;build&quot;: {
    &quot;mac&quot;: {
      &quot;notarize&quot;: false,
      &quot;target&quot;: {
        &quot;target&quot;: &quot;default&quot;,
        &quot;arch&quot;: [
          &quot;arm64&quot;,
          &quot;x64&quot;
        ]
      },
    },
    &quot;afterSign&quot;: &quot;./scripts/notarize.js&quot;,
}
</code></pre>
<p>Great! We have successfully code-signed and notarized our macOS application.
Now, macOS will trust our application, and an added benefit of this process is
that it allows us to auto-update our application seamlessly, ensuring that users
always have the latest version.</p>
]]></content>
    </entry>
  <entry>
      <title type="text"><![CDATA[Configuring webpack for multiple Electron windows]]></title>
      <link rel="alternate" type="text/html" href="https://www.bigbinary.com/blog/electron-multiple-browser-windows"/>
      <link rel="enclosure" type="image/jpeg" href="https://www.bigbinary.com/blog/images/social_preview_images/configuring_webpack_handle_multiple_browser.jpg"/>
      <id>https://www.bigbinary.com/blog/electron-multiple-browser-windows</id>
      <published>2024-11-12T00:00:00.000Z</published>
      <updated>2024-11-12T00:00:00.000Z</updated>
      <author>
        <name>Farhan CK</name>
        <uri>https://www.bigbinary.com/blog/authors/farhanlatheef</uri>
      </author>
      <category term="JavaScript"/>
      <category term="ReactJS"/>
      <category term="Electron"/>
      <media:thumbnail url="https://www.bigbinary.com/blog/images/social_preview_images/configuring_webpack_handle_multiple_browser.jpg" width="1200" height="627"/>
      <summary type="text"><![CDATA[How to configure webpack to handle multiple browser windows in Electron]]></summary>
      <content type="html" xml:base="https://www.bigbinary.com/blog/electron-multiple-browser-windows"><![CDATA[<p><em>Recently, we built <a href="https://neetorecord.com/neetorecord/">NeetoRecord</a>, a loom
alternative. The desktop application was built using Electron. In a series of
blogs, we capture how we built the desktop application and the challenges we ran
into. This blog is part 4 of the blog series. You can also read about
<a href="https://www.bigbinary.com/blog/sync-store-main-renderer-electron">part 1</a>,
<a href="https://www.bigbinary.com/blog/publish-electron-application">part 2</a>,
<a href="https://www.bigbinary.com/blog/video-background-removal">part 3</a>,
<a href="https://www.bigbinary.com/blog/code-sign-notorize-mac-desktop-app">part 5</a>,
<a href="https://www.bigbinary.com/blog/deep-link-electron-app">part 6</a>,
<a href="https://www.bigbinary.com/blog/request-camera-micophone-permission-electron">part 7</a>
<a href="https://www.bigbinary.com/blog/native-modules-electron">part 8</a> and
<a href="https://www.bigbinary.com/blog/ev-code-sign-windows-application-ssl-com">part 9</a>
.</em></p>
<p>When developing desktop applications with Electron, managing multiple browser
windows within a single app is often necessary. Whether we need to display
different types of content or create a more complex user interface, handling
multiple windows efficiently can be challenging.</p>
<p>In this blog, we'll explore how to configure Webpack to manage multiple browser
windows in our Electron application, ensuring that each window operates smoothly
in our project.</p>
<h3>Configuring Webpack for a Single Browser Window</h3>
<p>Before diving into the setup for multiple windows, let's first review how to
configure Webpack for a single browser window. This example focuses on the
renderer process, which is responsible for rendering the UI and handling
interactions. If interested in learning how to configure Webpack for the entire
Electron app, including the main process, check out
<a href="https://www.bigbinary.com/blog/publish-electron-application">this blog</a>.</p>
<p>Consider the following typical folder structure for an Electron project:</p>
<pre><code class="language-js">electron-app
├── assets
├── app
├── src
│   └── main
│     └── main.js
│   └── renderer
│     └── App.jsx
│     └── index.ejs
├── node_modules
├── package.json
</code></pre>
<p>This structure separates the code for the <code>main</code> and <code>renderer</code> processes, which
is a standard practice in Electron projects.</p>
<p>Here's how we can configure Webpack for a single browser window:</p>
<pre><code class="language-js">// ./config/webpack/renderer.mjs

import webpack from &quot;webpack&quot;;
import HtmlWebpackPlugin from &quot;html-webpack-plugin&quot;;

const configuration = {
  target: [&quot;web&quot;, &quot;electron-renderer&quot;],
  entry: &quot;src/renderer/App.jsx&quot;,
  output: {
    path: &quot;app/dist/renderer&quot;,
    publicPath: &quot;./&quot;,
    filename: &quot;renderer.js&quot;,
    library: {
      type: &quot;umd&quot;,
    },
  },
  module: {...},  // Module configuration (loaders, etc.)
  optimization: {...},  // Optimization settings (minification, etc.)
  plugins: [
    // Other plugins...
    new HtmlWebpackPlugin({
      filename: &quot;app.html&quot;,
      template: &quot;src/renderer/index.ejs&quot;,
    }),
  ],
};

export default configuration;
</code></pre>
<p>In this configuration:</p>
<ul>
<li>The <code>target</code> is set to <code>[&quot;web&quot;, &quot;electron-renderer&quot;]</code>, enabling both standard
web and Electron renderer environments.</li>
<li>The <code>entry</code> specifies the entry point for the renderer process, which is
<code>src/renderer/App.jsx</code>.</li>
<li>The output is bundled into a single file named <code>renderer.js</code>, which is stored
in the <code>app/dist/renderer</code> directory. In an Electron app, it's often
preferable to bundle everything into a single file since the files are loaded
locally.</li>
<li>The <code>HtmlWebpackPlugin</code> generates an <code>app.html</code> file from a template
(<code>index.ejs</code>), embedding the necessary script to load <code>renderer.js</code>.</li>
</ul>
<p>We can compile and bundle our frontend code using the following command:</p>
<pre><code class="language-bash">webpack --config ./config/webpack/renderer.mjs
</code></pre>
<p>This will produce an <code>app.html</code> file in the <code>app/dist/renderer</code> directory, along
with <code>renderer.js</code>.</p>
<pre><code class="language-html">&lt;!DOCTYPE html&gt;
&lt;html&gt;
   &lt;head&gt;
      &lt;meta charset=utf-8&gt;
      &lt;meta http-equiv=Content-Security-Policy content=&quot;script-src 'self' 'unsafe-inline'&quot;&gt;
      &lt;title&gt;MyApp&lt;/title&gt;
      &lt;script defer=defer src=./renderer.js&gt;&lt;/script&gt;
   &lt;/head&gt;
   &lt;body&gt;
      &lt;div id=root&gt;&lt;/div&gt;
   &lt;/body&gt;
&lt;/html&gt;
</code></pre>
<p>The <code>HtmlWebpackPlugin</code> correctly injects the <code>&lt;script/&gt;</code> tag to load
<code>renderer.js</code>. This <code>app.html</code> can now be loaded into a browser window from the
<code>main</code> process.</p>
<pre><code class="language-js">const appWindow = new BrowserWindow({
  show: false,
  width: 1408,
  height: 896,
});
appWindow.loadURL(&quot;app/dist/renderer/app.html&quot;);
appWindow.on(&quot;ready-to-show&quot;, () =&gt; {
  appWindow.show();
});
</code></pre>
<h3>Configuring Webpack for Multiple Browser Windows</h3>
<p>With the single window setup complete, let's add another browser window to the
app. For example, let's say we want to create a <code>Settings.jsx</code> component within
the renderer folder:</p>
<pre><code class="language-js">electron-app
├── assets
├── app
├── src
│   └── main
│     └── main.js
│   └── renderer
│     └── App.jsx
│     └── Settings.jsx
│     └── index.ejs
├── node_modules
├── package.json
</code></pre>
<p>Previously, we bundled all JavaScript code into a single <code>renderer.js</code> file.
However, since we're now working with multiple windows, it makes sense to create
separate bundles for each window—one for the <code>App</code> window and another for the
<code>Settings</code> window. To achieve this, we can specify multiple entry points in
Webpack:</p>
<pre><code class="language-js">// ./config/webpack/renderer.mjs

import webpack from &quot;webpack&quot;;
import HtmlWebpackPlugin from &quot;html-webpack-plugin&quot;;

const configuration = {
  target: [&quot;web&quot;, &quot;electron-renderer&quot;],
  entry: {
    app: &quot;src/renderer/App.jsx&quot;,
    settings: &quot;src/renderer/Settings.jsx&quot;,
  },
  output: {
    path: &quot;app/dist/renderer&quot;,
    publicPath: &quot;./&quot;,
    filename: &quot;[name].js&quot;, // Use placeholders to generate separate bundles
    library: {
      type: &quot;umd&quot;,
    },
  },
  // Other configuration options...
};

export default configuration;
</code></pre>
<p>In this configuration:</p>
<ul>
<li>The <code>entry</code> property now contains two entry points: <code>app</code> and <code>settings</code>.
Webpack will generate separate bundles for each, named <code>app.js</code> and
<code>settings.js</code> respectively.</li>
<li>The <code>filename</code> in the <code>output</code> section uses the <code>[name]</code> placeholder to
dynamically generate filenames based on the entry point names.</li>
</ul>
<p>Next, we need to generate two HTML files—one for each window. We can achieve
this by adding another instance of <code>HtmlWebpackPlugin</code> to the <code>plugins</code> array:</p>
<pre><code class="language-js">// ./config/webpack/renderer.mjs

import webpack from &quot;webpack&quot;;
import HtmlWebpackPlugin from &quot;html-webpack-plugin&quot;;

const configuration = {
  target: [&quot;web&quot;, &quot;electron-renderer&quot;],
  entry: {
    app: &quot;src/renderer/App.jsx&quot;,
    settings:&quot;src/renderer/Settings.jsx&quot;
  },
  output: {
    path: &quot;app/dist/renderer&quot;,
    publicPath: &quot;./&quot;,
    filename: '[name].js',
    library: {
      type: &quot;umd&quot;,
    },
  },
  module: {...},
  optimization: {...},
  plugins: [
    // Other plugins...
    new HtmlWebpackPlugin({
      filename: &quot;app.html&quot;,
      template: &quot;src/renderer/index.ejs&quot;,
      chunks: ['app'],  // Load only the 'app' bundle
    }),
    new HtmlWebpackPlugin({
      filename: &quot;settings.html&quot;,
      template: &quot;src/renderer/index.ejs&quot;,
      chunks: ['settings'],  // Load only the 'settings' bundle
    }),
  ],
};

export default configuration;
</code></pre>
<p>By specifying the <code>chunks</code> property for each <code>HtmlWebpackPlugin</code> instance, we
ensure that each HTML file only includes the appropriate JavaScript bundle. The
final output will include two HTML files:</p>
<pre><code class="language-html">&lt;!-- app.html --&gt;
&lt;!DOCTYPE html&gt;
&lt;html&gt;
   &lt;head&gt;
      &lt;meta charset=utf-8&gt;
      &lt;meta http-equiv=Content-Security-Policy content=&quot;script-src 'self' 'unsafe-inline'&quot;&gt;
      &lt;title&gt;MyApp&lt;/title&gt;
      &lt;script defer=defer src=./app.js&gt;&lt;/script&gt;
   &lt;/head&gt;
   &lt;body&gt;
      &lt;div id=root&gt;&lt;/div&gt;
   &lt;/body&gt;
&lt;/html&gt;

&lt;!-- settings.html --&gt;
&lt;!DOCTYPE html&gt;
&lt;html&gt;
   &lt;head&gt;
      &lt;meta charset=utf-8&gt;
      &lt;meta http-equiv=Content-Security-Policy content=&quot;script-src 'self' 'unsafe-inline'&quot;&gt;
      &lt;title&gt;MyApp&lt;/title&gt;
      &lt;script defer=defer src=./settings.js&gt;&lt;/script&gt;
   &lt;/head&gt;
   &lt;body&gt;
      &lt;div id=root&gt;&lt;/div&gt;
   &lt;/body&gt;
&lt;/html&gt;
</code></pre>
<p>Finally, from the <code>main</code> process, we can easily create two browser windows, each
with its own renderer code:</p>
<pre><code class="language-js">const appWindow = new BrowserWindow({
  show: false,
  width: 1408,
  height: 896,
});
appWindow.loadURL(&quot;app/dist/renderer/app.html&quot;);
appWindow.on(&quot;ready-to-show&quot;, () =&gt; {
  appWindow.show();
});

const settingsWindow = new BrowserWindow({
  show: false,
  width: 1408,
  height: 896,
});
settingsWindow.loadURL(&quot;app/dist/renderer/settings.html&quot;);
settingsWindow.on(&quot;ready-to-show&quot;, () =&gt; {
  settingsWindow.show();
});
</code></pre>
<p>With this setup, each browser window will load its own dedicated JavaScript
bundle, ensuring that our Electron application is both efficient and modular.
This approach not only makes our code easier to manage but also enhances the
performance of our application by reducing unnecessary code loading.</p>
]]></content>
    </entry>
  <entry>
      <title type="text"><![CDATA[Evaluating JavaScript code in the browser]]></title>
      <link rel="alternate" type="text/html" href="https://www.bigbinary.com/blog/evaluating-javascript-in-neeto-course"/>
      <link rel="enclosure" type="image/jpeg" href="https://www.bigbinary.com/blog/images/social_preview_images/evaluating_javascript_code_in_browser.jpg"/>
      <id>https://www.bigbinary.com/blog/evaluating-javascript-in-neeto-course</id>
      <published>2024-10-08T00:00:00.000Z</published>
      <updated>2024-10-08T00:00:00.000Z</updated>
      <author>
        <name>Sayooj Surendran</name>
        <uri>https://www.bigbinary.com/blog/authors/sayoojtmc</uri>
      </author>
      <category term="JavaScript"/>
      <media:thumbnail url="https://www.bigbinary.com/blog/images/social_preview_images/evaluating_javascript_code_in_browser.jpg" width="1200" height="627"/>
      <summary type="text"><![CDATA[Learn how we evaluate JavaScript in NeetoCourse]]></summary>
      <content type="html" xml:base="https://www.bigbinary.com/blog/evaluating-javascript-in-neeto-course"><![CDATA[<p><a href="https://www.neeto.com/neetocourse">NeetoCourse</a> allows anyone to build
interactive courses where they can add code blocks and assessments. This allows
the user to run their code, see the output and check if their solution is
correct or not. Check out
<a href="https://courses.bigbinaryacademy.com/learn-javascript/array/challenge-create-array/">Bigbinary Academy's JavaScript course</a>
to see this in action.</p>
<p>Let's see how we evaluate JavaScript code and check if the output matches the
corresponding solution.</p>
<h2>Synchronous code</h2>
<p>For a simple synchronous code, the first thing we need to check is if everything
logged by the user is the same as that of the solution code. What we do here is
aggregate all the logs to an array and then compare that array with the array
generated by the solution code. This is done by transforming the code using an
<a href="https://www.npmjs.com/package/abstract-syntax-tree">AST library</a></p>
<p>Take this
<a href="https://courses.bigbinaryacademy.com/learn-javascript/variables/challenge-variables/">exercise</a>
as an example.</p>
<p><img src="https://www.bigbinary.com/blog/images/images_used_in_blog/2024/evaluating-javascript-in-neeto-course/code1.png" alt="code"></p>
<p>Now let's see the transformed code.</p>
<p><img src="https://www.bigbinary.com/blog/images/images_used_in_blog/2024/evaluating-javascript-in-neeto-course/transformed1.png" alt="transformed"></p>
<p>Here <code>pushTologs</code> replaces the <code>console.log</code> function and <code>logsAggregator</code> is an
array that stores all the logs. We also replace <code>throw</code> statements with
<code>pushToLogs</code> to evaluate exceptions.</p>
<p>We also perform serialization to make comparison easier. The transformed code is
then ran as an
<a href="https://www.bigbinary.com/videos/learn-javascript/immediately-invoked-function-expression">IIFE</a>
and the result is used for comparison.</p>
<p>We run the user submitted code in an iframe so that any bug in the submitted
code doesn't mess up the page.</p>
<h2>How code is transformed</h2>
<p>Let's see how this &quot;code transformation&quot; works. We mentioned the use of an
<a href="https://www.npmjs.com/package/abstract-syntax-tree">AST library</a>. AST(abstract
syntax tree) is a tree representation of the code which helps the compiler to
understand the structure of the code. Let's use a tool called
<a href="https://astexplorer.net/">AST Explorer</a> to see how the AST looks like for the
below code.</p>
<pre><code class="language-js">const priceOfPencil = 5;

console.log(&quot;Price of 1 pencil:&quot;);
console.log(priceOfPencil);
</code></pre>
<p><img src="https://www.bigbinary.com/blog/images/images_used_in_blog/2024/evaluating-javascript-in-neeto-course/astexplorer-2.png" alt="astexplorer"></p>
<p>Here, <code>MemberExpression</code> is a node and in that node we can use <code>object.name</code>.
See the underline highlights using pink color.</p>
<p>Using <code>object.name</code> we can get to value <code>console</code>. See the green arrow.</p>
<p>Similarly using <code>property.name</code> we can get to <code>log</code>.</p>
<p>Now our goal is to walk the tree and replace all <code>console.log</code> statements with
<code>pushToLogs</code> statement. For walking and replacing the value we will use the
<code>replace</code> function provided by the library.</p>
<pre><code class="language-js">replace(tree, node =&gt; {
  const { callee } = node;

  // create the node that needs to be put instead of console.log
  const pushToLogsExpression = parse(&quot;pushToLogs()&quot;).body[0].expression;

  // check for the console.log node
  if (
    callee?.type === &quot;MemberExpression&quot; &amp;&amp;
    callee?.object?.name === &quot;console&quot; &amp;&amp;
    callee?.property?.name === &quot;log&quot;
  ) {
    pushToLogsExpression.arguments = node.arguments;
    node = pushToLogsExpression;
  }

  return node;
});
</code></pre>
<p>Here we are creating a new node by parsing the string <code>&quot;pushToLogs()&quot;</code>. We are
then adding the arguments of the <code>console.log</code> to the <code>pushToLogs</code> node. When we
return this new node, the code transformation is complete.</p>
<h2>Asynchronous code</h2>
<p>Evaluating async code is a bit tricky since we won't get the output of the code
right away. What we do in this case is transform the code to make it
synchronous. For evaluating the output, these are the information we need:</p>
<ol>
<li>Console logs</li>
<li>Exceptions</li>
<li>The order in which the code needs to be executed</li>
</ol>
<p>We will transform the code in such a way that this information are available to
us. Let's see how the code is transformed in the following cases:</p>
<h3>SetTimeout / SetInterval</h3>
<p><img src="https://www.bigbinary.com/blog/images/images_used_in_blog/2024/evaluating-javascript-in-neeto-course/code2.png" alt="code"></p>
<p><img src="https://www.bigbinary.com/blog/images/images_used_in_blog/2024/evaluating-javascript-in-neeto-course/transformed2.png" alt="transformed"></p>
<p>In this case the function that needs to be executed after the specified timeout
is executed inline. And the delay value is just added to the <code>logsAggregator</code>
for record keeping. There will be no delay in the evaluation.</p>
<p>We do the same for <code>setInterval</code>.</p>
<p>In both the cases we evaluate the function &quot;inline&quot; and then compare the
console.log outputs.</p>
<p>What if we want an exercise involving <code>clearTimeout</code> ? We simply add
<code>Timeout cleared</code> to the <code>logsAggregator</code>.</p>
<h3>Promises</h3>
<p><img src="https://www.bigbinary.com/blog/images/images_used_in_blog/2024/evaluating-javascript-in-neeto-course/code3.png" alt="code"></p>
<p><img src="https://www.bigbinary.com/blog/images/images_used_in_blog/2024/evaluating-javascript-in-neeto-course/transformed3.png" alt="transformed"></p>
<p>Without going too much in details, to evaluate Promises all we did was move the
callbacks from the <code>then</code> method of the promise to the arguments of a function.</p>
<p>We handle <code>async/await</code> code in a similar style.</p>
<p>What happens in the case of promise chaining?</p>
<p><img src="https://www.bigbinary.com/blog/images/images_used_in_blog/2024/evaluating-javascript-in-neeto-course/code5.png" alt="code"></p>
<p><img src="https://www.bigbinary.com/blog/images/images_used_in_blog/2024/evaluating-javascript-in-neeto-course/transformed5.png" alt="transformed"></p>
<p>Here, if we detect that there are more than one <code>then</code> calls, then the second
body of <code>then</code> is passed as <code>resolveFn</code> to the function that the first <code>then</code>
returns. This can go multiple levels based on the chaining.</p>
<p>In other words, we go back to adding &quot;callbacks&quot;.</p>
<p>This is how we evaluate JavaScript in NeetoCourse. We evaluate HTML, CSS and SQL
similarly on the browser. We have also recently added the evaluation of HTML
Canvas. Evaluation of HTML Canvas animations is on the roadmap. But these can be
a story for another day.</p>
<p>Want to see code evaluation in action. Checkout
<a href="https://courses.bigbinaryacademy.com/learn-javascript/challenges-set-4/find-second-largest-value-in-array/">this question</a>
from our JavaScript course.</p>
<p>Interested to know more about NeetoCourse? Follow
<a href="https://twitter.com/NeetoCourse">@NeetoCourse</a> to see what we're up to.</p>
]]></content>
    </entry>
  <entry>
      <title type="text"><![CDATA[Syncing state between Electron main and renderer]]></title>
      <link rel="alternate" type="text/html" href="https://www.bigbinary.com/blog/sync-store-main-renderer-electron"/>
      <link rel="enclosure" type="image/jpeg" href="https://www.bigbinary.com/blog/images/social_preview_images/creating_synchronized_store_between_main_and_renderer_process_in_electron.jpg"/>
      <id>https://www.bigbinary.com/blog/sync-store-main-renderer-electron</id>
      <published>2024-10-01T00:00:00.000Z</published>
      <updated>2024-10-01T00:00:00.000Z</updated>
      <author>
        <name>Farhan CK</name>
        <uri>https://www.bigbinary.com/blog/authors/farhanlatheef</uri>
      </author>
      <category term="JavaScript"/>
      <category term="ReactJS"/>
      <category term="Electron"/>
      <media:thumbnail url="https://www.bigbinary.com/blog/images/social_preview_images/creating_synchronized_store_between_main_and_renderer_process_in_electron.jpg" width="1200" height="627"/>
      <summary type="text"><![CDATA[Creating a synchronized store between main and renderer process in Electron]]></summary>
      <content type="html" xml:base="https://www.bigbinary.com/blog/sync-store-main-renderer-electron"><![CDATA[<p><em>Recently, we built <a href="https://neetorecord.com/neetorecord/">NeetoRecord</a>, a loom
alternative. The desktop application was built using Electron. In a series of
blogs, we capture how we built the desktop application and the challenges we ran
into. This blog is part 1 of the blog series. You can also read
<a href="https://www.bigbinary.com/blog/publish-electron-application">part 2</a>,
<a href="https://www.bigbinary.com/blog/video-background-removal">part 3</a>,
<a href="https://www.bigbinary.com/blog/electron-multiple-browser-windows">part 4</a>,
<a href="https://www.bigbinary.com/blog/code-sign-notorize-mac-desktop-app">part 5</a>,
<a href="https://www.bigbinary.com/blog/deep-link-electron-app">part 6</a>,
<a href="https://www.bigbinary.com/blog/request-camera-micophone-permission-electron">part 7</a>
<a href="https://www.bigbinary.com/blog/native-modules-electron">part 8</a> and
<a href="https://www.bigbinary.com/blog/ev-code-sign-windows-application-ssl-com">part 9</a>
.</em></p>
<p>When building desktop applications with <a href="https://electronjs.org/">Electron</a>, one
of the key challenges developers often face is managing the shared state between
the <code>main</code> process and multiple <code>renderer</code> processes. While the <code>main</code> process
handles the core application logic, <code>renderer</code> processes are responsible for the
user interface. However, they often need access to the same data, like user
preferences, application state, or session information.</p>
<p>Electron does not natively provide a way to persist data, let alone give a
synchronized state across these processes.</p>
<h3>electron-store to store data persistently</h3>
<p>Since Electron doesn't have a built-in way to persist data, We can use
<a href="https://github.com/sindresorhus/electron-store">electron-store</a>, an npm package
to store data persistently. <code>electron-store</code> stores the data in a JSON file
named <code>config.json</code> in <code>app.getPath('userData')</code>.</p>
<p>Even though we can configure <code>electron-store</code> to be made directly available in
the <code>renderer</code> process, it is recommended not to do so. The best way is to
expose it via
<a href="https://www.electronjs.org/docs/latest/tutorial/tutorial-preload">Electron's preload script</a>.</p>
<p>Let's look at how we can expose the <code>electron store</code> to the renderer via a
preload script.</p>
<pre><code class="language-js">// preload.js
import { contextBridge, ipcRenderer } from &quot;electron&quot;;

const electronHandler = {
  store: {
    get(key) {
      return ipcRenderer.sendSync(&quot;get-store&quot;, key);
    },
    set(property, val) {
      ipcRenderer.send(&quot;set-store&quot;, property, val);
    },
  },
  // ...others code
};
contextBridge.exposeInMainWorld(&quot;electron&quot;, electronHandler);
</code></pre>
<p>Here, we exposed a <code>set</code> function that calls the <code>ipcRenderer.send</code> method,
which just sends a message to the <code>main</code> process. The <code>get</code> function calls the
<code>ipcRenderer.sendSync</code> method, which will send a message to the <code>main</code> process
while expecting a return value.</p>
<p>Now, let's add <code>ipcMain</code> events to handle these requests in the <code>main</code> process.</p>
<pre><code class="language-js">import Store from &quot;electron-store&quot;;

const store = new Store();

ipcMain.on(&quot;get-store&quot;, async (event, val) =&gt; {
  event.returnValue = store.get(val);
});
ipcMain.on(&quot;set-store&quot;, async (_, key, val) =&gt; {
  store.set(key, val);
});
</code></pre>
<p>In the <code>main</code> process, we created an <code>electron-store</code> instance and added
<code>get-store</code> and <code>set-store</code> event handlers to retrieve and set data from the
store.</p>
<p>Now, we can read and write data from any <code>renderer</code> process without exposing the
whole <code>electron-store</code> class to it.</p>
<pre><code class="language-js">window.electron.store.set(&quot;key&quot;, &quot;value&quot;);
window.electron.store.get(&quot;key&quot;);
</code></pre>
<h2>Synchronization</h2>
<p>Since we sorted out the storage issue, let's look into how we can synchronize
data between the <code>main</code> process and all its <code>renderer</code> processes.</p>
<p>Before we start synchronization, let's create a simple utility function that can
send a message to all active <code>renderer</code> processes or, in other words, browser
windows (we will use the terms <code>renderer</code> process and browser windows
interchangeably).</p>
<pre><code class="language-js">export const sendToAll = (channel, msg) =&gt; {
  BrowserWindow.getAllWindows().forEach(browseWindow =&gt; {
    browseWindow.webContents.send(channel, msg);
  });
};
</code></pre>
<p><code>BrowserWindow.getAllWindows()</code> returns all active browser windows, and
<code>browseWindow.webContents.send</code> is the standard way of sending a message from
<code>main</code> to a <code>renderer</code> process.</p>
<h3>electron-store onDidChange</h3>
<p><code>electron-store</code> provides an option to add an event listener when there is a
change in the store called <code>onDidChange</code>. This is the key feature we are going
to use to create synchronization.</p>
<pre><code class="language-js">store.onDidChange(&quot;key&quot;, newValue =&gt; {
  // TODO
});
</code></pre>
<p>Not all data needs to be synchronized. So, instead of adding <code>onDidChange</code> to
every field, let's expose an API for the <code>renderer</code> process so that it can
decide which data it needs and subscribe to it.</p>
<pre><code class="language-js">import Store from &quot;electron-store&quot;;

const store = new Store();
const subscriptions = new Map();

ipcMain.on(&quot;get-store&quot;, async (event, val) =&gt; {
  event.returnValue = store.get(val);
});
ipcMain.on(&quot;set-store&quot;, async (_, key, val) =&gt; {
  store.set(key, val);
});

ipcMain.on(&quot;subscribe-store&quot;, async (event, key) =&gt; {
  const unsubscribeFn = store.onDidChange(key, newValue =&gt; {
    sendToAll(`onChange:${key}`, newValue);
  });
  subscriptions.set(key, unsubscribeFn);
});
</code></pre>
<p>Here, we exposed another API called <code>subscribe-store</code>. When calling that API
with a key, we listen to that field's <code>onDidChange</code> event. Then, when the
<code>onDidChange</code> triggers, we call the <code>sendToAll</code> function we created earlier, and
all the <code>renderer</code> processes listening to these changes will be notified with
the latest data. For example, if a field called <code>user</code> is subscribed to changes,
we send a message to all <code>renderer</code> processes with the new value on a channel
called <code>onChange:user.</code> We will soon add code in the <code>renderer</code> process to
handle this.</p>
<p><code>store.onDidChange</code> returns the <code>unsubscribe</code> function for that particular key.
Since we won't be unsubscribing straight away, we need to store this function
for later use. Here, we are storing it in a hash map against the same key.</p>
<p>Let's add an option to unsubscribe as well.</p>
<pre><code class="language-js">//... other codes

ipcMain.on(&quot;unsubscribe-store&quot;, async (event, key) =&gt; {
  subscriptions.get(key)();
});
</code></pre>
<h3>Update preload script</h3>
<p>Let's update the preload script to support the store's
subscription/unsubscribing.</p>
<pre><code class="language-js">// preload.js
import { contextBridge, ipcRenderer } from &quot;electron&quot;;

const electronHandler = {
  store: {
    get(key) {
      return ipcRenderer.sendSync(&quot;get-store&quot;, key);
    },
    set(property, val) {
      ipcRenderer.send(&quot;set-store&quot;, property, val);
    },
    subscribe(key, func) {
      ipcRenderer.send(&quot;subscribe-store&quot;, key);
      const subscription = (_event, ...args) =&gt; func(...args);
      const channelName = `onChange:${key}`;
      ipcRenderer.on(channelName, subscription);

      return () =&gt; {
        ipcRenderer.removeListener(channelName, subscription);
      };
    },
    unsubscribe(key) {
      ipcRenderer.send(&quot;unsubscribe-store&quot;, key);
    },
  },
  // ...others code
};
contextBridge.exposeInMainWorld(&quot;electron&quot;, electronHandler);
</code></pre>
<p>We add two APIs here, <code>subscribe</code> and <code>unsubscribe</code>. While <code>unsubscribe</code> is
straightforward, <code>subscribe</code> might need some explanation. It exposes two
arguments, a store key and a callback function, to be called when there is a
change to that field.</p>
<p>First, we call <code>subscribe-store</code> to subscribe to change to that data field;
then, we listen to <code>ipcRenderer.on</code> for any changes. For example, when there is
a change to the <code>user</code> field, <code>sendToAll</code> will propagate the change, and here we
are listening to it on <code>onChange:user</code>.</p>
<p>Now, from a <code>renderer</code> process, if it needs to be notified of changes to the
<code>user</code> field, we can subscribe to it like below.</p>
<pre><code class="language-js">window.electron.store.subscribe(&quot;user&quot;, newUser =&gt; {
  // TODO
});
</code></pre>
<h3>useSyncExternalStore</h3>
<p>React provides a hook to connect to an external store called
<code>useSyncExternalStore</code>. It expects two functions as arguments.</p>
<ul>
<li>The <code>subscribe</code> function should subscribe to the store and return an
unsubscribe function.</li>
<li>The <code>getSnapshot</code> function should read a snapshot of the data from the store.</li>
</ul>
<p>In the <code>renderer</code> process, create a <code>SyncedStore</code> class with <code>subscribe</code> and
<code>getSnapshot</code> functions that <code>useSyncExternalStore</code> expects.</p>
<pre><code class="language-js">class SyncedStore {
  snapshot;
  defaultValue;
  storageKey;
  constructor(defaultValue = &quot;&quot;, storageKey) {
    this.defaultValue = defaultValue;
    this.snapshot = window.electron.store.get(storageKey) ?? defaultValue;
    this.storageKey = storageKey;
  }
  getSnapshot = () =&gt; this.snapshot;

  subscribe = callback =&gt; {
    // TODO
  };
}
</code></pre>
<p>Here, we created a generic class that takes a <code>defaultValue</code> and <code>storageKey</code>.
While creating the object, we loaded the existing data for that field from the
<code>main</code> store.</p>
<p>When React tries to subscribe to this using <code>useSyncExternalStore</code>, we need to
call our <code>main</code> store's subscribe.</p>
<pre><code class="language-js">class SyncedStore {
  snapshot;
  defaultValue;
  storageKey;
  constructor(defaultValue = &quot;&quot;, storageKey) {
    this.defaultValue = defaultValue;
    this.snapshot = window.electron.store.get(storageKey) ?? defaultValue;
    this.storageKey = storageKey;
  }
  getSnapshot = () =&gt; this.snapshot;

  subscribe = callback =&gt; {
    window.electron.store.subscribe(this.storageKey, callback);
    return () =&gt; {
      window.electron.store.unsubscribe(this.storageKey);
    };
  };
}
</code></pre>
<p>We have our <code>SyncedStore</code> ready, but it's a bit inefficient; for example, if we
are subscribed to the same <code>storageKey</code> in multiple places, it will create a
subscription for each instance in the main store. That is needless IPC
communications for the same data.</p>
<p>Let's improve this a bit so that only one subscription is registered per browser
window(<code>renderer</code> process), and if there are multiple use cases of the same,
let's handle it internally.</p>
<pre><code class="language-js">class SyncedStore {
  snapshot;
  defaultValue;
  storageKey;
  listeners = new Set();
  constructor(defaultValue = &quot;&quot;, storageKey) {
    this.defaultValue = defaultValue;
    this.snapshot = window.electron.store.get(storageKey) ?? defaultValue;
    this.storageKey = storageKey;
  }
  getSnapshot = () =&gt; this.snapshot;

  onChange = newValue =&gt; {
    if (JSON.stringify(newValue) === JSON.stringify(this.snapshot)) return;
    this.snapshot = newValue ?? this.defaultValue;
    this.listeners.forEach(listener =&gt; listener());
  };

  subscribe = callback =&gt; {
    this.listeners.add(callback);
    if (this.listeners.size === 1) {
      window.electron.store.subscribe(this.storageKey, this.onChange);
    }
    return () =&gt; {
      this.listeners.delete(callback);
      if (this.listeners.size !== 0) return;
      window.electron.store.unsubscribe(this.storageKey);
    };
  };
}
</code></pre>
<p>We made the change so that only one request is sent to <code>main</code>; the rest of the
subscriptions are stored internally and respond to it when the first one is
notified.</p>
<p>We also added additional checks to ensure that rerender is not triggered if
there are no changes to the data.</p>
<h3>Usage</h3>
<p>Now, whenever a synchronized store for a field is needed, we just need to create
an instance of this class and pass it to <code>useSyncExternalStore</code>.</p>
<pre><code class="language-js">import { useSyncExternalStore } from &quot;react&quot;;

const createSyncedStore = ({ defaultValue, storageKey }) =&gt; {
  const store = new SyncedStore(defaultValue, storageKey);
  return () =&gt; useSyncExternalStore(store.subscribe, store.getSnapshot);
};

const useUser = createSyncedStore({
  storageKey: &quot;user&quot;,
  defaultValue: { firstName: &quot;Oliver&quot;, lastName: &quot;Smith&quot; },
});

const App = () =&gt; {
  const user = useUser();

  return &lt;div&gt;Name: {`${user.firstName} ${user.lastName}`}&lt;/div&gt;;
};
</code></pre>
<p>Now, if we update the <code>user</code> field from anywhere, let it be from any <code>renderer</code>
process or <code>main</code>.</p>
<pre><code class="language-js">window.electron.store.set(&quot;user&quot;, { firstName: &quot;John&quot;, lastName: &quot;Smith&quot; });
</code></pre>
<p>The above <code>App</code> component will be rerendered with the latest user data.</p>
]]></content>
    </entry>
  <entry>
      <title type="text"><![CDATA[Introduction to custom Babel plugins]]></title>
      <link rel="alternate" type="text/html" href="https://www.bigbinary.com/blog/how-to-build-your-own-babel-plugins"/>
      <link rel="enclosure" type="image/jpeg" href="https://www.bigbinary.com/blog/images/social_preview_images/introducing_to_custom_babel_plugins.jpg"/>
      <id>https://www.bigbinary.com/blog/how-to-build-your-own-babel-plugins</id>
      <published>2024-09-10T00:00:00.000Z</published>
      <updated>2024-09-10T00:00:00.000Z</updated>
      <author>
        <name>Joseph Mathew</name>
        <uri>https://www.bigbinary.com/blog/authors/josephmathew900</uri>
      </author>
      <category term="JavaScript"/>
      <media:thumbnail url="https://www.bigbinary.com/blog/images/social_preview_images/introducing_to_custom_babel_plugins.jpg" width="1200" height="627"/>
      <summary type="text"><![CDATA[Learn how to create custom Babel plugins.]]></summary>
      <content type="html" xml:base="https://www.bigbinary.com/blog/how-to-build-your-own-babel-plugins"><![CDATA[<p><a href="https://babeljs.io/docs/">Babel</a> is a tool that allows us to write modern
JavaScript while ensuring it works across older browsers. Instead of generating
binary code like traditional compilers, Babel performs source-to-source
transformations.</p>
<p>For example, with modern JavaScript, we might use arrow functions like this:</p>
<pre><code class="language-js">const add = (a, b) =&gt; a + b;
</code></pre>
<p>This code works in modern browsers but not in older ones, like Internet
Explorer, which does not support arrow functions. Without Babel, we would need
to use older syntax to ensure compatibility, which limits our use of modern
features. Babel solves this problem by transforming the modern code into an
older syntax that more browsers can handle. For example, Babel converts the
arrow function code above into the standard function syntax shown below, which
is compatible with all browsers.</p>
<pre><code class="language-js">var add = function add(a, b) {
  return a + b;
};
</code></pre>
<p>With Babel, we can write modern JavaScript code without worrying about browser
compatibility. Babel uses several presets and plugins to achieve this.</p>
<h2>Plugins and Presets</h2>
<p><strong>Plugins</strong> are individual components that handle specific tasks in JavaScript
code. For example, there are plugins for converting Arrow Functions to ES5
Functions, JSX to React functional calls and so on.</p>
<p>There are two main types of plugins:</p>
<ul>
<li>
<p><strong>Syntax Plugins</strong>: These plugins help Babel understand new syntax that it
doesn’t recognize otherwise. For example, Babel doesn’t understand JSX syntax
by default, so we need a plugin to enable this.
<a href="https://babeljs.io/docs/babel-plugin-syntax-jsx">@babel/plugin-syntax-jsx</a> is
a syntax plugin that allows Babel to recognize and parse JSX syntax.</p>
</li>
<li>
<p><strong>Transformation Plugins</strong>: This type of plugins help Babel convert code
written in modern syntax into format more widely supported by different
browsers. For instance,
<a href="https://babeljs.io/docs/babel-plugin-transform-react-jsx">@babel/plugin-transform-react-jsx</a>
is a transformation plugin that converts JSX into React functional calls.</p>
</li>
</ul>
<p><strong>Presets</strong> make things easier by bundling related plugins together. Instead of
setting up each plugin separately, we can use a preset that includes all the
necessary plugins. For instance,
<a href="https://babeljs.io/docs/babel-preset-react">@babel/preset-react</a> includes both
<code>@babel/plugin-syntax-jsx</code> and <code>@babel/plugin-transform-react-jsx</code>, handling
both JSX recognition and transformation in one go.</p>
<h2>Plugin and Preset Order in Babel Configuration</h2>
<p>Babel processes plugins in the order they are listed in the Babel configuration
file. This is important because the output of one plugin can affect the input of
another. For example, if we want to convert JSX to React functional calls, we
need to ensure that the JSX syntax is recognized first. So, we should list the
syntax plugin before the transformation plugin in the configuration file.</p>
<pre><code class="language-json">{
  &quot;plugins&quot;: [&quot;@babel/plugin-syntax-jsx&quot;, &quot;@babel/plugin-transform-react-jsx&quot;]
}
</code></pre>
<p>Babel process presets in reverse order. This means that the last preset listed
will be the first to be processed.</p>
<pre><code class="language-json">{
  &quot;presets&quot;: [&quot;@babel/preset-env&quot;, &quot;@babel/preset-react&quot;]
}
</code></pre>
<p>For example, let's look at the configuration mentioned above. In this case
<code>@babel/preset-react</code> preset will be applied first, followed by
<code>@babel/preset-env</code>, ensuring that React-specific transformations are handled
before general environment compatibility transformations.</p>
<h2>Custom Babel Plugin</h2>
<p>While Babel offers a wide range of plugins and presets, it's true potential lies
in the ability to create custom plugins tailored to our project's specific
needs. In the final section of this blog, we will explore a use case we
encountered at <a href="https://www.neeto.com/">Neeto</a> and how we solved it with a
custom Babel plugin. For now, let's focus on creating a simple plugin. Before we
begin, it's important to understand a key concept called an AST (Abstract Syntax
Tree).</p>
<h3>Abstract Syntax Tree (AST)</h3>
<p>An AST is a tree representation of the structure of a program. It breaks down
the code into its constituent parts and represents them as nodes in a tree. Each
node in the tree represents a different part of the code, such as a variable
declaration, a function call, or a loop. Babel uses ASTs to analyze and
transform JavaScript code. For example, consider the following code:</p>
<pre><code class="language-js">const sum = (x, y) =&gt; x + y;
</code></pre>
<p>This is how its AST looks:</p>
<p><img src="https://www.bigbinary.com/blog/images/images_used_in_blog/2024/how-to-build-your-own-babel-plugins/ast_demo.gif" alt="AST Demo"></p>
<p>In this example, the root node is the <code>File</code> node, which represents the entire
code file. Within it, there are several nested nodes like, <code>VariableDeclarator</code>,
<code>ArrowFunctionExpression</code> and so on, each dedicated to different parts of the
code. As shown in the animation, hovering over each node highlights the
corresponding code segment on the left-hand side. To explore and interact with
both the code and its AST, the <a href="https://astexplorer.net/">AST Explorer</a> tool can
be used.</p>
<h3>Babel transpile stages</h3>
<p>Now that we have a basic understanding of ASTs, let's see at how Babel works. It
has three main stages:</p>
<ul>
<li><strong>Parse Stage</strong>: In this stage, the code that is passed to Babel as input is
converted into an AST. This is done using the
<a href="https://babeljs.io/docs/babel-parser">@babel/parser</a> package.</li>
<li><strong>Transform Stage</strong>: This is the stage where Babel traverses and modifies the
AST using <a href="https://babeljs.io/docs/babel-traverse">@babel/traverse</a> package.
This is where plugins come into play to apply specific transformations. It’s
important to note that this is the only step we can influence. In the next
section, we'll see how to create a custom Babel plugin.</li>
<li><strong>Generate Stage</strong>: Once the AST has been modified, it needs to be converted
back into code. This is done using
<a href="https://babeljs.io/docs/babel-generator">@babel/generator</a> package.</li>
</ul>
<h3>Creating a Babel Plugin</h3>
<p>As mentioned in the previous section, Babel plugins are used to apply
transformations to the AST, and this is the only step we can influence. So,
let’s see how to create a simple Babel plugin. We will create a plugin that
converts all <code>==</code> operators in the code to <code>===</code>. This is a common
transformation that developers often use to ensure strict equality checks in
their code.</p>
<p>First, let's set up the project structure for our plugin.</p>
<ul>
<li>
<p><strong>Step 1</strong>: Create a new directory and initialize a new npm package for the
plugin. Let's prefix the package name with <code>babel-plugin-</code>. This naming
convention clearly indicates that the package is a Babel plugin, making it
easier for others to identify its purpose.</p>
<pre><code class="language-bash">mkdir babel-plugin-strict-equality
cd babel-plugin-strict-equality
npm init -y
</code></pre>
</li>
<li>
<p><strong>Step 2</strong>: Create a file named <code>index.js</code> in the root of the plugin
directory. This file will contain the logic for the plugin.</p>
<pre><code class="language-bash">touch index.js
</code></pre>
</li>
</ul>
<p>Now that we have set up the project structure, let's start writing the plugin
code.</p>
<p>To transform the code, we need to traverse the AST generated from the parse
stage. We can do this by creating a <code>visitor</code> object that defines the
transformations to be applied to the AST. The visitor object contains methods
that correspond to different types of nodes in the AST. When Babel encounters a
node of a particular type, it calls the corresponding method in the <code>visitor</code>
object to apply the transformation.</p>
<p>To understand this better, let's look at a code example that we want to
transform:</p>
<pre><code class="language-js">a == b;
</code></pre>
<p>We want to transform this code into:</p>
<pre><code class="language-js">a === b;
</code></pre>
<p>First, let's examine the AST representation of the original code:</p>
<pre><code class="language-json">{
  &quot;type&quot;: &quot;File&quot;,
  &quot;program&quot;: {
    &quot;type&quot;: &quot;Program&quot;,
    &quot;body&quot;: [
      {
        &quot;type&quot;: &quot;ExpressionStatement&quot;,
        &quot;expression&quot;: {
          &quot;type&quot;: &quot;BinaryExpression&quot;,
          &quot;left&quot;: {
            &quot;type&quot;: &quot;Identifier&quot;,
            &quot;name&quot;: &quot;a&quot;
          },
          &quot;operator&quot;: &quot;==&quot;,
          &quot;right&quot;: {
            &quot;type&quot;: &quot;Identifier&quot;,
            &quot;name&quot;: &quot;b&quot;
          }
        }
      }
    ]
  }
}
</code></pre>
<p>Here, our goal is to modify the <code>BinaryExpression</code> node with the operator <code>==</code>
to <code>===</code>. To achieve this, we need to create a visitor method for the
<code>BinaryExpression</code>. When Babel encounters a <code>BinaryExpression</code> node with the
operator <code>==</code> in the AST, it will call our visitor method to apply the
transformation.</p>
<p>So, let's write the code for our plugin. Open the <code>index.js</code> file we created
earlier and add the following code:</p>
<pre><code class="language-js">module.exports = function () {
  return {
    visitor: {
      BinaryExpression(path) {
        if (path.node.operator === &quot;==&quot;) {
          path.node.operator = &quot;===&quot;;
        }
      },
    },
  };
};
</code></pre>
<p>This plugin will traverse the AST, identify <code>BinaryExpression</code> nodes with the
<code>==</code> operator, and replace them with <code>===</code>, ensuring strict equality checks are
used throughout the code.</p>
<p>Now that we have written the plugin code, let's see how to test it.</p>
<h3>Adding tests for the plugin</h3>
<p>To ensure that our plugin works as expected, we need to write tests. For this,
we can use the
<a href="https://www.npmjs.com/package/babel-plugin-tester">babel-plugin-tester</a> and
<a href="https://www.npmjs.com/package/jest?activeTab=readme">jest</a> packages.
<code>babel-plugin-tester</code> is a utility that makes it easy to test Babel plugins,
while <code>jest</code> is a popular testing framework for JavaScript. Let's see how we can
add tests for our plugin.</p>
<ul>
<li>
<p><strong>Step 1:</strong> Install the required packages:</p>
<pre><code class="language-bash">yarn add --dev babel-plugin-tester jest
</code></pre>
</li>
<li>
<p><strong>Step 2:</strong> Create a folder named <code>tests</code> in the project directory. Inside
this folder, create a test file named <code>strict-equality.spec.js</code> with the
following content:</p>
<pre><code class="language-js">const pluginTester = require(&quot;babel-plugin-tester&quot;);

const plugin = require(&quot;../index&quot;);

pluginTester({
  plugin,
  tests: {
    &quot;should convert == to ===&quot;: {
      code: &quot;a == b;&quot;,
      output: &quot;a === b;&quot;,
    },
    &quot;should not modify == inside a string or comment&quot;: {
      code: `
        const str = &quot;a == b&quot;;
        // comparison: a == b
      `,
      output: `
        const str = &quot;a == b&quot;;
        // comparison: a == b
      `,
    },
  },
});
</code></pre>
<p>In the code above, we are passing an object to the <code>pluginTester</code> function
with two keys: <code>plugin</code> and <code>tests</code>. The <code>plugin</code> key specifies the Babel
plugin we want to test, while the <code>tests</code> key contains an object defining our
test cases. Each test case includes a <code>code</code> key with the input code and an
<code>output</code> key with the expected result after the plugin is applied. The
<code>pluginTester</code> function runs each test case, comparing the actual output with
the expected output. If they match, the test passes; if they don’t, it fails.</p>
</li>
<li>
<p><strong>Step 3:</strong> Now to run the tests, use the following command:</p>
<pre><code class="language-bash">yarn jest
</code></pre>
<p>This will run the tests and display the results in the terminal. If the test
passes, it means our plugin is working as expected.</p>
<p><img src="https://www.bigbinary.com/blog/images/images_used_in_blog/2024/how-to-build-your-own-babel-plugins/jest-result.png" alt="jest-result"></p>
</li>
</ul>
<h3>Testing the plugin in a real project using yalc</h3>
<p>While <code>pluginTester</code> helps cover many edge cases, it’s challenging to anticipate
all possible scenarios. For this, we need to run our rules in real projects and
we will have to achieve this without publishing our package to the remote
registry right away.</p>
<p>To achieve this, we can use the <a href="https://www.npmjs.com/package/yalc">yalc</a>
package. <code>yalc</code> is a tool that allows us to work on the npm packages as if they
were published, but without actually publishing them. It creates a symlink to
our local package in the global npm registry, allowing us to install and use it
in other projects. Let's see how we can use <code>yalc</code> to test our plugin.</p>
<ul>
<li>
<p><strong>Step 1:</strong> Install <code>yalc</code> globally.</p>
<pre><code class="language-bash">yarn global add yalc
</code></pre>
</li>
<li>
<p><strong>Step 2:</strong> Publish the plugin using <code>yalc</code> by running the following command
in the plugin directory.</p>
<pre><code class="language-bash">yalc publish
</code></pre>
<p>This creates a symlink to the local package in the global npm registry.</p>
</li>
<li>
<p><strong>Step 3:</strong> Install the plugin in the project using <code>yalc</code> by running the
following command in the project directory.</p>
<pre><code class="language-bash">yalc add babel-plugin-strict-equality
</code></pre>
<p>This will add the plugin to the project as if it were installed from npm
registry.</p>
</li>
<li>
<p><strong>Step 4:</strong> Include the plugin in the Babel configuration.</p>
<pre><code class="language-json">{
  &quot;plugins&quot;: [&quot;babel-plugin-strict-equality&quot;]
}
</code></pre>
</li>
</ul>
<p>After testing the plugin in a real project and being satisfied with the results,
it can be published to the npm registry.</p>
<h3>Creating a Babel preset</h3>
<p>If we have multiple plugins that we want to bundle together, we can create a
Babel preset. As mentioned earlier, presets make it easier to configure Babel by
bundling related plugins together. Here is an example of how we can create a
Babel preset that includes the <code>babel-plugin-strict-equality</code> plugin:</p>
<ul>
<li>
<p><strong>Step 1</strong>: Create a new directory for the preset and initialize a new npm
package for the preset. Let's prefix the package name with <code>babel-preset-</code> to
indicate that it is a Babel preset.</p>
<pre><code class="language-bash">mkdir babel-preset-strict-equality
cd babel-preset-strict-equality
npm init -y
</code></pre>
</li>
<li>
<p><strong>Step 2</strong>: Create a folder named <code>plugins</code> in the root of the preset
directory. This folder will contain the plugins that we want to include in the
preset. In our case, we have only one plugin, so create a file named
<code>strict-equality.js</code> inside the <code>plugins</code> folder and add our plugin code to
it.</p>
<pre><code class="language-js">module.exports = function () {
  return {
    visitor: {
      BinaryExpression(path) {
        if (path.node.operator === &quot;==&quot;) {
          path.node.operator = &quot;===&quot;;
        }
      },
    },
  };
};
</code></pre>
</li>
<li>
<p><strong>Step 3</strong>: Create a file named <code>index.js</code> in the root of the preset
directory. This file will contain the logic for bundling the plugins together.</p>
<pre><code class="language-js">const strictEquality = require(&quot;./plugins/strict-equality.js&quot;);

module.exports = function () {
  return {
    plugins: [strictEquality],
  };
};
</code></pre>
<p>Here we are returning an object with a <code>plugins</code> key that contains an array of
plugins to be included in the preset. If there are multiple plugins, we can
list them all in this array. We can now publish this preset to the npm
registry and use it in our Babel configuration.</p>
</li>
<li>
<p><strong>Step 4</strong>: To use the preset in the Babel configuration, include it like
this:</p>
<pre><code class="language-json">{
  &quot;presets&quot;: [&quot;babel-preset-strict-equality&quot;]
}
</code></pre>
</li>
</ul>
<p>Here we have created a simple Babel plugin and preset. This is just the tip of
the iceberg when it comes to creating custom Babel plugins. We can create
plugins to handle a wide range of tasks, from optimizing code to adding new
features. To know more about the functions and methods available in Babel, you
can refer to the
<a href="https://github.com/jamiebuilds/babel-handbook/blob/master/translations/en/plugin-handbook.md">Babel handbook</a>.
In the next section, we will see the use case we encountered at Neeto and how we
solved it using a custom Babel plugin.</p>
<h2>Motivation behind babel-preset-neeto</h2>
<p>At <a href="https://neeto.com/">Neeto</a>, we build our own custom plugins and presets to
streamline and simplify our development workflow. Let's look into one of the
specific plugins we've designed and implemented and see how it enhances our
development process.</p>
<p>We use <a href="https://github.com/pmndrs/zustand">Zustand</a> for global state management.
Zustand provides <code>shallow</code> function, which allows us to construct a single
object with multiple state-picks inside. This helps prevent unnecessary
re-renders by using shallow equality to check if the selected state values have
changed. Let's consider the following example:</p>
<pre><code class="language-js">import { shallow } from &quot;zustand/shallow&quot;;

const { id, name } = useSessionStore(
  store =&gt; ({
    id: store[sessionId]?.user.id,
    name: store[sessionId]?.user.name,
  }),
  shallow
);
</code></pre>
<p>In this example, the component only re-renders if <code>id</code> or <code>name</code> changes. If any
other state in the store changes, the component will not re-render. This
significantly improves performance. To know how this works, you can refer to
this
<a href="https://www.bigbinary.com/blog/upgrading-react-state-management-with-zustand">blog post</a>.
However, when dealing with many state selections, the code can become verbose
and repetitive. For example, consider the following code:</p>
<pre><code class="language-js">import { shallow } from &quot;zustand/shallow&quot;;

const {
  id,
  name,
  email,
  notifications,
  theme,
  language,
  isAuthenticated,
  apiToken,
  appVersion,
  darkModeEnabled,
} = useSessionStore(
  store =&gt; ({
    id: store[sessionId]?.user.id,
    name: store[sessionId]?.user.name,
    email: store[sessionId]?.user.email,
    notifications: store[sessionId]?.user.notifications,
    theme: store[sessionId]?.user.theme,
    language: store[sessionId]?.user.language,
    isAuthenticated: store[sessionId]?.user.isAuthenticated,
    apiToken: store[sessionId]?.user.apiToken,
    appVersion: store[sessionId]?.user.appVersion,
    darkModeEnabled: store[sessionId]?.user.darkModeEnabled,
  }),
  shallow
);
</code></pre>
<p>This is really repetitive, for each state, we need to add a line on left and
right side of the code. Then we thought, what if we can infer the right side
from the left side of the code. This will make the code more readable and less
error-prone. But this is not possible with the custom functions or hooks because
they operate at runtime and cannot modify the structure of the code during
transpilation. This is where custom Babel plugins come into play. We have built
a
<a href="https://github.com/bigbinary/babel-preset-neeto/blob/main/docs/zustand-pick.md">Zustand pick transformer</a>
capable of generating the boilerplate at the time of transpiling the code.</p>
<p>If this plugin is added to the babel configuration, we can rewrite the previous
example as:</p>
<pre><code class="language-js">const {
  id,
  name,
  email,
  notifications,
  theme,
  language,
  isAuthenticated,
  apiToken,
  appVersion,
  darkModeEnabled,
} = useSessionStore.pick([sessionId, &quot;user&quot;]);
</code></pre>
<p>The array inside <code>pick()</code> is the path of the nested object to be accessed. You
might also notice that we don't have the
<code>import { shallow } from &quot;zustand/shallow&quot;</code> statement in this piece of code. We
don't need that. The plugin will automatically add it for us at the time of
transpiling.</p>
<p>The plugin detects that <code>id</code>, <code>name</code>, <code>email</code>, and other properties are to be
accessed from the <code>store[sessionId].user</code> in <code>useSessionStore</code>, and it generates
code for it. It will also add optional chaining for all the nested properties
automatically to make the picks free from null-pointer errors.</p>
<p>For more information about the plugin, refer to the
<a href="https://github.com/bigbinary/babel-preset-neeto/blob/main/docs/zustand-pick.md">documentation</a>.
To see the implementation of the plugin, check the
<a href="https://github.com/bigbinary/babel-preset-neeto/blob/main/src/plugins/zustand-pick/index.js">source code</a></p>
<p>We've open-sourced this preset package so that it's accessible for use in your
projects as well. To include this preset, install it using the following
command:</p>
<pre><code class="language-bash">yarn add -D @bigbinary/babel-preset-neeto
</code></pre>
<p>And then include it in the Babel configuration:</p>
<pre><code class="language-json">{
  &quot;presets&quot;: [&quot;@bigbinary/neeto&quot;]
}
</code></pre>
]]></content>
    </entry>
  <entry>
      <title type="text"><![CDATA[Building custom extensions in Tiptap]]></title>
      <link rel="alternate" type="text/html" href="https://www.bigbinary.com/blog/building-custom-extensions-in-tiptap"/>
      <link rel="enclosure" type="image/jpeg" href="https://www.bigbinary.com/blog/images/social_preview_images/tiptap_custom_extensions.jpg"/>
      <id>https://www.bigbinary.com/blog/building-custom-extensions-in-tiptap</id>
      <published>2024-08-06T00:00:00.000Z</published>
      <updated>2024-08-06T00:00:00.000Z</updated>
      <author>
        <name>Gaagul C Gigi</name>
        <uri>https://www.bigbinary.com/blog/authors/gaagul</uri>
      </author>
      <category term="React"/>
      <category term="JavaScript"/>
      <media:thumbnail url="https://www.bigbinary.com/blog/images/social_preview_images/tiptap_custom_extensions.jpg" width="1200" height="627"/>
      <summary type="text"><![CDATA[A comprehensive guide on building custom extensions in Tiptap.]]></summary>
      <content type="html" xml:base="https://www.bigbinary.com/blog/building-custom-extensions-in-tiptap"><![CDATA[<p><a href="https://neeto-editor.neeto.com">neetoEditor</a> is a rich text editor used across
<a href="https://neeto.com">neeto</a> products. It is built on Tiptap, an open-source
headless content editor, and offers a seamless and customizable solution for
rich text editing.</p>
<p>The decision to use Tiptap as the foundational framework for neetoEditor is
based on its flexibility. Tiptap simplifies the complex Prosemirror syntax into
simple JavaScript classes. In this blog post, we'll walk you through the process
of building an Embed extension using Tiptap.</p>
<h2>What is the Embed extension?</h2>
<div>
  <img width="100" alt="embed-extension" src="https://www.bigbinary.com/blog/images/images_used_in_blog/2024/building-custom-extensions-in-tiptap/embed-youtube-video.gif">
</div>
<br />
<br />
<p>The Embed extension enables embedding of videos from YouTube, Vimeo, Loom and
<a href="https://neeto.com/neetorecord">NeetoRecord</a>.</p>
<h2>Implementation</h2>
<p>If you think of the document as a tree, every content type in Tiptap is a Node.
Examples of nodes include paragraphs, headings, and code blocks. Here, we are
creating a new &quot;embed&quot; node.</p>
<pre><code class="language-jsx">import { Node } from &quot;@tiptap/core&quot;;

export default Node.create({
  name: &quot;embed&quot;, // A unique identifier for the Node
  group: &quot;block&quot;, // Belongs to the &quot;block&quot; group of extensions

  //...
});
</code></pre>
<h3>Attributes</h3>
<p><a href="https://tiptap.dev/docs/editor/guide/custom-extensions#attributes">Attributes</a>
store extra information about a node and are rendered as HTML attributes by
default. They are parsed from the content during initialization.</p>
<pre><code class="language-javascript">const Embed = Node.create({
  //...

  addAttributes() {
    return {
      src: { default: null },

      title: { default: null },

      frameBorder: { default: &quot;0&quot; },

      allow: {
        default:
          &quot;accelerometer; autoplay; clipboard-write; encrypted-media; gyroscope; picture-in-picture&quot;,
      },

      allowfullscreen: { default: &quot;allowfullscreen&quot; },

      figheight: {
        default: 281,
        parseHTML: element =&gt; element.getAttribute(&quot;figheight&quot;),
      },

      figwidth: {
        default: 500,
        parseHTML: element =&gt; element.getAttribute(&quot;figwidth&quot;),
      },
    };
  },
});
</code></pre>
<p>These attributes customize the video embed behavior:</p>
<ul>
<li><strong>src</strong>: Specify the URL of the video you want to embed.</li>
<li><strong>title</strong>: Add additional information about the video (optional).</li>
<li><strong>frameBorder</strong>: Set to &quot;0&quot; for seamless integration (default).</li>
<li><strong>allow</strong>: Define various permissions for optimal video experience (default
value provided).</li>
<li><strong>allowfullscreen</strong>: Enable fullscreen mode (default).</li>
<li><strong>figheight &amp; figwidth</strong>: Control the video frame's size.</li>
</ul>
<h3>Render HTML</h3>
<p>The
<a href="https://Video.dev/docs/editor/guide/custom-extensions#render-html">renderHTML</a>
function controls how an extension is rendered to HTML.</p>
<pre><code class="language-javascript">import { Node, mergeAttributes } from &quot;@tiptap/core&quot;;

const Embed = Node.create({
  //...
  renderHTML({ HTMLAttributes, node }) {
    const { figheight, figwidth } = node.attrs;

    return [
      &quot;div&quot;,
      {
        class: `neeto-editor__video-wrapper neeto-editor__video--${align}`,
      },
      [
        &quot;div&quot;,
        {
          class: &quot;neeto-editor__video-iframe&quot;,
          style: `width: ${figwidth}px; height: ${figheight}px;`,
        },
        [
          &quot;iframe&quot;,
          mergeAttributes(this.options.HTMLAttributes, {
            ...HTMLAttributes,
          }),
        ],
      ],
    ];
  },
});
</code></pre>
<p>This renders the following HTML content:</p>
<pre><code class="language-jsx">&lt;div class=&quot;neeto-editor__video-wrapper neeto-editor__video--center&quot;&gt;
  &lt;div class=&quot;neeto-editor__video-iframe&quot; style=&quot;width: 281px;height: 500px&quot;&gt;
    &lt;iframe
      src=&quot;&lt;src of the embed&gt;&quot;
      title=&quot;&lt;title of the embed&gt;&quot;
      frameborder=&quot;0&quot;
      allow=&quot;accelerometer; autoplay; clipboard-write; encrypted-media; gyroscope; picture-in-picture&quot;
      allowfullscreen=&quot;allowfullscreen&quot;
      figheight=&quot;281&quot;
      figwidth=&quot;500&quot;
      align=&quot;center&quot;
    &gt;&lt;/iframe&gt;
  &lt;/div&gt;
&lt;/div&gt;
</code></pre>
<h3>Parse HTML</h3>
<p>The
<a href="https://tiptap.dev/docs/editor/guide/custom-extensions#parse-html">parseHTML</a>
function loads the editor document from HTML by receiving an HTML DOM element as
input and returning an object with attributes and their values.</p>
<pre><code class="language-javascript">const Embed = Node.create({
  //...
  parseHTML() {
    return [{ tag: &quot;iframe[src]&quot; }];
  },
});
</code></pre>
<p>This ensures that whenever Tiptap encounters a <code>&lt;iframe&gt;</code> tag with an <code>src</code>
attribute, our custom &quot;embed&quot; Node renders our custom UI.</p>
<h3>Commands</h3>
<p><a href="https://tiptap.dev/docs/editor/api/commands">Commands</a> help us to easily modify
or alter a selection programmatically. For our embed extension, let's write a
command to insert the embed node.</p>
<pre><code class="language-javascript">const Embed = Node.create({
  //...
  addCommands() {
    return {
      setExternalVideo:
        options =&gt;
        ({ commands }) =&gt;
          commands.insertContent({ type: this.name, attrs: options }),
    };
  },
});
</code></pre>
<p>This is how a command can be executed:</p>
<pre><code class="language-javascript">editor
  .setExternalVideo({ src: &quot;https://www.youtube.com/embed/3sQv3Xh3Gt4&quot; })
  .run();
</code></pre>
<h3>NodeView</h3>
<p>Node views in TipTap enable customization for interactive nodes in your editor.</p>
<p>You can learn more about Node views with React
<a href="https://tiptap.dev/docs/editor/guide/node-views/react">here</a>.</p>
<p>This is how your node extension could look like:</p>
<pre><code class="language-jsx">import { Node } from &quot;@tiptap/core&quot;;
import { ReactNodeViewRenderer } from &quot;@tiptap/react&quot;;
import Component from &quot;./Component.jsx&quot;;

export default Node.create({
  // configuration …

  addNodeView() {
    return ReactNodeViewRenderer(Component);
  },
});
</code></pre>
<blockquote>
<p>Note: The <code>ReactNodeViewRenderer</code> passes a few very helpful props to your
custom React component.</p>
</blockquote>
<p>This is how our Embed component looks like:</p>
<pre><code class="language-jsx">import React from &quot;react&quot;;

import { NodeViewWrapper } from &quot;@tiptap/react&quot;;
import { mergeRight } from &quot;ramda&quot;;
import { Resizable } from &quot;re-resizable&quot;;

import Menu from &quot;../Image/Menu&quot;;

const EmbedComponent = ({
  node,
  editor,
  getPos,
  updateAttributes,
  deleteNode,
}) =&gt; {
  const { figheight, figwidth, align } = node.attrs;
  const { view } = editor;
  let height = figheight;
  let width = figwidth;

  const handleResize = (_event, _direction, ref) =&gt; {
    height = ref.offsetHeight;
    width = ref.offsetWidth;
    view.dispatch(
      view.state.tr.setNodeMarkup(
        getPos(),
        undefined,
        mergeRight(node.attrs, {
          figheight: height,
          figwidth: width,
          height,
          width,
        })
      )
    );
    editor.commands.focus();
  };

  return (
    &lt;NodeViewWrapper
      className={`neeto-editor__video-wrapper neeto-editor__video--${align}`}
    &gt;
      &lt;Resizable
        lockAspectRatio
        className=&quot;neeto-editor__video-iframe&quot;
        size={{ height, width }}
        onResizeStop={handleResize}
      &gt;
        &lt;Menu {...{ align, deleteNode, editor, updateAttributes }} /&gt; // Menu
        component to handle alignment and delete
        &lt;iframe {...node.attrs} /&gt;
      &lt;/Resizable&gt;
    &lt;/NodeViewWrapper&gt;
  );
};

export default EmbedComponent;
</code></pre>
<p>The <code>NodeViewWrapper</code> component is a wrapper for the custom component provided
by TipTap. The <code>Resizable</code> component is used to resize the embed node.</p>
<h2>Putting it all together</h2>
<p>Here's the final output of the Embed extension in neetoEditor:</p>
<pre><code class="language-javascript">import { Node, mergeAttributes, PasteRule } from &quot;@tiptap/core&quot;;
import { ReactNodeViewRenderer } from &quot;@tiptap/react&quot;;
import { TextSelection } from &quot;prosemirror-state&quot;;

import { COMBINED_REGEX } from &quot;common/constants&quot;;

import EmbedComponent from &quot;./EmbedComponent&quot;;
import { validateUrl } from &quot;./utils&quot;;

export default Node.create({
   name: &quot;embed&quot;

  addOptions() {
    return { inline: false, HTMLAttributes: {} };
  },

  inline() {
    return this.options.inline;
  },

  group() {
    return this.options.inline ? &quot;inline&quot; : &quot;block&quot;;
  },

  addAttributes() {
    return {
      src: { default: null },

      title: { default: null },

      frameBorder: { default: &quot;0&quot; },

      allow: {
        default:
          &quot;accelerometer; autoplay; clipboard-write; encrypted-media; gyroscope; picture-in-picture&quot;,
      },

      allowfullscreen: { default: &quot;allowfullscreen&quot; },

      figheight: {
        default: 281,
        parseHTML: element =&gt; element.getAttribute(&quot;figheight&quot;),
      },

      figwidth: {
        default: 500,
        parseHTML: element =&gt; element.getAttribute(&quot;figwidth&quot;),
      },

      align: {
        default: &quot;center&quot;,
        parseHTML: element =&gt; element.getAttribute(&quot;align&quot;),
      },
    };
  },

  parseHTML() {
    return [{ tag: &quot;iframe[src]&quot; }];
  },

  renderHTML({ HTMLAttributes, node }) {
    const { align, figheight, figwidth } = node.attrs;

    return [
      &quot;div&quot;,
      {
        class: `neeto-editor__video-wrapper neeto-editor__video--${align}`,
      },
      [
        &quot;div&quot;,
        {
          class: &quot;neeto-editor__video-iframe&quot;,
          style: `width: ${figwidth}px; height: ${figheight}px;`,
        },
        [
          &quot;iframe&quot;,
          mergeAttributes(this.options.HTMLAttributes, {
            ...HTMLAttributes,
          }),
        ],
      ],
    ];
  },

  addNodeView() {
    return ReactNodeViewRenderer(EmbedComponent);
  },

  addCommands() {
    return {
      setExternalVideo:
        options =&gt;
        ({ commands }) =&gt;
          commands.insertContent({ type: this.name, attrs: options }),
    };
  },

  addPasteRules() {
    return [
      new PasteRule({
        find: COMBINED_REGEX,
        handler: ({ state, range, match }) =&gt; {
          state.tr.delete(range.from, range.to);
          state.tr.setSelection(
            TextSelection.create(state.doc, range.from + 1)
          );

          const validatedUrl = validateUrl(match[0]);
          if (validatedUrl) {
            const node = state.schema.nodes[&quot;embed&quot;].create({
              src: validatedUrl,
            });
            state.tr.insert(range.from, node);
            state.tr.insert(
              range.from + node.nodeSize + 1,
              state.schema.nodes.paragraph.create()
            );

            state.tr.setSelection(
              TextSelection.create(state.tr.doc, range.from + node.nodeSize + 1)
            );
          }
        },
      }),
    ];
  },
});
</code></pre>
]]></content>
    </entry>
  <entry>
      <title type="text"><![CDATA[Widget state synchronisation across tabs]]></title>
      <link rel="alternate" type="text/html" href="https://www.bigbinary.com/blog/widget-synchronisation"/>
      <link rel="enclosure" type="image/jpeg" href="https://www.bigbinary.com/blog/images/social_preview_images/widget_state_synchronisation.jpg"/>
      <id>https://www.bigbinary.com/blog/widget-synchronisation</id>
      <published>2024-07-02T00:00:00.000Z</published>
      <updated>2024-07-02T00:00:00.000Z</updated>
      <author>
        <name>Labeeb Latheef</name>
        <uri>https://www.bigbinary.com/blog/authors/labeebklatif</uri>
      </author>
      <category term="React"/>
      <category term="JavaScript"/>
      <media:thumbnail url="https://www.bigbinary.com/blog/images/social_preview_images/widget_state_synchronisation.jpg" width="1200" height="627"/>
      <summary type="text"><![CDATA[How we implemented widget state synchronisation in NeetoChat widget.]]></summary>
      <content type="html" xml:base="https://www.bigbinary.com/blog/widget-synchronisation"><![CDATA[<p>The NeetoChat widget is the end-user-facing companion widget of our
<a href="https://www.neeto.com/neetochat">NeetoChat</a> application. By embedding the
NeetoChat widget on their website, NeetoChat users can easily interact with
their customers in real-time.</p>
<p><img src="https://www.bigbinary.com/blog/images/images_used_in_blog/2024/widget-synchronisation/neeto-chat.png" alt="NeetoChat chat screen"></p>
<p>The NeetoChat widget has a feature to synchronize its state across other widget
instances you might have open in any other tab or window, in real-time. This
ability gives users the illusion of interacting with the same widget instance
across tabs and provides a sense of continuity. For example, user interactions
such as navigating to another page, and minimizing/maximizing the widget
performed on a widget instance in one tab are reflected across widgets in every
other tab.</p>
<p>In fact, a widget or the underlying script cannot be shared between multiple
browser contexts (tabs, windows, etc). All scripts in a context run in an
isolated environment, strictly separate from other executing contexts. However,
there are methods we can use to enable communication between two browser
contexts. Some of the popular choices are listed below. With a proper
communication channel set in place, two widget instances can notify each other
about their user interactions and state updates in real time to be synchronized.</p>
<ol>
<li>Use <strong>BroadcastChannel</strong> API</li>
<li>Use <strong>localStorage</strong> change listener</li>
<li>Use <strong>window.postMessage()</strong> method</li>
<li>Use Service Worker Post Message</li>
</ol>
<p>With ease of implementation and compatibility across different browser
environments in mind, we have chosen to implement this feature using the
localStorage change listener. The details of the implementation can be split
into two parts.</p>
<h5>1. Navigation Checkpoint:</h5>
<p>When opening a new widget instance in a new tab or window, the widget resumes
from the last checkpoint, allowing the users to continue from where they left
off. This implementation is pretty straightforward. Whenever the URL pathname
changes, we keep a reference in the localStorage called &quot;checkpoint&quot;.</p>
<pre><code class="language-jsx">const Router = ({ children }) =&gt; {
  const history = useHistory();
  const pathname = history.location.pathname;

  const addCheckPoints = pathname =&gt; {
    // Check if the current pathname matches any allowed routes.
    // Only navigations to main pages are allowed to be added as checkpoints.
    const isAllowed = ALLOWED_CHECKPOINT_ROUTES.some(route =&gt;
      matchPath(pathname, { path: route, exact: true, strict: true })
    );
    // Writes the pathname to localStorage with a unique identifier
    if (isAllowed) localStorage.setItem(&quot;checkpoint&quot;, pathname);
  };

  // Run for every pathname changes
  useEffect(() =&gt; {
    addCheckPoints(pathname);
  }, [pathname]);

  return &lt;App /&gt;;
};
</code></pre>
<p>Now, upon initializing a new widget instance, we check localStorage for any
existing checkpoint and set this as the initial route, presenting the user with
the same screen they visited last time.</p>
<pre><code class="language-jsx">const history = useHistory();

// Run on initial mount
useEffect(() =&gt; {
  const checkpoint = localStorage.getItem(&quot;checkpoint&quot;);
  // Replace initial route with checkpoint from localStorage.
  if (checkpoint) history.replace(checkpoint);
}, []);
</code></pre>
<h5>2. Real-time Synchronisation:</h5>
<p>The above implementation only allows a new widget instance to start in the last
checkpoint. From this point onwards, each state updates (minimize, maximize),
and user navigation in one widget has to be synchronized in real time with
active widget instances in other tabs to maintain the same appearance across the
tabs. At the core, this communication is enabled by adding a custom React hook
called <code>useWindowMessenger</code>. The <code>useWindowMessenger</code> hook relies on
localStorage values and localStorage change listeners for sending messages or
events across different browser contexts.</p>
<pre><code class="language-javascript">const storageKey = `__some_unique_localStorage_key__`;
const origin = window.location.origin;
const windowId = uuid(); // Assigns unique id for each browser contexts.

const createPayload = message =&gt; {
  const payload = {};
  payload.message = message;
  payload.meta = {};
  payload.meta.origin = origin;
  payload.meta.window = windowId;
  return JSON.stringify(payload);
};

const useWindowMessenger = messageHandler =&gt; {
  const messageHandlerRef = useRef();
  messageHandlerRef.current = messageHandler;

  const sendMessage = useCallback(message =&gt; {
    const payload = createPayload(message);
    // A new item is updated in local storage and immediately removed,
    // This is sufficient to get the 'storage' event to be fired.
    localStorage.setItem(storageKey, payload);
    localStorage.removeItem(storageKey);
  }, []);

  useEffect(() =&gt; {
    if (typeof messageHandlerRef.current !== &quot;function&quot;) return;

    const handleStorageChange = event =&gt; {
      if (event.key !== storageKey) return;
      if (!event.newValue) return;
      const { message, meta } = JSON.parse(event.newValue);
      // Every window has a unique `windowId` attached.
      // If event originated from the same `window`, the event is ignored.
      if (meta.window === windowId || meta.origin !== origin) return;
      messageHandlerRef.current(message);
    };

    // `storage` event is fired whenever value updates are sent to localStorage
    window.addEventListener(&quot;storage&quot;, handleStorageChange);
    return () =&gt; {
      window.removeEventListener(&quot;storage&quot;, handleStorageChange);
    };
  }, [messageHandlerRef]);

  return sendMessage;
};

export default useWindowMessenger;
</code></pre>
<p>In essence, the useWindowMessenger hook returns a <code>sendMessage</code> function that
can be used to send a message to widget instances in other tabs. Also, it
accepts a <code>messageHandler</code> callback that can receive and handle the messages
sent by other instances.</p>
<p>Now, when one widget instance emits state and navigation change events, other
widget instances handle these events to make necessary updates to their internal
state to mirror the changes. Below is a simplified example of how this was done
in the NeetoChat widget.</p>
<pre><code class="language-javascript">import { useCallback } from &quot;react&quot;;
import { useHistory } from &quot;react-router-dom&quot;;

// useLocalStorage is an in-house implementation that sync its state value into localStorage and restores the last value on next load.
import useLocalStorage from &quot;@hooks/useLocalStorage&quot;;
import useWindowMessenger from &quot;@hooks/useWindowMessenger&quot;;

export const MESSAGE_TYPES = {
  STATE_UPDATE: &quot;STATE_UPDATE&quot;,
  PATH_UPDATE: &quot;PATH_UPDATE&quot;,
};

const useWidgetState = () =&gt; {
  // This internal state controls widget visibility and other behaviours.
  const [widgetState, setWidgetState] = useLocalStorage(
    &quot;widgetState&quot;, // Unique localStorage key
    { maximized: false }
  );
  const history = useHistory();
  const pathname = history.location.pathname;

  const sendMessage = useWindowMessenger(message =&gt;
    handleMessageTypes(message.type, message.payload)
  );

  const handleMessageTypes = (type, payload) =&gt; {
    switch (type) {
      // Actions such as minimize, maximize are received as &quot;STATE_UPDATE&quot;
      case MESSAGE_TYPES.STATE_UPDATE:
        // Payload contains new state values
        // Commit new value updates to the internal state that controls widget.
        setWidgetState(prevState =&gt; ({ ...prevState, ...payload }));
        break;

      // User navigation actions are received as &quot;PATH_UPDATE&quot;
      case MESSAGE_TYPES.PATH_UPDATE:
        // Payload contains new pathname
        // Navigate to page if not already in the same page.
        if (history.location.pathname !== payload) history.push(payload);
        break;
      default:
        console.warn(`Unhandled message type: ${type}`);
    }
  };

  // This function extends `setWidgetState` function by adding the ability to emit `STATE_UPDATE` event for each state update call.
  const updateWidgetState = useCallback(async update =&gt; {
    let nextState;
    await setWidgetState(prevState =&gt; {
      nextState = { ...prevState, ...update };
      return nextState;
    });
    sendMessage({ type: MESSAGE_TYPES.STATE_UPDATE, payload });
  }, []);

  // Send &quot;PATH_UPDATE&quot; event for every path changes in the active widget.
  useEffect(() =&gt; {
    sendMessage({
      type: MESSAGE_TYPES.PATH_UPDATE,
      payload: pathname,
    });
  }, [pathname]);

  return [widgetState, updateWidgetState];
};
</code></pre>
<p>With the above setup, all the widget instances in different tabs act like a
single widget by mirroring the actions from the active instance.</p>
]]></content>
    </entry>
  <entry>
      <title type="text"><![CDATA[How we build, release and maintain frontend packages]]></title>
      <link rel="alternate" type="text/html" href="https://www.bigbinary.com/blog/build-release-frontend-packages"/>
      <link rel="enclosure" type="image/jpeg" href="https://www.bigbinary.com/blog/images/social_preview_images/neeto_build_release.jpg"/>
      <id>https://www.bigbinary.com/blog/build-release-frontend-packages</id>
      <published>2024-06-11T00:00:00.000Z</published>
      <updated>2024-06-11T00:00:00.000Z</updated>
      <author>
        <name>Farhan CK</name>
        <uri>https://www.bigbinary.com/blog/authors/farhanlatheef</uri>
      </author>
      <category term="JavaScript"/>
      <category term="ReactJS"/>
      <category term="npm"/>
      <media:thumbnail url="https://www.bigbinary.com/blog/images/social_preview_images/neeto_build_release.jpg" width="1200" height="627"/>
      <summary type="text"><![CDATA[Here at neeto, we build and manage a lot of products. Each product has its team. However, ensuring consistent design and functionalities across these products poses a significant challenge. To aid...]]></summary>
      <content type="html" xml:base="https://www.bigbinary.com/blog/build-release-frontend-packages"><![CDATA[<p>Here at <a href="https://www.neeto.com/">neeto</a>, we build and manage a
<a href="https://blog.neeto.com/p/neeto-products-and-people">lot of products</a>. Each
product has its team. However, ensuring consistent design and functionalities
across these products poses a significant challenge. To aid our product teams in
focusing on their core business logic, we've organized common functionalities
into separate packages.</p>
<p>In this blog, we'll look into how we build, release, and maintain these packages
to support our product development cycles. Let's take a look at some of these
key packages.</p>
<h3>neeto-cist</h3>
<p><a href="https://github.com/bigbinary/neeto-cist">neeto-cist</a> contains essential pure
utility functions and forms the backbone of our development framework.</p>
<h3>neeto-ui</h3>
<p><a href="https://github.com/bigbinary/neeto-ui">neeto-ui</a> is the foundational design
structure for our Neeto products. It contains basic-level components like
Buttons, Input fields, etc.</p>
<h3>neeto-molecules</h3>
<p>Built on top of <code>neeto-ui</code>, the <code>neeto-molecules</code> package houses reusable UI
elements like a login page, settings page, sidebars etc. It simplifies the
creation of consistent user experiences across Neeto products.</p>
<h3>neeto-commons</h3>
<p><code>neeto-commons</code> store crucial elements such as initializers, constants, hooks
and configurations shared across our entire product range. We wrote in great
detail about the
<a href="https://www.bigbinary.com/blog/neeto-commons-frontend">challenges we faced while building neeto-commons</a>.</p>
<p>Let's look at how we build, release, and maintain these packages.</p>
<h2>Build</h2>
<p>In general we use <a href="https://babeljs.io/">Babel</a> to transpile and
<a href="https://rollupjs.org">Rollup</a> to bundle with some exceptions.</p>
<p>Let's look at our standard build configuration.</p>
<pre><code class="language-js">import peerDepsExternal from &quot;rollup-plugin-peer-deps-external&quot;;
import svgr from &quot;@svgr/rollup&quot;;
import babel from &quot;@rollup/plugin-babel&quot;;
import resolve from &quot;@rollup/plugin-node-resolve&quot;;
import alias from &quot;@rollup/plugin-alias&quot;;
import json from &quot;@rollup/plugin-json&quot;;
import commonjs from &quot;@rollup/plugin-commonjs&quot;;
import styles from &quot;rollup-plugin-styles&quot;;
import aliases from &quot;./aliases&quot;;

export default {
  input: {
    Component1: &quot;src/components/Component1&quot;,
    Component2: &quot;src/components/Component2&quot;,
    //... rest of the entry points
  },
  output: [&quot;esm&quot;, &quot;cjs&quot;].map(format =&gt; ({
    format,
    sourcemap: true,
    //... other options
  })),
  plugins: [
    // To automatically externalize peerDependencies in a Rollup bundle.
    peerDepsExternal(),
    // Inline any svg files
    svgr(),
    // To integrate Rollup and Babel.
    babel({
      exclude: &quot;node_modules/**&quot;,
      babelHelpers: &quot;runtime&quot;,
    }),
    // To use third party modules from node_modules
    resolve({ extensions: [&quot;.js&quot;, &quot;.jsx&quot;, &quot;.svg&quot;] }),
    // To define aliases while bundling package.
    alias({ entries: aliases }),
    // To convert .json files to ES6 modules.
    json(),
    // To convert CommonJS modules to ES6.
    commonjs(),
    // Handle styles
    styles({
      minimize: true,
      extensions: [&quot;.css&quot;, &quot;.scss&quot;, &quot;.min.css&quot;],
    }),
  ],
};
</code></pre>
<p>When dealing with multiple entry points, passing an array of <code>input</code> is a common
mistake people make. The problem with an <code>input</code> array is that it will be
duplicated if there is shared code. So, the best approach here is to pass a
key-value object. This way, Rollup will create separate files for shared code
and reuse them everywhere.</p>
<p>Looking at the <code>output</code>, notice that we built it for CommonJS and ECMAScript.
Even though we don't have any Node.js projects (we are mainly a Rails company),
we still need the CommonJS format to run Jest tests and some scripts for build
and automation purposes.</p>
<p>When using Babel to transpile and Rollup to bundle, we ran into some
configuration pain points.
<a href="https://www.npmjs.com/package/@rollup/plugin-babel"><code>@rollup/plugin-babel</code></a>
plugin made the configuration far easier.
<a href="https://www.npmjs.com/package/@svgr/rollup"><code>@svgr/rollup</code></a> converts normal svg
files to react components.
<a href="https://www.npmjs.com/package/rollup-plugin-peer-deps-external"><code>rollup-plugin-peer-deps-external</code></a>
automatically externalizes peer dependencies, keeping the bundle lean. Even
though we don't have any CommonJS modules, it's better to add
<a href="https://www.npmjs.com/package/@rollup/plugin-commonjs"><code>@rollup/plugin-commonjs</code></a>
so that if there is any deep in dependency rabbit hole.</p>
<p>Above is a simplified version of the Rollup configuration we use on
<code>neeto-cist</code>, <code>neeto-ui</code> and <code>neeto-molecules</code>. We took a much simpler approach
when building <code>neeto-commons</code>. The reason for abandoning bundling for
<code>neeto-commons</code> is that within this package, we have a variety of commonly used
elements, such as components, hooks, initializers, constants, utils, etc., each
with varying sizes and dependency requirements. If the host project only wants
to use a few simple util functions, we don't want them to be served with the
entire bundle and need to install lots of dependencies.</p>
<p>Instead of serving everything from the root <code>index.js</code>, we use
<a href="https://webpack.js.org/guides/package-exports/"><code>exports</code></a> field in the
<code>package.json</code> to specify which files can be imported by the host project. Below
is a sample of our exports.</p>
<pre><code class="language-json">&quot;exports&quot;: {
  &quot;./react-utils&quot;: {
    &quot;import&quot;: &quot;./react-utils/index.js&quot;,
    &quot;require&quot;: &quot;./cjs/react-utils/index.js&quot;,
    &quot;types&quot;: &quot;./react-utils.d.ts&quot;
  },
  &quot;./react-utils/*&quot;: {
    &quot;import&quot;: &quot;./react-utils/*&quot;,
    &quot;require&quot;: &quot;./cjs/react-utils/*&quot;,
    &quot;types&quot;: &quot;./react-utils.d.ts&quot;
  },
  &quot;./utils&quot;: {
    &quot;import&quot;: &quot;./utils/index.js&quot;,
    &quot;require&quot;: &quot;./cjs/utils/index.js&quot;,
    &quot;types&quot;: &quot;./utils.d.ts&quot;
  },
  &quot;./utils/*&quot;: {
    &quot;import&quot;: &quot;./utils/*&quot;,
    &quot;require&quot;: &quot;./cjs/utils/*&quot;,
    &quot;types&quot;: &quot;./utils.d.ts&quot;
  },
  &quot;./initializers&quot;: {
    &quot;import&quot;: &quot;./initializers/index.js&quot;,
    &quot;require&quot;: &quot;./cjs/initializers/index.js&quot;,
    &quot;types&quot;: &quot;./initializers.d.ts&quot;
  },
  &quot;./constants&quot;: {
    &quot;import&quot;: &quot;./constants/index.js&quot;,
    &quot;require&quot;: &quot;./cjs/constants/index.js&quot;,
    &quot;types&quot;: &quot;./constants.d.ts&quot;
  }
}

</code></pre>
<p>We export, for example, <code>./react-utils</code> and <code>./react-utils/*</code> because we want to
support both import styles below.</p>
<pre><code class="language-js">import { useLocalStorage } from &quot;neetocommons/react-utils&quot;;
</code></pre>
<pre><code class="language-js">import useLocalStorage from &quot;neetocommons/react-utils/useLocalStorage&quot;;
</code></pre>
<p>We initially employed the first import style, but as we expanded, we recognized
the necessity of supporting a more concise approach in smaller projects. This
second method involves importing solely the target file without additional
dependencies, significantly improving tree-shaking capabilities.</p>
<p>We also ensure we build for <code>esm</code> and <code>cjs</code>. Below is our simplified Babel
config.</p>
<pre><code class="language-js">const defaultConfigurations = require(&quot;./defaultConfigurations&quot;);

const alias = {
  assets: &quot;./src/assets&quot;,
  neetocist: &quot;@bigbinary/neeto-cist&quot;,
  // others
};

module.exports = function (api) {
  const config = defaultConfigurations(api);
  config.sourceMaps = true;

  config.plugins.push(
    [&quot;module-resolver&quot;, { root: [&quot;./src&quot;], alias }],
    &quot;inline-react-svg&quot;
  );

  if (process.env.BABEL_MODE === &quot;commonjs&quot;) {
    config.overrides = [
      {
        presets: [[&quot;@babel/preset-env&quot;, { modules: &quot;commonjs&quot; }]],
      },
    ];
  }
  return config;
};
</code></pre>
<p>When transpiling, we ensure aliases are correctly resolved, and if there are any
SVG files, we inline them using the
<a href="https://www.npmjs.com/package/babel-plugin-inline-react-svg"><code>inline-react-svg</code></a>
plugin to make life easy for the host application. Below is our build script.</p>
<pre><code class="language-json">&quot;scripts&quot;: {
  &quot;build:pre&quot;: &quot;del-cli dist&quot;,
  &quot;build:es&quot;: &quot;babel  --extensions \&quot;.js,.jsx\&quot; src --out-dir=dist&quot;,
  &quot;build:cjs&quot;: &quot;BABEL_MODE=commonjs babel  --extensions \&quot;.js,.jsx\&quot; src --out-dir=dist/cjs&quot;,
  &quot;build:post&quot;: &quot;node ./.scripts/post-build.mjs&quot;,
  &quot;build&quot;: &quot;yarn build:pre &amp;&amp; yarn build:es &amp;&amp; yarn build:cjs &amp;&amp; yarn build:post&quot;,
}
</code></pre>
<h2>Release</h2>
<p>We did not want to create a release every time we merged a PR, and we also
didn't want to manually release packages every time. Instead, we rely on GitHub
Labels while running Github Actions to do the release.</p>
<p>We created three labels specifically for this purpose: <code>patch</code>, <code>minor</code> and
<code>major</code>. As the names suggest, these labels help us create <code>patch</code>, <code>minor</code> and
<code>major</code> versions. When we create a PR and want to do a release when merging,
attach any of these labels, and GitHub Action will create releases accordingly.</p>
<pre><code class="language-yaml">name: &quot;Create and publish releases&quot;
on:
  pull_request:
    branches:
      - main
    types: [closed]
jobs:
  release:
    name: &quot;Create Release&quot;
    runs-on: ubuntu-latest
    if: &gt;-
      ${{ github.event.pull_request.merged == true &amp;&amp; (
      contains(github.event.pull_request.labels.*.name, 'patch') ||
      contains(github.event.pull_request.labels.*.name, 'minor') ||
      contains(github.event.pull_request.labels.*.name, 'major') ) }}
</code></pre>
<p>As evident from the code above, we trigger the <code>Create and publish releases</code>
GitHub Action only if any of the three aforementioned labels are present. Once
that condition is met, we proceed to use
<a href="https://classic.yarnpkg.com/lang/en/docs/cli/version/"><code>yarn version</code></a> to
update the version.</p>
<pre><code class="language-yaml">- name: Bump the patch version and create a git tag on release
  if: ${{ contains(github.event.pull_request.labels.*.name, 'patch') }}
  run: yarn version --patch --no-git-tag-version

- name: Bump the minor version and create a git tag on release
  if: ${{ contains(github.event.pull_request.labels.*.name, 'minor') }}
  run: yarn version --minor --no-git-tag-version

- name: Bump the major version and create a git tag on release
  if: ${{ contains(github.event.pull_request.labels.*.name, 'major') }}
  run: yarn version --major --no-git-tag-version
</code></pre>
<p>Then, we extract changelogs from PR's title and description.</p>
<pre><code class="language-yaml">- name: Extract changelog
  id: CHANGELOG
  run: |
    content=$(echo '${{ steps.PR.outputs.pr_body }}' | python3 -c 'import json; import sys; print(json.dumps(sys.stdin.read().partition(&quot;**Description**&quot;)[2].partition(&quot;**Checklist**&quot;)[0].strip()))')
    echo &quot;CHANGELOG=${content}&quot; &gt;&gt; $GITHUB_ENV
  shell: bash

- name: Update Changelog
  continue-on-error: true
  uses: stefanzweifel/changelog-updater-action@v1
  with:
    latest-version: ${{ steps.package-version.outputs.version }}
    release-notes: ${{ fromJson(env.CHANGELOG) }}
</code></pre>
<p>Finally, we publish the package to NPM.</p>
<pre><code class="language-yaml">- name: Publish the package on NPM
  uses: JS-DevTools/npm-publish
  with:
    access: &quot;public&quot;
    token: ${{ secrets.NPM_TOKEN }}
</code></pre>
<h2>Maintenance</h2>
<p>Now that the release is done, we need to propagate changes to our products. For
example, we may have extracted an existing functionality from one of the
packages. Here is an example of
<a href="https://www.bigbinary.com/blog/how-we-standardized-keyboard-shortcuts">how we standardized keyboard shortcuts in neeto</a>
and extracted out into a package. Now, the product team needs to remove that
functionality and use it from the package. Reaching out to each team and asking
them to replace it can be tedious, especially considering their priorities. So
we came up with a plan to use custom
<a href="https://eslint.org/docs/latest/extend/custom-rules">ESLint rules</a> to enforce
them, and we built <code>eslint-plugin-neeto</code>.</p>
<p>Let's look at a few examples of how we use <code>eslint-plugin-neeto</code> to enforce
changes on the product team.</p>
<p>There are some third-party packages we decided not to use when we found better
alternatives, and they even included our own. For example, <code>bootstrap</code>,
<code>moment.js</code>, <code>@bigbinary/neeto-utils</code>, etc. To enforce this, we create ESLint
rules called <code>no-blacklisted-imports</code>. This rule throws a lint error if
developers attempt to commit changes that include these blacklisted imports.</p>
<p>Another example is that we moved higher-level constants, commonly utilized
across various products, to <code>neeto-commons</code>. To enforce this, we created an
ESLint rule called <code>use-common-constants</code>. This rule detects any local imports
and recommends importing from <code>neeto-commons</code> instead.</p>
<p>Here is another great blog post in which we explained the challenges we faced
while
<a href="https://www.bigbinary.com/blog/react-localization">adding translations and enforcing them using ESLint and Babel plugins</a>.</p>
<p>These are just a few of the many ESLint and Babel plugins we created.</p>
]]></content>
    </entry>
  <entry>
      <title type="text"><![CDATA[Automatically sentence-case i18next translations]]></title>
      <link rel="alternate" type="text/html" href="https://www.bigbinary.com/blog/lowercase-translations"/>
      <link rel="enclosure" type="image/jpeg" href="https://www.bigbinary.com/blog/images/social_preview_images/sentence_case_translations.jpg"/>
      <id>https://www.bigbinary.com/blog/lowercase-translations</id>
      <published>2024-04-09T00:00:00.000Z</published>
      <updated>2024-04-09T00:00:00.000Z</updated>
      <author>
        <name>Farhan CK</name>
        <uri>https://www.bigbinary.com/blog/authors/farhanlatheef</uri>
      </author>
      <category term="JavaScript"/>
      <category term="ReactJS"/>
      <media:thumbnail url="https://www.bigbinary.com/blog/images/social_preview_images/sentence_case_translations.jpg" width="1200" height="627"/>
      <summary type="text"><![CDATA[We use i18next to handle our localization requirements. We have written in great detail how we use i18next and react-i18next libraries in our applications. As our translations grew, we realized that...]]></summary>
      <content type="html" xml:base="https://www.bigbinary.com/blog/lowercase-translations"><![CDATA[<p>We use <a href="https://www.i18next.com/">i18next</a> to handle our localization
requirements. We have written in great detail how we use
<a href="https://www.bigbinary.com/blog/react-localization">i18next and react-i18next libraries</a>
in our applications.</p>
<p>As our translations grew, we realized that instead of adding every combination of the
texts as separate entries in the translation file, we can reuse most of them by
utilizing the i18next interpolation feature.</p>
<p><a href="https://www.i18next.com/translation-function/interpolation">Interpolation</a> is
one of the most used functionalities in i18n. It allows integrating dynamic
values into our translations.</p>
<pre><code class="language-json">{
  &quot;key&quot;: &quot;{{what}} is {{how}}&quot;
}
</code></pre>
<pre><code class="language-js">i18next.t(&quot;key&quot;, { what: &quot;i18next&quot;, how: &quot;great&quot; });
// -&gt; &quot;i18next is great&quot;
</code></pre>
<h3>Problem</h3>
<p>As we started to use interpolation more and more, we started seeing a lot of text
with irregular casing. For instance, in one of our apps, we have an <code>Add</code> button
in a few pages.</p>
<pre><code class="language-json">{
  &quot;addMember&quot;: &quot;Add a member&quot;,
  &quot;addWebsite&quot;: &quot;Add a website&quot;
}
</code></pre>
<p>Instead of adding each text as an entry in the translation file as shown above,
we took a bit of a generic approach and started using interpolation. Now our
translation files started to look like this.</p>
<pre><code class="language-json">{
  &quot;add&quot;: &quot;Add a {{entity}}&quot;,
  &quot;entities&quot;: {
    &quot;member&quot;: &quot;Member&quot;,
    &quot;website&quot;: &quot;Website&quot;
  }
}
</code></pre>
<p>This is great, but it has a slight problem. The final text looked like
this.</p>
<pre><code class="language-plaintext">Add a Member
</code></pre>
<p>We can see the <code>Member</code> is still capitalized, we needed it to be properly
sentence-cased like this.</p>
<pre><code class="language-plaintext">Add a member
</code></pre>
<p>We first thought we would just add <code>.toLocaleLowerCase()</code> to the dynamic value.</p>
<pre><code class="language-js">t(&quot;add&quot;, { entity: t(&quot;entities.member&quot;).toLocaleLowerCase() });
</code></pre>
<p>It worked fine. But often, developers would forget to add <code>.toLocaleLowerCase()</code>
in a lot of places. Secondly, it started to pollute our code with too much
<code>.toLocaleLowerCase()</code>.</p>
<p>As always, we decided to extract this problem to our
<a href="https://www.bigbinary.com/blog/neeto-commons-frontend">neeto-commons-frontend</a>
package.</p>
<h3>Solutions we looked at</h3>
<p>At first, it seemed like a very simple problem. We thought we can just use the
<a href="https://www.i18next.com/misc/creating-own-plugins#post-processor">post-processor</a>
feature. We just need to sentence-case the entire text on <code>post-process</code> like
this.</p>
<pre><code class="language-js">const sentenceCaseProcessor = {
  type: &quot;postProcessor&quot;,
  name: &quot;sentenceCaseProcessor&quot;,
  process: text =&gt; {
    // Sentence-case text.
    return (
      text.charAt(0).toLocaleUpperCase() + text.slice(1).toLocaleLowerCase()
    );
  },
};

i18next
  .use(LanguageDetector)
  .use(initReactI18next)
  .use(sentenceCaseProcessor)
  .init({
    resources: resources,
    fallbackLng: &quot;en&quot;,
    interpolation: {
      escapeValue: false,
      skipOnVariables: false,
    },
    postProcess: [sentenceCaseProcessor.name],
  });
</code></pre>
<p>Voila! Now onwards, all the texts will be properly sentence-cased, we no longer
need to add <code>.toLocaleLowerCase()</code>. Great? Not really.</p>
<p>We soon realized that not every text should be sentence-cased, there are a lot
of cases where we need to preserve the original casing. Here are some examples.</p>
<pre><code class="language-plaintext">Your file is larger than 2MB.
Disconnect Google integration?
No results found with your search query &quot;Oliver&quot;.
Your Api Key: AJg3c4TcXXXXXXXXX
No internet, NeetoForm is offline.
</code></pre>
<p>These examples clearly show why it's not a simple problem. We require a more
targeted and nuanced solution. Upon revisiting the issue, we found that our
initial solution of adding <code>.toLocaleLowerCase()</code> does work, but it's a bit
verbose.</p>
<p>So we decided to try
<a href="https://www.i18next.com/translation-function/formatting#adding-custom-format-function">custom formatters</a>.
So instead of adding <code>.toLocaleLowerCase()</code>, we created a nice custom formatter
called <code>lowercase</code>.</p>
<pre><code class="language-js">i18next.services.formatter.add(&quot;lowercase&quot;, (value, lng, options) =&gt; {
  return value.toLocaleLowerCase();
});
</code></pre>
<pre><code class="language-json">{
  &quot;add&quot;: &quot;Add a {{entity, lowercase}}&quot;,
  &quot;entities&quot;: {
    &quot;member&quot;: &quot;Member&quot;,
    &quot;website&quot;: &quot;Website&quot;
  }
}
</code></pre>
<p>This works perfectly, but it doesn't solve the verbosity problem. Instead of
adding <code>.toLocaleLowerCase()</code> in JavaScript files, we're now adding it in
translation JSON files - essentially just moving the problem to a different
place.</p>
<p>We needed a better solution that required minimal effort.</p>
<p>The idea here is to lowercase all dynamic values by default and create a
formatter to handle exceptions. To achieve this, we combined our previous
post-processor and a new formatter. The new formatter, which we called <code>anyCase</code>
can be used to flag any dynamic part in the text that needs to be excluded from
lowercasing. The post-processor will ignore these particular parts of the text
while sentence-casing.</p>
<pre><code class="language-js">const ANY_CASE_STR = &quot;__ANY_CASE__&quot;;
i18next.services.formatter.add(&quot;anyCase&quot;, (value, lng, options) =&gt; {
  return ANY_CASE_STR + value + ANY_CASE_STR;
});
</code></pre>
<pre><code class="language-json">{
  &quot;message&quot;: &quot;Your file is larger than {{size, anyCase}}&quot;
}
</code></pre>
<p>The post-processor we wrote attempted to identify these parts of the text marked
by <code>anyCase</code> formatter using pattern matching and retaining the original casing.
However, this approach failed when the text contained identical words in both
the dynamic and static parts of the text. It ended up lowercasing both words,
which is not the output we needed.</p>
<h3>Final solution</h3>
<p>Before we discuss the final solution, i18next recently changed how a formatter
is added, which is what we have been using so far, like below.</p>
<pre><code class="language-js">i18next.services.formatter.add(&quot;underscore&quot;, (value, lng, options) =&gt; {
  return value.replace(/\s+/g, &quot;_&quot;);
});
</code></pre>
<p>Before this, i18next had a different syntax, which they now call legacy formatting
is like below.</p>
<pre><code class="language-js">i18next.use(initReactI18next).init({
  resources: resources,
  fallbackLng: &quot;en&quot;,
  interpolation: {
    format: (value, format, lng, options) =&gt; {
      // All our formatters should go here.
    },
  },
});
</code></pre>
<p>Now back to our original problem.</p>
<p>We need to make sure that when applying formatting, it only formats dynamic parts. For
this, we found that if we use the legacy version of formatting, it offers an
option called <code>alwaysFormat: true</code>. One thing to remember here is if we choose
to use this flag, the latest style of formatting does not work. That means we
need to move all our custom formatters to the legacy format function.</p>
<pre><code class="language-js">i18next.use(initReactI18next).init({
  resources: resources,
  fallbackLng: &quot;en&quot;,
  interpolation: {
    escapeValue: false,
    skipOnVariables: false,
    alwaysFormat: true,
    format: (value, format, lng, options) =&gt; {
      // All your formatters should go here.
    },
  },
});
</code></pre>
<p>This is not a problem for us, because we are already maintaining all our custom
formatter in one place(<code>neeto-commons-frontend</code> package). Now the formatter is
applied to every dynamic text. This approach also overcame the &quot;identical words
in the text problem&quot; that we encountered with the previous version of the
formatter. Let's look at our updated formatter.</p>
<pre><code class="language-js">const LOWERCASED = &quot;__LOWERCASED__&quot;;
const lowerCaseFormatter = (value, format) =&gt; {
  if (!value || format === ANY_CASE || typeof value !== &quot;string&quot;) {
    return value;
  }
  return LOWERCASED + value.toLocaleLowerCase();
};
</code></pre>
<p>To elaborate on the code, the formatter lowercases all dynamic texts and
prefixes them with <code>__LOWERCASED__</code>. This prefixing is necessary because the
formatter lacks information about where this specific piece of text originally
appeared in the complete text. By adding this prefix, if the lowercased text
happens to be the first part of the output, we can revert it during the
post-processing stage. And that's precisely what we accomplished in the
post-processor.</p>
<pre><code class="language-js">const sentenceCaseProcessor = {
  type: &quot;postProcessor&quot;,
  name: &quot;sentenceCaseProcessor&quot;,
  process: value =&gt; {
    const shouldSentenceCase = value.startsWith(LOWERCASED); // Check if first word is lowercased.
    value = value.replaceAll(LOWERCASED, &quot;&quot;); // Remove all __LOWERCASED__

    return shouldSentenceCase ? sentenceCase(value) : value;
  },
};
</code></pre>
<p>Below is everything put together, If you're interested in a working example of
the same, checkout this
<a href="https://gist.github.com/neerajsingh0101/3c1413c28ec9115091b6644e3ceb9764">gist</a>.</p>
<pre><code class="language-js">const LOWERCASED = &quot;__LOWERCASED__&quot;;
const ANY_CASE = &quot;anyCase&quot;;

const sentenceCase = value =&gt;
  value.charAt(0).toLocaleUpperCase() + value.slice(1);

const lowerCaseFormatter = (value, format) =&gt; {
  if (!value || format === ANY_CASE || typeof value !== &quot;string&quot;) {
    return value;
  }
  return LOWERCASED + value.toLocaleLowerCase();
};

const sentenceCaseProcessor = {
  type: &quot;postProcessor&quot;,
  name: &quot;sentenceCaseProcessor&quot;,
  process: value =&gt; {
    const shouldSentenceCase = value.startsWith(LOWERCASED);
    value = value.replaceAll(LOWERCASED, &quot;&quot;);

    return shouldSentenceCase ? sentenceCase(value) : value;
  },
};

i18next
  .use(LanguageDetector)
  .use(initReactI18next)
  .use(sentenceCaseProcessor)
  .init({
    resources: resources,
    fallbackLng: &quot;en&quot;,
    interpolation: {
      escapeValue: false,
      skipOnVariables: false,
      alwaysFormat: true,
      format: (value, format, lng, options) =&gt; {
        // other formatters
        return lowerCaseFormatter(value, format);
      },
    },
    postProcess: [sentenceCaseProcessor.name],
    detection: {
      order: [&quot;querystring&quot;, &quot;cookie&quot;, &quot;navigator&quot;, &quot;path&quot;],
      caches: [&quot;cookie&quot;],
      lookupQuerystring: &quot;lang&quot;,
      lookupCookie: &quot;lang&quot;,
    },
  });
</code></pre>
]]></content>
    </entry>
  <entry>
      <title type="text"><![CDATA[Implementation of a universal timer]]></title>
      <link rel="alternate" type="text/html" href="https://www.bigbinary.com/blog/universal-timer"/>
      <link rel="enclosure" type="image/jpeg" href="https://www.bigbinary.com/blog/images/social_preview_images/implementation_of_universal_timer.jpg"/>
      <id>https://www.bigbinary.com/blog/universal-timer</id>
      <published>2024-03-26T00:00:00.000Z</published>
      <updated>2024-03-26T00:00:00.000Z</updated>
      <author>
        <name>Labeeb Latheef</name>
        <uri>https://www.bigbinary.com/blog/authors/labeebklatif</uri>
      </author>
      <category term="JavaScript"/>
      <category term="ReactJS"/>
      <media:thumbnail url="https://www.bigbinary.com/blog/images/social_preview_images/implementation_of_universal_timer.jpg" width="1200" height="627"/>
      <summary type="text"><![CDATA[Control multiple UI components with a single timer.]]></summary>
      <content type="html" xml:base="https://www.bigbinary.com/blog/universal-timer"><![CDATA[<p>When developing a web application, there could be numerous instances where we
deal with timers. The timer functions such as <code>setTimeout</code>, and <code>setInterval</code>
are basic browser APIs that all web developers are well acquainted with. When
trying to implement something like a self-advancing timer, these timer APIs make
the job easy.</p>
<p>Let's consider a simple use case. In React, if we are asked to implement a
countdown timer that updates the time on the screen every second, we can use the
<code>setInterval</code> method to get the job done.</p>
<pre><code class="language-jsx">const CountDownTimer = () =&gt; {
  const [time, setTime] = useState(10);

  useEffect(() =&gt; {
    const interval = setInterval(() =&gt; {
      setTime(time =&gt; {
        if (time &gt; 0) return time - 1;

        clearInterval(interval);
        return time;
      });
    }, 1000); // Run this every 1 second.
  }, []);

  return &lt;p&gt;Remaining time: {time}&lt;/p&gt;;
};
</code></pre>
<p>This works great if we are only expecting to show a single timer on the page.
What if we have to show multiple timers running on the same page?</p>
<h4>Multiple timers</h4>
<p>In the conversation page of our <a href="https://neetochat.com">NeetoChat</a> application,
when listing each message in a conversation, we annotate each message with a
&quot;time-ago&quot; label. This label indicates the duration since the message was
received and is expected to self-advance with passing time.</p>
<p><img src="https://www.bigbinary.com/blog/images/images_used_in_blog/2024/universal-timer/neeto-chat-timestamp-2.png" alt="NeetoChat timestamp">
<img src="https://www.bigbinary.com/blog/images/images_used_in_blog/2024/universal-timer/neeto-chat-timestamp-1.png" alt="NeetoChat timestamp"></p>
<p>Normally, our first take on such implementation would be to use a <code>setInterval</code>
timer inside the message component, which triggers the component to re-render
every second to update the label. This becomes highly inefficient when we have
hundreds of messages to be rendered on the screen at the same time.</p>
<p>The browser ends up running separate timers for each message to update their
label. Also, due to their asynchronous behavior, there is a higher chance that
these timer events get stuck in the JS event loop and get fired at inappropriate
moments or get dropped altogether.</p>
<h4>Using a single timer</h4>
<p>An alternate approach could be to keep a single timer and a state on the message
listing parent component. Then update the state on every passing second, and
trigger the entire list re-render. The obvious downside of this approach is
rerendering a large conversation list and its children every single second. This
is highly inappropriate and leads to unexpected stutter and other performance
issues.</p>
<p>What we wanted to achieve was to use a single timer that updates a single state,
triggering the re-render of all the components that need to be updated. In case
of NeetoChat conversations, we needed to update &quot;time-ago&quot; labels alone, not the
entire message component or any of its parent.</p>
<p>React's <a href="https://legacy.reactjs.org/docs/context.html">Context API</a> was the most
appropriate choice at the time for this task. The Context API offers a simple
way of sharing states or values across different components. Whenever the value
or the state changes, all its subscribed components are immediately notified of
the change and trigger a re-render. To use this approach, first, we extracted
the timer and the state into a Context. Then, all the components that need to be
updated over time are subscribed to this context value. The timer updates the
context value, and the subscribed components get rerendered.</p>
<pre><code class="language-jsx">import React, {
  createContext,
  useEffect,
  useRef,
  useMemo,
  useCallback,
} from &quot;react&quot;;

const IntervalContext = createContext({});
const defaultClockDelay = 10 * 1000; // 10 seconds

export const IntervalProvider = ({ children }) =&gt; {
  const subscriptions = useRef(new Map()).current;

  useEffect(() =&gt; {
    const interval = setInterval(() =&gt; {
      const now = Date.now();
      for (const subscription of subscriptions.values()) {
        // Check if delay is elapsed
        if (now &lt; subscription.time) return;
        subscription.callback(now);
        // Set next callback time for the subscription.
        subscription.time = now + subscription.delay;
      }
    }, defaultClockDelay);

    return () =&gt; {
      clearInterval(interval);
    };
  }, [subscriptions]);

  const subscribe = useCallback(
    (callback, delay = defaultClockDelay) =&gt; {
      if (typeof callback !== &quot;function&quot;) return undefined;
      const subscription = { callback, delay, time: Date.now() + delay };
      subscriptions.set(subscription, subscription);

      //unsubscribe callback
      return () =&gt; subscriptions.delete(subscription);
    },
    [subscriptions]
  );

  const contextValue = useMemo(() =&gt; ({ subscribe }), [subscribe]);

  return (
    &lt;IntervalContext.Provider value={contextValue}&gt;
      {children}
    &lt;/IntervalContext.Provider&gt;
  );
};

export default IntervalContext;
</code></pre>
<p>The above context exposes a <code>subscribe</code> method that accepts a callback and a
delay, which is added to the list of subscriptions. During each interval, we are
iterating through the list of subscriptions and will invoke those callbacks for
which the specified delay has elapsed.</p>
<p>To integrate this universal timer into the individual components easily, we have
also added a hook that wraps around the common subscription and cleanup logic.</p>
<pre><code class="language-javascript">import { useContext, useEffect, useState } from &quot;react&quot;;

import IntervalContext from &quot;contexts/interval&quot;;

const useInterval = delay =&gt; {
  const [state, setState] = useState(Date.now());

  const { subscribe } = useContext(IntervalContext);

  useEffect(() =&gt; {
    const unsubscribe = subscribe(now =&gt; setState(now), delay);

    return unsubscribe;
  }, [delay, subscribe]);

  return state;
};

export default useInterval;
</code></pre>
<p>Now, the component integration require only minimal configuration.</p>
<pre><code class="language-jsx">import { timeFormat } from &quot;neetocommons/utils&quot;;

const TimeAgo = () =&gt; {
  useInterval(10000); // Rerender every 10 seconds

  // timeFormat.fromNow() returns the time
  // difference between given time and now.
  return &lt;p&gt;{timeFormat.fromNow(time)}&lt;/p&gt;;
};
</code></pre>
<p>This way, only the &quot;time-ago&quot; label components are updated every 10 seconds
while the parent message components remain unaffected by these updates.</p>
<h4>Using a global store</h4>
<p>As soon as that work was finished, our development guidelines were updated to
reflect that we should use <a href="https://github.com/pmndrs/zustand">zustand</a> for all
shared state usages. The above universal timer implementation was refactored to
use a zustand store instead of React Context.</p>
<pre><code class="language-javascript">import { useEffect, useMemo } from &quot;react&quot;;

import { isEmpty, omit, prop } from &quot;ramda&quot;;
import { v4 as uuid } from &quot;uuid&quot;;
import { create } from &quot;zustand&quot;;

const useTimerStore = create(() =&gt; ({}));

// Interval is created directly inside the module body,
// outside the components and hooks.
setInterval(() =&gt; {
  const currentState = useTimerStore.getState();
  const nextState = {};
  const now = Date.now();

  for (const key in currentState) {
    const { lastUpdated, interval } = currentState[key];
    // Check if delay is elapsed.
    const shouldUpdate = now - lastUpdated &gt;= interval;
    if (shouldUpdate) nextState[key] = { lastUpdated: now, interval };
  }

  if (!isEmpty(nextState)) useTimerStore.setState(nextState);
}, 1000);

// `useInterval` was changed to `useTimer`.
const useTimer = (interval = 60) =&gt; {
  const key = useMemo(uuid, []);

  useEffect(() =&gt; {
    useTimerStore.setState({
      [key]: {
        lastUpdated: Date.now(),
        interval: 1000 * interval, // convert seconds to ms
      },
    });

    return () =&gt;
      useTimerStore.setState(omit([key], useTimerStore.getState()), true);
  }, [interval, key]);

  return useTimerStore(prop(key));
};

export default useTimer;
</code></pre>
<p>zustand store allows access and updates to store values imperatively, outside
the render by calling the <code>getState()</code> and <code>setState()</code> methods.</p>
<h4>An improved version</h4>
<p>In the latest iteration of the <code>useTimer</code> hook, we decided to cut down on the
external dependency <code>zustand</code> and instead migrate the implementation to use
React's new
<a href="https://react.dev/reference/react/useSyncExternalStore"><code>useSyncExternalStore</code></a>
hook. The <code>useSyncExternalStore</code> hook basically allows you to derive a React
state from external change events.</p>
<pre><code class="language-javascript">import { useRef, useSyncExternalStore } from &quot;react&quot;;

import { isNotEmpty } from &quot;neetocist&quot;;

const subscriptions = [];
let interval = null;

const initiateInterval = () =&gt; {
  // Create new interval if there are no existing subscriptions.
  if (isNotEmpty(subscriptions)) return;
  interval = setInterval(() =&gt; {
    subscriptions.forEach(callback =&gt; callback());
  }, 1000);
};

const cleanupInterval = () =&gt; {
  // Cleanup existing interval if there are no more subscriptions
  if (isNotEmpty(subscriptions)) return;
  clearInterval(interval);
};

const subscribe = callback =&gt; {
  initiateInterval();
  subscriptions.push(callback);

  // Runs on unmout. Remove subscription from the list.
  return () =&gt; {
    subscriptions.splice(subscriptions.indexOf(callback), 1);
    cleanupInterval();
  };
};

const useTimer = (delay = 60) =&gt; {
  const lastUpdatedRef = useRef(Date.now());

  return useSyncExternalStore(subscribe, () =&gt; {
    const now = Date.now();
    let lastUpdated = lastUpdatedRef.current;
    // Calculate the time difference to derive new state
    // If specified delay elapsed, return new value for the state. If not, return last value (no state change)
    if (now - lastUpdated &gt;= delay * 1000) lastUpdated = now;
    lastUpdatedRef.current = lastUpdated;

    return lastUpdated;
  });
};
</code></pre>
<p>In summary, when <code>useTimer</code> hook is invoked with a delay, the callback is added
to the list of subscriptions and executed when the specified delay has elapsed.
On unmount, the subscription is removed from the list of subscriptions. In
contrast to previous versions, the new version is much cleaner and has the added
benefit of running the interval timer only when required. The timer is added
only when the first subscription is added and removed when all subscriptions
have been completed.</p>
]]></content>
    </entry>
  <entry>
      <title type="text"><![CDATA[Automating case conversion in Axios requests]]></title>
      <link rel="alternate" type="text/html" href="https://www.bigbinary.com/blog/axios-case-conversion"/>
      <link rel="enclosure" type="image/jpeg" href="https://www.bigbinary.com/blog/images/social_preview_images/automating_case_conversion_in_axios_for_seamless_frontend_backend_integration.jpg"/>
      <id>https://www.bigbinary.com/blog/axios-case-conversion</id>
      <published>2024-03-12T00:00:00.000Z</published>
      <updated>2024-03-12T00:00:00.000Z</updated>
      <author>
        <name>Ajmal Noushad</name>
        <uri>https://www.bigbinary.com/blog/authors/ajmaln</uri>
      </author>
      <category term="Neeto"/>
      <category term="React"/>
      <category term="JavaScript"/>
      <media:thumbnail url="https://www.bigbinary.com/blog/images/social_preview_images/automating_case_conversion_in_axios_for_seamless_frontend_backend_integration.jpg" width="1200" height="627"/>
      <summary type="text"><![CDATA[Learn why we decided to automatically case convert request and response data and how we did it.]]></summary>
      <content type="html" xml:base="https://www.bigbinary.com/blog/axios-case-conversion"><![CDATA[<p>In the world of web development, conventions often differ between backend and
frontend technologies. This becomes evident when comparing variable naming case
conventions used in Ruby on Rails (snake case) and JavaScript (camel case). At
Neeto, this difference posed a major hurdle: the requirement for manual case
conversion between requests and responses. As a result, there was a significant
amount of repetitive code needed to handle this conversion.</p>
<p>Here’s a snippet illustrating the issue faced by our team:</p>
<pre><code class="language-js">// For requests, we had to manually convert camelCase values to snake_case.
const createUser = ({ userName, fullName, dateOfBirth }) =&gt;
  axios.post(&quot;/api/v1/users&quot;, {
    user_name: userName,
    full_name: fullName,
    date_of_birth: dateOfBirth,
  });

// For responses, we had to manually convert snake_case values to camelCase
const {
  user_name: userName,
  full_name: fullName,
  date_of_birth: dateOfBirth,
} = await axios.get(&quot;/api/v1/users/user-id-1&quot;);
</code></pre>
<p>This manual conversion process consumed valuable development time and introduced
the risk of errors or inconsistencies in data handling.</p>
<p>To streamline our workflow and enhance interoperability between the frontend and
backend, we decided to automate case conversion.</p>
<h2>Implementing automatic case conversion</h2>
<p>Implementing automatic case conversion across Neeto products required a
thoughtful approach to minimize disruptions and ensure a smooth transition.
Here's how we achieved this goal while minimizing potential disruptions:</p>
<h3>1. Axios Interceptors for Recursive Case Conversion</h3>
<p>We created a pair of Axios interceptors to handle case conversion for requests
and responses. The interceptors were designed to recursively convert the cases,
managing the translation between snake case and camel case as data traveled
between the frontend and backend. This smooth transition simplified the
workflow, cutting out the requirement for manual case conversion in most
situations.</p>
<h3>2. Custom Parameters to Control Case Conversion</h3>
<p>To do a smooth rollout without breaking any products, and due to certain special
APIs requiring specific case conventions due to legacy reasons or external
dependencies, we introduced custom parameters <code>transformResponseCase</code> and
<code>transformRequestCase</code> within Axios. These parameters allowed developers to
opt-out of the automatic case conversion for specific API endpoints. By
configuring these parameters appropriately, we prevented unintentional case
conversions where needed, maintaining compatibility with APIs that required
different conventions.</p>
<p>This is how we crafted our axios interceptors:</p>
<pre><code class="language-js">import {
  keysToCamelCase,
  serializeKeysToSnakeCase,
} from &quot;@bigbinary/neeto-cist&quot;;

// To transform response data to camel case
const transformResponseKeysToCamelCase = response =&gt; {
  const { transformResponseCase = true } = response.config;

  if (response.data &amp;&amp; transformResponseCase) {
    response.data = keysToCamelCase(response.data);
  }

  return response;
};

// To transform error response data to camel case
const transformErrorKeysToCamelCase = error =&gt; {
  const { transformResponseCase = true } = error.config ?? {};

  if (error.response?.data &amp;&amp; transformResponseCase) {
    error.response.data = keysToCamelCase(error.response.data);
  }

  return error;
};

// To transform the request payload to snake_case
const transformDataToSnakeCase = request =&gt; {
  const { transformRequestCase = true } = request;

  if (!transformRequestCase) return request;

  request.data = serializeKeysToSnakeCase(request.data);
  request.params = serializeKeysToSnakeCase(request.params);

  return request;
};

// Adding interceptors
axios.interceptors.request.use(transformDataToSnakeCase);
axios.interceptors.response.use(
  transformResponseKeysToCamelCase,
  transformErrorKeysToCamelCase
);
</code></pre>
<p>Note that <code>keysToCamelCase</code>, <code>serializeKeysToSnakeCase</code> are methods from our
open source pure utils library
<a href="https://github.com/bigbinary/neeto-cist"><code>@bigbinary/neeto-cist</code></a>.</p>
<p>While rolling out the change to all products, we wrote a JSCodeShift script to
automatically add these flags to every Axios API requests in all Neeto products
to ensure that nothing was broken due to it. Then the team had manually went
through the code base and removed those flags while making the necessary changes
to the code.</p>
<p>After the change was introduced the API code was much cleaner without the
boilerplate for case conversion.</p>
<pre><code class="language-js">// Request
const createUser = ({ userName, fullName, dateOfBirth }) =&gt;
  axios.post(&quot;/api/v1/users&quot;, { userName, fullName dateOfBirth })

// Response
const { userName, fullName, dateOfBirth } = await axios.get(&quot;/api/v1/users/user-id-1&quot;);
</code></pre>
<h2>Pain points</h2>
<p>In our work towards automating case conversion within neeto, we encountered
several pain points.</p>
<h3>1. Manual work is involved</h3>
<p>During the rollout phase of our automated case conversion solution, there was an
unavoidable requirement for manual intervention. As we transitioned the existing
code bases to incorporate the new mechanisms for automatic case conversion
within Axios, each Axios call needed an adjustment to remove the manual case
conversion codes written before.</p>
<p>This stage demanded some manual work from our development teams. They updated
and modified existing Axios requests across multiple projects to ensure they
aligned with the new automated case conversion mechanism. While this manual
effort temporarily increased the workload, it was a necessary step to implement the
automated solution effectively across Neeto.</p>
<p>This phase highlighted the importance of a structured rollout plan and
meticulous attention to detail. Despite the initial manual workload, once the
changes were applied uniformly across the codebase, the benefits of automated
case conversion quickly became evident, significantly reducing ongoing manual
efforts and improving the overall efficiency of our development process.</p>
<h3>2. Serialization Issues</h3>
<p>As our initial implementation of automated case conversion, we used
<code>keysToSnakeCase</code> method, which recursively transforms all the keys to snake
case for a given object. It internally used <code>transformObjectDeep</code> function to
recursively traverse through each key-value pair inside an object for
transformation.</p>
<pre><code class="language-js">import { camelToSnakeCase } from &quot;@bigbinary/neeto-cist&quot;;

const transformObjectDeep = (object, keyValueTransformer) =&gt; {
  if (Array.isArray(object)) {
    return object.map(obj =&gt;
      transformObjectDeep(obj, keyValueTransformer, objectPreProcessor)
    );
  } else if (object === null || typeof object !== &quot;object&quot;) {
    return object;
  }

  return Object.fromEntries(
    Object.entries(object).map(([key, value]) =&gt;
      keyValueTransformer(
        key,
        transformObjectDeep(value, keyValueTransformer, objectPreProcessor)
      )
    )
  );
};

export const keysToSnakeCase = object =&gt;
  transformObjectDeep(object, (key, value) =&gt; [camelToSnakeCase(key), value]);
</code></pre>
<p>However, this recursive transformation approach led to a serialization issue,
especially with objects that required special treatment, such as <code>dayjs</code> objects
representing dates. The method treated these objects like any other JavaScript
object, causing unexpected transformations and resulting in invalid payload data
in some cases.</p>
<p>To mitigate these serialization issues and prevent interference with specific
object types, we enhanced the <code>transformObjectDeep</code> method to accommodate a
preprocessor function for objects before the transformation:</p>
<pre><code class="language-js">const transformObjectDeep = (
  object,
  keyValueTransformer,
  objectPreProcessor = undefined
) =&gt; {
  if (objectPreProcessor &amp;&amp; typeof objectPreProcessor === &quot;function&quot;) {
    object = objectPreProcessor(object);
  }

  // Existing transformation logic
};
</code></pre>
<p>This modification allowed us to serialize objects before initiating the
transformation process. To facilitate this, we introduced a new method,
<code>serializeKeysToSnakeCase</code>, incorporating the object preprocessor. For specific
object types requiring special serialization, such as <code>dayjs</code> objects, we
leveraged the built-in <code>toJSON</code> method, allowing the object to transform itself
to its desired format, such as a date string:</p>
<pre><code class="language-js">import { transformObjectDeep, camelToSnakeCase } from &quot;@bigbinary/neeto-cist&quot;;
export const serializeKeysToSnakeCase = object =&gt;
  transformObjectDeep(
    object,
    (key, value) =&gt; [camelToSnakeCase(key), value],
    object =&gt; (typeof object?.toJSON === &quot;function&quot; ? object.toJSON() : object)
  );
</code></pre>
<p>This resolved the serialization issue for the request payloads. Since the
response is always in JSON format, all values are objects, arrays, or
primitives. It won't contain such 'magical' objects. So we need this logic only
for request interceptors.</p>
<h2>Conclusion</h2>
<p>In simplifying our web development workflow at Neeto, automating case conversion
proved crucial. Despite challenges during implementation, refining our methods
strengthened our system. By streamlining data translation and overcoming hurdles
like serialization issues, we've improved efficiency and compatibility across
our ecosystem.</p>
<p>If you're starting a new project, adopting automated case conversion mechanisms
similar to what we've built in Axios can offer significant advantages.
Implementing these standards from the beginning promotes consistency and
simplifies how data moves between your frontend and backend systems. Introducing
these practices early in your project's lifecycle help sidestep the
difficulties of adjusting existing code and establishing a unified convention
throughout your project's structure.</p>
<p>For existing projects, adopting automated case conversion might initially come
with a cost. Introducing these changes requires careful planning and execution
to minimize disruptions. The rollout process might necessitate manual updates
across various parts of the codebase, leading to increased workload and
potential short-term setbacks.</p>
]]></content>
    </entry>
  <entry>
      <title type="text"><![CDATA[Embracing Type Definitions and JSDoc Comments in JS packages]]></title>
      <link rel="alternate" type="text/html" href="https://www.bigbinary.com/blog/jsdoc-generation"/>
      <link rel="enclosure" type="image/jpeg" href="https://www.bigbinary.com/blog/images/social_preview_images/embracing_type_definitions_and_jsdoc_comments_in_js_packages.jpg"/>
      <id>https://www.bigbinary.com/blog/jsdoc-generation</id>
      <published>2024-02-08T00:00:00.000Z</published>
      <updated>2024-02-08T00:00:00.000Z</updated>
      <author>
        <name>Ajmal Noushad</name>
        <uri>https://www.bigbinary.com/blog/authors/ajmaln</uri>
      </author>
      <category term="JavaScript"/>
      <media:thumbnail url="https://www.bigbinary.com/blog/images/social_preview_images/embracing_type_definitions_and_jsdoc_comments_in_js_packages.jpg" width="1200" height="627"/>
      <summary type="text"><![CDATA[Read why we added Type Definitions and JSDoc Comments to our packages.]]></summary>
      <content type="html" xml:base="https://www.bigbinary.com/blog/jsdoc-generation"><![CDATA[<p>At BigBinary, we decided to experiment with type definitions and JSDoc comments
to see if using these tools improves how we interact with JavaScript packages.</p>
<h2>Why Type Definitions</h2>
<p>We considered using TypeScript. However, in the end, we opted against it since
most of our clients use plain JavaScript. Still, we added type definitions for
our JavaScript packages to:</p>
<ul>
<li><strong>Reduce Ambiguity and Improved Clarity</strong>: Type definitions shed light on the
expected input and output of functions and components, eliminating ambiguity
and allowing developers to understand the code without needing to constantly
refer to separate documentation.</li>
<li><strong>Enhance Productivity and Efficiency</strong>: By providing clear insights into the
structure of our libraries, including information about arguments, props, and
data types, type definitions significantly boost developer productivity and
facilitate efficient coding practices.</li>
<li><strong>Seamless Code Editor Integration</strong>: Popular editors like VSCode leverage
type definitions to offer powerful features like
<a href="https://code.visualstudio.com/docs/editor/intellisense">IntelliSense</a>,
further streamlining the development process and minimizing errors.</li>
</ul>
<h2>Unifying Documentation with JSDoc Comments</h2>
<p>Although type definitions offered a valuable structural understanding,
comprehensive documentation remained a challenge. Here is a typical example of
our documentation of an exported function inside a Markdown file:</p>
<p><img src="https://www.bigbinary.com/blog/images/images_used_in_blog/2024/jsdoc-generation/documentation.png" alt="Documentation"></p>
<p>Navigating between code and Markdown files scattered across the package
repository was cumbersome and time-consuming.</p>
<p>To address this pain point, we incorporated JSDoc comments alongside type
definitions. This allowed us to:</p>
<ul>
<li><strong>Consolidate Essential Documentation</strong>: Instead of relying on separate files,
we embedded detailed usage instructions, examples, and additional information
directly within the JSDoc comments, providing developers with readily
available context within their IDE environment.</li>
<li><strong>Improve Accessibility and Transparency</strong>: By integrating documentation with
the code itself, JSDoc comments eliminate the need for context switching and
offer immediate access to critical information, enhancing the developer
understanding and decision-making.</li>
</ul>
<h2>Optimizing Documentation Workflow</h2>
<p>Maintaining two separate documentation sets – Markdown files and JSDoc comments
– proved inefficient. To ensure consistency and to eliminate redundancy, we
automated the generation of JSDoc comments from existing Markdown documentation.</p>
<p>This involved:</p>
<ul>
<li><strong>Standardization for Efficiency</strong>: We implemented a standardized structure
and format for the Markdown documentation, facilitating easier readability for
a developer as well as parsing for an automated parser.</li>
<li><strong>Building a Custom Script</strong>: A dedicated script was developed to parse the
Markdown files, extract relevant documentation for each function or component,
and automatically prepend it to the corresponding type definitions.</li>
<li><strong>Integration with Build Process</strong>: To ensure automatic updates and maintain a
single source of truth, we integrated the JSDoc generation script into the
package build process, seamlessly generating up-to-date documentation
alongside the code itself.</li>
</ul>
<p>Below snippet shows a minimized version of the JSdoc generation script:</p>
<pre><code class="language-js">import fs from &quot;fs&quot;;
import path from &quot;path&quot;;

import _generate from &quot;@babel/generator&quot;;
import _traverse from &quot;@babel/traverse&quot;;
import * as babelTypes from &quot;@babel/types&quot;;

const traverse = _traverse.default;
const generate = _generate.default;

const buildJsdoc = () =&gt; {
  const fileNamesInsideDocs = getFileNameList(path.resolve(DOCS_FOLDER_NAME));
  const typeFileNames = fs.readdirSync(path.resolve(TYPES_FOLDER_NAME));

  syncTypeFiles(EXPORTED_TYPES_FOLDER_NAME);

  const entityTitleToDescMapOfAllFiles = {};

  fileNamesInsideDocs.forEach(docFileName =&gt; {
    const fileContent = getFileContent(docFileName);
    const markdownAST = parseMarkdown(fileContent);

    buildEntityTitleToEntityDescMap(
      markdownAST.children,
      entityTitleToDescMapOfAllFiles
    );
  });

  typeFileNames.forEach(typeFileName =&gt; {
    const typeFileContent = getFileContent(
      path.join(EXPORTED_TYPES_FOLDER_NAME, typeFileName)
    );
    const typeFileAST = parseTypeFile(typeFileContent);

    typeFileTraverser({
      typeFileName: `${EXPORTED_TYPES_FOLDER_NAME}/${typeFileName}`,
      typeFileAST,
      entityTitleToDescMapOfAllFiles,
      babelTraverse: traverse,
      babelCodeGenerator: generate,
      babelTypes,
    });
  });

  console.log(&quot;Successfully added JSDoc comments to type files.&quot;);
};
</code></pre>
<p>Let's dive deep into the above snippet to understand how the JSDoc generation
script works.</p>
<h3>Initial Setup and Imports</h3>
<p>The script starts with essential imports and variable initializations. This
section sets up the necessary tools and libraries to work with file systems and
Abstract Syntax Trees (AST).</p>
<pre><code class="language-js">import fs from &quot;fs&quot;;
import path from &quot;path&quot;;

import _generate from &quot;@babel/generator&quot;;
import _traverse from &quot;@babel/traverse&quot;;
import * as babelTypes from &quot;@babel/types&quot;;

const traverse = _traverse.default;
const generate = _generate.default;
</code></pre>
<h4>Gathering File Information</h4>
<p>We created a <code>buildJsdoc</code> function to encapsulate the JSDoc generation process.
The <code>buildJsdoc</code> function begins by collecting file names from the documentation
(<code>DOCS_FOLDER_NAME</code>) and type definitions (<code>TYPES_FOLDER_NAME</code>) folders. It then
copies the type definition files to the <code>EXPORTED_TYPES_FOLDER_NAME</code>.</p>
<pre><code class="language-js">const fileNamesInsideDocs = getFileNameList(path.resolve(DOCS_FOLDER_NAME));
const typeFileNames = fs.readdirSync(path.resolve(TYPES_FOLDER_NAME));
syncTypeFiles(EXPORTED_TYPES_FOLDER_NAME); // copying the files
</code></pre>
<h4>Building Entity Descriptions Map</h4>
<p>The script parses Markdown documentation files to construct a map linking entity
titles to their descriptions. This map serves as a bridge between the
documentation and the type definitions. We use <code>unified</code> package and
<code>remarkParse</code> plugin for parsing Markdown.</p>
<pre><code class="language-js">const entityTitleToDescMapOfAllFiles = {};
fileNamesInsideDocs.forEach(docFileName =&gt; {
  const fileContent = getFileContent(docFileName);
  const markdownAST = parseMarkdown(fileContent);
  buildEntityTitleToEntityDescMap(
    markdownAST.children,
    entityTitleToDescMapOfAllFiles
  );
});
</code></pre>
<h4>Updating Type Definitions</h4>
<p>Next, the script traverses the AST of each type definition file. For each
entity, it finds the corresponding description from the map and adds it to the
type definition file. The <code>typeFileTraverser</code> function is responsible for
traversing the AST of a type definition file and looks for
<code>ExportNamedDeclaration</code> nodes. It then prepends the corresponding JSDoc comment
to the node.</p>
<pre><code class="language-js">typeFileNames.forEach(typeFileName =&gt; {
  const typeFileContent = getFileContent(
    path.join(EXPORTED_TYPES_FOLDER_NAME, typeFileName)
  );
  const typeFileAST = parseTypeFile(typeFileContent);

  typeFileTraverser({
    typeFileName: `${EXPORTED_TYPES_FOLDER_NAME}/${typeFileName}`,
    typeFileAST,
    entityTitleToDescMapOfAllFiles,
    babelTraverse: traverse,
    babelCodeGenerator: generate,
    babelTypes,
  });
});
</code></pre>
<p>The script concludes by logging a success message, indicating the completion of
the JSDoc generation process.</p>
<p>Once everything was set up and released, we were able to access both types and
documentation from the code editor itself.</p>
<p><img src="https://www.bigbinary.com/blog/images/images_used_in_blog/2024/jsdoc-generation/vs-code-docs.png" alt="VS Code showing the types and docs"></p>
<h2>Conclusion</h2>
<p>By leveraging the power of type definitions and JSDoc comments, we were able to
provide easy access to documentation and significantly enhance the developer
experience and streamline the development process. The automated generation of
JSDoc comments from Markdown documentation further optimized our workflow,
ensuring clarity, consistency and eliminating redundancy.</p>
]]></content>
    </entry>
  <entry>
      <title type="text"><![CDATA[Bundle Splitting]]></title>
      <link rel="alternate" type="text/html" href="https://www.bigbinary.com/blog/bundle-splitting"/>
      <link rel="enclosure" type="image/jpeg" href="https://www.bigbinary.com/blog/images/social_preview_images/bundle_splitting.jpg"/>
      <id>https://www.bigbinary.com/blog/bundle-splitting</id>
      <published>2024-01-30T00:00:00.000Z</published>
      <updated>2024-01-30T00:00:00.000Z</updated>
      <author>
        <name>Labeeb Latheef</name>
        <uri>https://www.bigbinary.com/blog/authors/labeebklatif</uri>
      </author>
      <category term="JavaScript"/>
      <media:thumbnail url="https://www.bigbinary.com/blog/images/social_preview_images/bundle_splitting.jpg" width="1200" height="627"/>
      <summary type="text"><![CDATA[Optimize JavaScript assets loading.]]></summary>
      <content type="html" xml:base="https://www.bigbinary.com/blog/bundle-splitting"><![CDATA[<h3>Loading JavaScript assets faster by bundling</h3>
<p>When we write code, we split parts of code into different files to manage
complexity. However, the web application requires all of its JavaScript files in
order for the application to function properly. On the surface, it might seem
like loading all the separate JavaScript files is easy, but it gets very
complicated very fast.</p>
<p>Let's assume that we have three different JavaScript files in our codebase that
we are referencing directly from the HTML.</p>
<pre><code class="language-html">&lt;head&gt;
  &lt;script src=&quot;/assets/js/script_1.js&quot;&gt;&lt;/script&gt;
  &lt;script src=&quot;/assets/js/script_2.js&quot;&gt;&lt;/script&gt;
  &lt;script src=&quot;/assets/js/script_3.js&quot;&gt;&lt;/script&gt;
&lt;/head&gt;
</code></pre>
<p>Now, what if we find that <code>script_1.js</code> has a dependency on <code>script_2.js</code> and
<code>script_2.js</code> needs to be loaded first? We will have to rearrange the ordering
such that all the dependencies are satisfied. Doing this iteratively for
hundreds of files can quickly become a nightmare.</p>
<p>One could argue why can't we write all the code in a single JavaScript file in
order to avoid this dependency issue. Modern web applications require a lot of
JavaScript code, so having all the JavaScript code in a single file is just not
practical.</p>
<p>Another issue with referencing hundreds of JavaScript files is that browsers can
fetch only four to eight files at a time. If we have hundreds of JavaScript
files then the browser will take a long time to load all the JavaScript files.</p>
<p>Solution to all these problems is packing all those JavaScript files into one
large file that can be downloaded in one shot. This large file will also have
all the code in the right order, which will satisfy the dependency requirement.
This process of packing all the JavaScript files into one big file is called
<strong>bundling</strong>. We can use tools like <a href="https://webpack.js.org/">Webpack</a> or
<a href="https://rollupjs.org/">Rollup</a> to achieve bundling. These tools that help us
achieve bundling are typically called <strong>bundlers</strong>.</p>
<p><img src="https://www.bigbinary.com/blog/images/images_used_in_blog/2024/bundle-splitting/single-bundle.png" alt="Single bundle"></p>
<p>It's obvious that when we use a bundler, it allows us to keep our code in any
hierarchy we want for development purposes. After all, the bundler will figure
out the dependency. So is the job of the bundler to only stitch all the
JavaScript files into one large JavaScript file in the right order?</p>
<p>No. During bundling, a bundler can be configured to apply different
transformations and optimizations to our source code. It allows us to write our
code using modern syntax while transforming it to a format more commonly
supported by different browser implementations during the bundling process.
Another common task is the minification of our JavaScript files by removing all
unwanted whitespace characters and comments.</p>
<p>We have discussed only a few optimizations and transformations here. Bundlers
support many more types of optimizations and transformations.</p>
<p><img src="https://www.bigbinary.com/blog/images/images_used_in_blog/2024/bundle-splitting/bundler-sample.png" alt="Sample bundler output"></p>
<br />
<h3>Loading JavaScript files faster by bundle splitting</h3>
<p>Bundle splitting is the process of splitting up this single bundle into multiple
chunks. We just talked about the advantages of bundling. Then why are we talking
about bundle splitting. As we will see, there are some advantages of splitting
the bundle as long as it's done strategically.</p>
<p>Most commonly, bundle splitting splits the code into three separate chunks. A
<code>vendor</code> chunk holds every code inside the <em>node_modules</em> folder, an
<code>application</code> chunk holds all the code we have written, and a <code>runtime</code> chunk is
added by the bundler that enables all other chunks to be loaded properly. If we
are using webpack to bundle our application, the default bundle splitting
configuration can be found in their
<a href="https://webpack.js.org/plugins/split-chunks-plugin/#defaults">documentation</a>.
If we use CRA to scaffold our application, an optimal configuration is already
in place.</p>
<p>There are different ways in which we can benefit from this process. Thanks to
HTTP 2.0, the browsers are now able to fetch resources from the server in
parallel. Because of this, instead of waiting for a single huge bundle to be
loaded, the browser can load multiple smaller chunks in parallel for a better
load time.</p>
<br />
<p><img src="https://www.bigbinary.com/blog/images/images_used_in_blog/2024/bundle-splitting/multiple-chunks.png" alt="Alt text"></p>
<br />
<p>On top of that, we can ask the browser to cache a specific JavaScript file. This
will make the application load those JavaScript files faster the next time
around. Usually, the contents in the <code>vendor</code> chunk are not expected to change
frequently and can be reused from the browser cache, cutting down on load time
significantly. This is usually achieved by encoding the chunk name with the
content hash. This tells the browser: &quot;If the hash changed, assume the content
changed, ignore the cache, and fetch the updated chunk from server&quot;.</p>
<pre><code class="language-javascript">// webpack.config.json

module.exports = {
  //...
  output: {
    filename: &quot;[contenthash].js&quot;,
  },
};
</code></pre>
<p>Now the question is what factors determine if the bundle should be split into
multiple chunks. One such factor is the file location. As mentioned above, files
from the <em>node_modules</em> folder are generally kept in the <code>vendor</code> chunk while
the application code goes into the <code>application</code> chunk. We can also specify a
maximum chunk size in the bundler configuration which creates an additional
chunk whenever the current chunk exceeds the size limit.</p>
<pre><code class="language-javascript">// webpack.config.json

module.exports = {
  //...
  optimization: {
    splitChunks: {
      maxSize: 15000000, // 15MB in static size, before compression
    },
  },
};
</code></pre>
<p>We can take this a step further by loading only those chunks that are necessary
to render the content that should be made visible to the user. Other chunks are
loaded only when they are truly needed. This is also called lazy loading.</p>
<p>For example, suppose we have an application that offers two pages - a Dashboard
page, and a Settings page. A user, after logging in, directly lands on the
Dashboard page. Normally, the loaded JavaScript bundle will also include code
related to the Settings page, which is not required to render the current
Dashboard page. The Settings code just sits there, waiting for the user to
navigate to the Settings page.</p>
<p><img src="https://www.bigbinary.com/blog/images/images_used_in_blog/2024/bundle-splitting/all-parts-in-single-bundle.png" alt="All components in single bundle"></p>
<br />
<p>This is the problem that lazy loading attempts to resolve. The easiest way to
achieve this is to import the code during runtime using an inline import
statement. React offers a wrapper for integrating lazy-loaded components using
<a href="https://react.dev/reference/react/Suspense">Suspense</a>.</p>
<pre><code class="language-jsx">import React, { Suspense } from &quot;react&quot;;

const LazyComponent = React.lazy(() =&gt; import(&quot;./LazyComponent&quot;));

const Component = () =&gt; (
  &lt;Suspense fallback={&lt;div&gt;Loading LazyComponent&lt;/div&gt;}&gt;
    &lt;LazyComponent /&gt;
  &lt;/Suspense&gt;
);
</code></pre>
<p>It means, during the bundling process, whenever a lazy import is encountered by
the bundler, the code in the required module will be kept as a separate &quot;async&quot;
chunk which is loaded only on demand. In the prior example, we can have the
Settings component is lazily imported so that when a user goes to the Dashboard
page, the Settings-related code will not be part of this bundle, resulting in a
lower initial bundle size.</p>
<br />
<p><img src="https://www.bigbinary.com/blog/images/images_used_in_blog/2024/bundle-splitting/split-parts-to-different-chunks.png" alt="Components splits into different chunks"></p>
<p>We can verify the results using tools like
<a href="https://github.com/webpack-contrib/webpack-bundle-analyzer">Bundle Analyzer Plugin</a>
that allow us to visualize and inspect the size and contents of each chunk in
the bundler output.</p>
<p>The lazy loading above may seem very promising, and we may be tempted to split
every part of the application into different chunks, expecting a more efficient
loading experience. However, this may not always be the case. Unlike other
methods, lazy loading requires careful evaluation of different parts of the
application and their dependencies to determine which parts can be effectively
lazy-loaded.</p>
<p>Let's bring back the above example. Suppose our Settings page requires API calls
to load data and render the content. If the code for the Settings page is part
of the same initial bundle, as soon as we navigate to the Settings page, the API
requests are fired, data is fetched, and content is rendered. Point to note that
the JavaScript code for the Settings page is already loaded, so the API call was
instantly made.</p>
<p>Now, what if the Settings code was split into a different on-demand chunk and
not part of the initial bundle? No, when we navigate to the Settings page, the
browser needs to fetch the Settings chunk from the server, execute, send network
requests, and then render the content. An additional delay is introduced here
for fetching chunks, which may add to the slowness. In a way, this brings down
the benefits offered by a single-page application (SPA).</p>
<p>When splitting up the bundle for our product <a href="https://neetochat.com">NeetoChat</a>,
we chose to split the Settings related code into a separate, on-demand chunk.
The Settings was not a random choice. It took up a large part of the bundle and
one interesting feature was that the Settings page didn't require data from the
server to render. In this case Settings page contains a predefined set of
category tiles that allow us to navigate to other settings-related pages.</p>
<p><img src="https://www.bigbinary.com/blog/images/images_used_in_blog/2024/bundle-splitting/chat-settings.png" alt="NeetoChat Settings"></p>
<p>For the reasons mentioned above, the Settings appeared to be a good candidate
for lazy-loading, and therefore, all the related code was extracted to a few
separate asynchronous bundles. After this change, when a user loads the
dashboard page of NeetoChat, the loaded bundles do not contain code related to
any of the Settings page,s thereby having a smaller overall initial asset size.</p>
<p>Later, when the user navigates to the Settings page, the related JavaScript
chunks are fetched, and the UI is rendered immediately without the need for API
data. From the Settings page, the user can choose any of the Settings categories
to navigate to the inner pages. The inner pages require API data to render the
content. However, the required JS assets are already loaded and available to
execute as part of the last asset request on the landing page, thereby reducing
the network latency.</p>
<p>For more fine-grained control over lazy-loading implementation in our app, we
are using the <a href="https://github.com/jamiebuilds/react-loadable">react-loadable</a>
library. Video below walks you through the bundle splitting process and results
in the NeetoChat web application.</p>
<p><a href="https://www.youtube.com/watch?v=JW-CVXhXQmg"><img src="https://img.youtube.com/vi/JW-CVXhXQmg/hqdefault.jpg" alt="Watch on YouTube" width="480" height="360"></a><br><a href="https://www.youtube.com/watch?v=JW-CVXhXQmg">Watch on YouTube</a></p>
]]></content>
    </entry>
  <entry>
      <title type="text"><![CDATA[Why did we build a custom ESLint plugin?]]></title>
      <link rel="alternate" type="text/html" href="https://www.bigbinary.com/blog/eslint-plugin-neeto"/>
      <link rel="enclosure" type="image/jpeg" href="https://www.bigbinary.com/blog/images/social_preview_images/why_did_we_build_custom_eslint_plugin.jpg"/>
      <id>https://www.bigbinary.com/blog/eslint-plugin-neeto</id>
      <published>2023-08-22T00:00:00.000Z</published>
      <updated>2023-08-22T00:00:00.000Z</updated>
      <author>
        <name>Amaljith K</name>
        <uri>https://www.bigbinary.com/blog/authors/amaljith-k</uri>
      </author>
      <category term="JavaScript"/>
      <media:thumbnail url="https://www.bigbinary.com/blog/images/social_preview_images/why_did_we_build_custom_eslint_plugin.jpg" width="1200" height="627"/>
      <summary type="text"><![CDATA[The story behind eslint-plugin-neeto]]></summary>
      <content type="html" xml:base="https://www.bigbinary.com/blog/eslint-plugin-neeto"><![CDATA[<p>At <a href="https://neeto.com">neeto</a> we are working on
<a href="https://blog.neeto.com/p/neeto-products-and-people">20+ products</a>
simultaneously. While we were developing multiple products, we aimed to make all
the products look like they were built by a single developer. They should have a
consistent coding style and should follow our standards &amp; best practices.</p>
<p>The backend code was fairly clean because of the convention-over-configuration
philosophy of the Ruby on Rails framework. But, since React is just a JS
library, developers have the complete freedom to write code in all possible ways
JavaScript would allow.</p>
<p>In the initial stages, when we were building only 4-5 products, the only
enforcement mechanism we had was pull request reviews, apart from basic linting
using <a href="https://eslint.org/">ESLint</a> and code formatting using
<a href="https://prettier.io/">Prettier</a>. PR reviews quickly turned inefficient as the
number of products grew. The code reviewers started missing some of the new
changes to the coding standards and continued suggesting the outdated standard.
This led to inconsistent code and behavior between products.</p>
<p>At that time, we thought of building our custom ESLint plugin. Initially, we
expected it to be very hard because of the need to deal with the language AST to
identify the code that didn't follow our standards. However, after some
research, we discovered a FOSS tool, <a href="https://astexplorer.net">astexplorer</a>,
which shows a visual representation of JavaScript AST. With that, writing ESLint
plugins for non-standard code became easy.</p>
<p>The custom plugin was a huge success during the POC itself. It helped us
significantly in improving the quality of the front-end code. At the time of
writing this blog, we have 50 custom ESLint rules enforced by the plugin.</p>
<p>The plugin was named <code>eslint-plugin-neeto</code>, adhering to
<a href="https://eslint.org/docs/latest/extend/plugins#name-a-plugin">ESLint's plugin naming conventions</a>.
Later, we namespaced it under <code>@bigbinary</code>, to be consistent with our other
frontend packages. Now the plugin is available as
<a href="https://www.npmjs.com/package/@bigbinary/eslint-plugin-neeto"><code>@bigbinary/eslint-plugin-neeto</code></a>.</p>
<h2>Enforcing ESLint at neeto</h2>
<p>In the overall development flow, ESLint will run on three levels.</p>
<ol>
<li>
<h4>IDE extension (optional)</h4>
<p>Even though BigBinary doesn't have any IDE preference, the majority of
developers use <a href="https://code.visualstudio.com">Visual Studio Code</a> here. The
popular
<a href="https://marketplace.visualstudio.com/items?itemName=dbaeumer.vscode-eslint">ESLint extension</a>
on VS Code runs ESLint while the developer is writing code and gives
immediate visual feedback with squiggly lines.</p>
<p><img src="https://www.bigbinary.com/blog/images/images_used_in_blog/2023/eslint-plugin-neeto/ide-extension.gif" alt="ESLint extension on VS Code"></p>
<p>The use of IDE extension is completely optional. We have enforcement
mechanisms at other levels to ensure the code quality &amp; standards.</p>
</li>
<li>
<h4>Pre-commit hook</h4>
<p>There are some ESLint rules like
<a href="https://eslint.org/docs/latest/rules/sort-imports">sort-imports</a> that are
only meant to keep code consistency. Even though functionality-wise, there
is nothing wrong with keeping the imports in any order, this rule would
throw an error if the imports are not correctly sorted.</p>
<p>Secondly, developers will see this error frequently because most IDEs add
the new import statement to the bottom of the imports list during
auto-import.</p>
<p><img src="https://www.bigbinary.com/blog/images/images_used_in_blog/2023/eslint-plugin-neeto/import-order.gif" alt="Auto import and import-order errors"></p>
<p>But, we believe that developers should not be concerned about errors like
these. They should be focusing on the business logic rather than spending
time on things that are auto-correctable. At the same time, we need this
rule to be auto-fixed at some point to keep consistency.</p>
<p>So, we chose Git's pre-commit hooks for automatically fixing such errors. We
used <a href="https://www.npmjs.com/package/husky">husky</a> to add <code>eslint --fix</code>
command to the pre-commit hook. Also, we used
<a href="https://www.npmjs.com/package/lint-staged">lint-staged</a> to run the commands
only on the files that are included in the current commit. Thus, we
automated lint-fixing and formatting of the files that we are going to
commit.</p>
<p>If any rule violations aren't auto-fixable, the commit would fail with an
error. Developers can get the details of the rule violation from the error
message, make corrections themselves, and commit again.</p>
<p><img src="https://www.bigbinary.com/blog/images/images_used_in_blog/2023/eslint-plugin-neeto/precommit-hook.gif" alt="Pre-commit hook"></p>
</li>
<li>
<h4>CI checks</h4>
<p>VS Code extension and pre-commit hooks are great tools to warn developers
early and it saves time. However, VS Code extensions and pre-commit hooks
are not something we can rely on fully. That's because the developer can
skip these if they prefer to.</p>
<p>Here are some cases where things might not work out:</p>
<ul>
<li>Lint checks from both the pre-commit hook and VS Code extension won't run
if the developer forgets to run <code>yarn install</code> while setting up the
repository. This is because the installation and setting up of all the npm
packages in a repository is done by <code>yarn install</code> command. So, the
packages <a href="https://www.npmjs.com/package/eslint">eslint</a>,
<a href="https://www.npmjs.com/package/husky">husky</a>, and
<a href="https://www.npmjs.com/package/lint-staged">lint-staged</a> won't be
available to run until <code>yarn install</code> is run.</li>
<li>Developers can manually skip Git's pre-commit hooks by running
<code>git commit --no-verify</code>. The <code>--no-verify</code> flag indicates that I want to
commit the changes, but I don't want the hooks to run and block me.</li>
</ul>
<p>To ensure that the code that goes into the repository is lint-free, we need
to implement continuous integration (CI) checks. With CI checks in place,
the PR (Pull Request) reviewer can know whether a PR meets the quality
standards just by looking into this section of the PR:</p>
<p>Passing CI checks
<img src="https://www.bigbinary.com/blog/images/images_used_in_blog/2023/eslint-plugin-neeto/ci-checks.png" alt="CI checks on github"></p>
<p>Failing CI checks
<img src="https://www.bigbinary.com/blog/images/images_used_in_blog/2023/eslint-plugin-neeto/failed-ci-checks.png" alt="Failed CI checks on github"></p>
<p>From the CI checks, we will run ESLint without the <code>--fix</code> flag. The goal of
CI checks is to detect and report lints and not correct them.</p>
<p>For CI, currently, we are using an in-house developed tool named
<a href="https://www.neeto.com/neetoci">NeetoCI</a>.</p>
</li>
</ol>
<h2>Challenges we faced</h2>
<p><a href="https://neeto.com">neeto</a> is building a lot of products. All these products had
a lot of code written in a non-standard way. It meant that when we got started
with the code standardization task, we had to deal with a large amount of code
to fix.</p>
<p>Some of the non-standard codes were auto-correctable. For such cases, we
published ESLint rules withan auto-fixer. Whenever anyone makes any changes in a
file containing that non-standard code pattern, it would get auto-corrected
during the pre-commit hook execution. It was easy.</p>
<p>But some cases weren't auto-fixable. For such patterns, we published the ESLint
rule and then asked a few engineers to go through all projects and run the
command <code>eslint app/**/*.{js,jsx,json}</code>. It would reveal all pieces of code that
violate the new rule. Those errors had to be fixed manually. We named this
process <strong>rollout</strong>.</p>
<p>While doing this, we realized that we were not thinking much about false
positives and true negatives. We started encountering them a lot during the
rollout. It forced us to make fixes, publish the updates again to npm, and redo
the rollout. This was inefficient.</p>
<p>After facing such incidents, we decided to clone all repos locally and test the
changes in all products before raising PR. Even though it was hard at the
beginning, it proved to be quite effective in detecting all possible edge cases
of a rule.</p>
<p>Later, we began developing rules for more complex, abstract standards. It was
impossible to detect and flag all non-standard code patterns for them. If we
stressed covering more cases, we would start getting several false positives
along with it.</p>
<p>A good example would be the <code>hard-coded-strings-should-be-localized</code> rule. The
aim was to force people to use <code>i18next</code> based localization instead of
hardcoding strings in English. In other words, all the strings that are supposed
to be rendered on the DOM should come from the translation files.</p>
<p>If we were to flag all string literals as errors in the code, we would have more
false positives than real errors. There were several strings like <code>enum</code> keys
that were used only in the application logic. They will never be rendered on UI.
There is no point in applying localization to them.</p>
<p>As you might guess, there is no way an ESLint plugin could tell if a string is
going to be rendered in the UI or if it is used only in the application logic.
To circumvent this, we decided to raise an error if the string contains a space
character in it. Since enum keys didn't contain spaces, it eliminated a lot of
false positives. But, it created a lot of true negatives. We were missing all
one-word strings that were rendered in the UI.</p>
<p>Also, even with that change, we didn't fully eliminate false positives. There
were several cases where we used space-separated strings in the application
logic. An example is <code>classNames</code> prop. It usually contains a space-separated
string of CSS classes (like <code>classNames=&quot;flex justify-center&quot;</code>).</p>
<p>To minimize such edge cases, we added a whitelist for property names like
<code>classNames</code> which should always be ignored, and a blacklist for properties like
<code>label</code> which should always be flagged even if it is a single word. With that
change, we were able to lower the false positives and true negatives to a great
extent.</p>
<p>Even with all this logic in place, we weren't confident that we have eliminated
false positives fully. So we decided to publish this rule as a warning. ESLint
warnings are less strict than errors. VS Code extension would still show yellow
squiggly lines and we would still get warning statements while running
pre-commit hooks. But the pre-commit hook won't fail when a warning is
encountered. The same applies to the CI checks.</p>
<p><img src="https://www.bigbinary.com/blog/images/images_used_in_blog/2023/eslint-plugin-neeto/eslint-warning.png" alt="ESLint warnings in VS Code"></p>
<h2>Lessons learned</h2>
<p>In the case of ESLint rules, false positives are more harmful than true
negatives. If a false positive error is raised, it would confuse the developers.
Even though they are writing code in the right way, the plugin would complain
that it is an error. Some developers might even write some tricky code to
circumvent the ESLint error, thinking that it is genuine.</p>
<p>We always try to minimize false positives by testing the rule with the existing
code in several repos before publishing it. In some cases, we can't avoid very
rare false positives to favor a large number of true negatives. If a developer
encounters false positives for such rules, they are advised to disable the rule
for that specific line of code.</p>
<p>Building ESLint rules not only helped us improve the code quality but also gave
us exposure to AST parsing and manipulation. With the help of that new
knowledge, we were able to accomplish several other achievements. As an example,
we have built a custom Babel plugin that could generate the boilerplate code of
<a href="https://github.com/pmndrs/zustand#selecting-multiple-state-slices">fetching values from a Zustand store</a>
at compile time. You can read about how you can build your own ESLint and Babel
plugins on our upcoming blogs. Stay tuned.</p>
]]></content>
    </entry>
  <entry>
      <title type="text"><![CDATA[Enhance code quality and performance with ESLint]]></title>
      <link rel="alternate" type="text/html" href="https://www.bigbinary.com/blog/enhance-code-quality-and-performance-with-eslint"/>
      <link rel="enclosure" type="image/jpeg" href="https://www.bigbinary.com/blog/images/social_preview_images/enhance-code-quality-and-performance-with-eslint.jpg"/>
      <id>https://www.bigbinary.com/blog/enhance-code-quality-and-performance-with-eslint</id>
      <published>2023-07-25T00:00:00.000Z</published>
      <updated>2023-07-25T00:00:00.000Z</updated>
      <author>
        <name>Krishnapriya S</name>
        <uri>https://www.bigbinary.com/blog/authors/krishnapriyaskk</uri>
      </author>
      <category term="JavaScript"/>
      <media:thumbnail url="https://www.bigbinary.com/blog/images/social_preview_images/enhance-code-quality-and-performance-with-eslint.jpg" width="1200" height="627"/>
      <summary type="text"><![CDATA[Explains what ESLint is, how to build custom rules and plugins, and other terminologies associated with it.]]></summary>
      <content type="html" xml:base="https://www.bigbinary.com/blog/enhance-code-quality-and-performance-with-eslint"><![CDATA[<h2>Introduction</h2>
<p>ESLint is a widely adopted JavaScript linter that analyzes and enforces coding
rules and guidelines. ESLint empowers developers by detecting errors, promoting
best practices, and enhancing code readability. This blog explores the
fundamental concepts of ESLint, from installing the necessary dependencies to
customizing rules, and integrating these custom rules into your host projects.</p>
<h2>Configure ESLint on a project</h2>
<p>To set up ESLint in your host project, install the ESLint package under
<code>devDependencies</code> as it is only used for development and not in production:</p>
<pre><code class="language-bash">  npm install -D eslint
  #or
  yarn add -D eslint
</code></pre>
<p>Now, you need to provide the required ESLint configurations. You can generate
your ESLint config file using any of the below commands:</p>
<pre><code class="language-bash">  npx eslint --init
  #or
  yarn run eslint --init
</code></pre>
<p>This will prompt multiple options. You can proceed by selecting options that
suit your use case. This generates a config file called <code>.eslintrc</code> in the
format you selected (<code>.json</code>, <code>.js</code>, etc). Here is an example of <code>.eslintrc.js</code>:</p>
<pre><code class="language-javascript">module.exports = {
  root: true,
  env: {
    node: true,
    browser: true,
    es2021: true,
  },
  parserOptions: {
    ecmaVersion: 2021,
    sourceType: &quot;module&quot;,
  },
  extends: [&quot;eslint:recommended&quot;, &quot;plugin:react/recommended&quot;],
  plugins: [&quot;react&quot;],
  rules: {
    &quot;no-console&quot;: &quot;warn&quot;,
    &quot;no-unused-vars&quot;: &quot;error&quot;,
  },
  settings: {
    react: {
      version: &quot;detect&quot;,
    },
  },
};
</code></pre>
<ul>
<li>
<p>The <code>root</code> property is set to true to indicate that this is the root
configuration file and should not inherit rules from parent directories.</p>
</li>
<li>
<p>The <code>env</code> property specifies the target environments where the code will run,
including node, browser, and es2021 for ECMAScript 2021 features.</p>
</li>
<li>
<p>In <code>parserOptions</code>, we specify JavaScript options like JSX support or ECMA
version.</p>
</li>
<li>
<p>The <code>plugins</code> property specifies the ESLint plugins to be used. Let us say you
are working on a React project. You want your code to follow some React best
practices and React-specific rules. You can achieve this by adding
<code>eslint-plugin-react</code>.</p>
</li>
<li>
<p>The <code>extends</code> property includes an array of preset configurations to extend
from, like <code>eslint:recommended</code> and <code>plugin:react/recommended</code>.</p>
</li>
<li>
<p>The <code>settings</code> property includes additional settings for specific plugins. In
this case, we set the React version to <code>detect</code> for the React plugin, so that
the React version is detected from our <code>package.json</code>.</p>
</li>
<li>
<p>In <code>rules</code>, we specify custom rule configurations for the codebase. For
instance, the rule <code>no-unused-vars</code> helps identify and throw errors for unused
variables in your code, while <code>no-console</code> warns against using <code>console.log()</code>
statements in production code. All pre-existing rules are available in this
<a href="https://eslint.org/docs/rules/">documentation</a> by ESLint. Rules have three
error levels:</p>
<pre><code class="language-javascript">rules: {
  &quot;no-console&quot;: &quot;warn&quot;, // Can also use 1
  &quot;no-unused-vars&quot;: 2, // Can also use &quot;error&quot;
  &quot;no-alert&quot;: &quot;off&quot;, // Can also use 0
}
</code></pre>
<ul>
<li>
<p><code>“error”</code> or <code>2</code>: This will turn on the rule as an error. This means that
ESLint will report violations of this rule as errors. Rules are typically
set to <code>error</code> to enforce compliance with the rule during continuous
integration testing, pre-commit checks, and pull request merging because
doing so causes ESLint to exit with a non-zero exit code.</p>
</li>
<li>
<p><code>“warn”</code> or <code>1</code>: If you don’t want to enforce compliance with a rule but
would still like ESLint to report the rule’s violations, set the severity to
<code>warn</code>. This will report violations of this rule as warnings.</p>
</li>
<li>
<p><code>“off”</code> or <code>0</code>: This means the rule is turned <code>off</code> and will not be
enforced. This can be useful if you want to disable a specific rule
temporarily throughout your project or if you don't find a particular rule
relevant to your project.</p>
</li>
</ul>
</li>
</ul>
<h2>Custom rules</h2>
<p>While ESLint comes bundled with a vast array of built-in rules, its true
potential lies in the ability to create custom rules tailored to your project's
unique requirements.</p>
<p>At the heart of every ESLint rule lies a well-crafted JavaScript object that
defines its behavior. But, before we dive into the basic structure of a custom
ESLint rule, there is something you need to get familiar with, called an AST
(Abstract Syntax Tree).</p>
<h3>Abstract Syntax Tree (AST)</h3>
<p>AST can be thought of as an interpreter that dissects your code and represents
it in a tree-like structure of interconnected nodes. An ESLint parser converts
code into an abstract syntax tree that ESLint can evaluate. Consider the
following JavaScript code snippet:</p>
<pre><code class="language-javascript">const sum = (x, y) =&gt; x + y;
</code></pre>
<p>This is how its AST looks:</p>
<p><img src="https://www.bigbinary.com/blog/images/images_used_in_blog/2023/enhance-code-quality-and-performance-with-eslint/ast_demo.gif" alt="AST Demo"></p>
<p>In this example, the root node is the <code>Program</code> node, which represents the
entire code file. Within it, there are several nested nodes,
<code>VariableDeclarator</code>, <code>ArrowFunctionExpression</code>, and so on, each dedicated to
different parts of the code. As demonstrated in the animation, when hovering
over each node, the corresponding code segment on the LHS is highlighted. To
explore and interact with both code and its AST, you can utilize the
<a href="https://astexplorer.net">AST Explorer</a> tool.</p>
<h3>Basic structure of a custom rule</h3>
<p>Now that you know what AST is, let us learn how these trees help us in creating
a custom rule. You will need to analyze the code's tree structure to find out
which node is to be chosen as the <strong>visitor node</strong>. A visitor node represents
the target node that is visited or traversed during the linting process.</p>
<p>To understand further, let us take into account a simple rule and try to build
it. Let us implement <code>no-var</code> rule. This rule encourages the use of <code>let</code> and
<code>const</code> keywords, instead of <code>var</code> keyword to declare variables. This usage
promotes block scoping and prevents any re-declarations.</p>
<p>The AST for a code snippet containing <code>var</code> would look like this:</p>
<p><img src="https://www.bigbinary.com/blog/images/images_used_in_blog/2023/enhance-code-quality-and-performance-with-eslint/var_keyword_ast_demo.gif" alt="Var Keyword AST Demo"></p>
<p>So, the node we are interested in examining is the <code>VariableDeclaration</code> node.
Hence, this will be our visitor node. This node contains an attribute called
<code>kind</code>, which contains the value <code>var</code>, <code>let</code>, or <code>const</code> depending on the
keyword used. All we have to do is verify whether it is a <code>var</code> and then throw
an error for that particular node.</p>
<p>We want this logic to run on all <code>VariableDeclaration</code> nodes:</p>
<pre><code class="language-javascript">if (node.kind === &quot;var&quot;) {
  // raise error
}
</code></pre>
<p>Let us embed that logic inside an ESLint rule object:</p>
<pre><code class="language-javascript">module.exports = {
  meta: {
    type: &quot;problem&quot;, // Can be: &quot;problem&quot;, &quot;suggestion&quot; or &quot;layout&quot;.
    docs: {
      description: &quot;Disallow the use of var.&quot;,
      category: &quot;Best Practices&quot;,
    },
  },
  create: context =&gt; ({
    VariableDeclaration(node) {
      if (node.kind === &quot;var&quot;) {
        context.report({ node, message: &quot;Using var is not allowed.&quot; });
      }
    },
  }),
};
</code></pre>
<ul>
<li>The <code>meta</code> object provides metadata about your rule, including its type,
description, category, etc.</li>
<li>The <code>create</code> function is the entry point for your rule implementation. It is
called by ESLint and provides the <code>context</code> object, which allows you to
interact with the code being analyzed.</li>
<li>Within the create function, you can define one or more visitor methods that
target specific node types in the AST. The rule logic will be defined inside
the visitor methods. In our example, the logic needs to be run only on all
<code>VariableDeclaration</code> nodes. Thus <code>VariableDeclaration</code> is the only visitor
method defined.</li>
<li>You can check for violations and report errors using <code>context.report()</code>.</li>
</ul>
<p>This is an example of how your rule would throw an error to that particular
node, once integrated into your project:</p>
<p><img src="https://www.bigbinary.com/blog/images/images_used_in_blog/2023/enhance-code-quality-and-performance-with-eslint/eslint_error_example.gif" alt="ESlint Error Example"></p>
<h2>Testing ESLint rules</h2>
<p>Rule testing in ESLint involves verifying the behavior of custom rules by
providing sample code snippets that should trigger violations (invalid cases)
and code snippets that should pass without violations (valid cases).
<strong>RuleTester</strong> is an ESLint utility that simplifies the process of defining and
running such tests.</p>
<h3>Configuring RuleTester</h3>
<p>First, you need to create a <code>RuleTester</code> instance. You can fine-tune the parser
options, environments, and other configurations when you create the instance:</p>
<pre><code class="language-javascript">const { RuleTester } = require(&quot;eslint&quot;);

const ruleTester = new RuleTester({
  parserOptions: {
    ecmaFeatures: { jsx: true },
    ecmaVersion: 2020,
    sourceType: &quot;module&quot;,
  },
});
</code></pre>
<h3>Writing test cases</h3>
<p>Now, you can use RuleTester's <code>run()</code> method to craft scenarios in the <code>valid</code>
and <code>invalid</code> arrays to cover all possible code variations, which will be tested
against your rule. Also, you can provide the expected error message, as the
<code>message</code> property in <code>errors</code>. Your basic test will look something like this,
for the <code>no-var</code> rule you implemented:</p>
<pre><code class="language-javascript">const { RuleTester } = require(&quot;eslint&quot;);

const rule = require(&quot;../rules/no-var&quot;);

const ruleTester = new RuleTester({
  parserOptions: {
    ecmaFeatures: { jsx: true },
    ecmaVersion: 2020,
    sourceType: &quot;module&quot;,
  },
});

ruleTester.run(&quot;no-var&quot;, rule, {
  valid: [&quot;let x = 10;&quot;, &quot;const x = 10;&quot;],
  invalid: [
    {
      code: &quot;var x = 10;&quot;,
      errors: [{ message: &quot;Using var is not allowed.&quot; }],
    },
  ],
});

console.log(&quot;Completed all tests for no-var rule&quot;);
</code></pre>
<h2>Diving deeper into custom rule creation</h2>
<p>Let us create another rule, that enforces the use of strict equality (===) over
loose equality (==). Strict equality provides more accurate comparison results
and helps prevent potential bugs caused by type coercion.</p>
<h3>Basic implementation</h3>
<ol>
<li>
<p>Create a new file called <code>strict-equality.js</code>.</p>
</li>
<li>
<p>Define the rule by providing a type, description, and <code>create</code> function to
implement our logic.</p>
<pre><code class="language-javascript">module.exports = {
  meta: {
    type: &quot;problem&quot;,
    docs: {
      description: &quot;Enforce the use of strict equality.&quot;,
      category: &quot;Best Practices&quot;,
    },
  },
  create: context =&gt; ({
    //Implementation logic.
  }),
};
</code></pre>
</li>
<li>
<p>Now we need to figure out the visitor node we need. This is where you can use
<a href="https://astexplorer.net">AST Explorer</a>. Let us consider the below example:</p>
<pre><code class="language-javascript">if (a == b) {
  //Do something
}
</code></pre>
<p>We can see that the AST notation for the same looks something like this:</p>
<pre><code class="language-javascript">{
  &quot;type&quot;: &quot;Program&quot;,
  &quot;body&quot;: [
    {
      &quot;type&quot;: &quot;IfStatement&quot;,
      &quot;test&quot;: {
        &quot;type&quot;: &quot;BinaryExpression&quot;,
        &quot;operator&quot;: &quot;==&quot;,
        &quot;left&quot;: {
          &quot;type&quot;: &quot;Identifier&quot;,
          &quot;name&quot;: &quot;a&quot;
        },
        &quot;right&quot;: {
          &quot;type&quot;: &quot;Identifier&quot;,
          &quot;name&quot;: &quot;b&quot;
        }
      },
      // Remaining attributes
    }
  ]
}
</code></pre>
<p>From this, it is evident that the node we are interested in has the type
<code>BinaryExpression</code>. All we have to check is whether the <code>operator</code> for this
node is &quot;==&quot; and then throw an error for that particular node.</p>
</li>
<li>
<p>Let us write this logic into our <code>create</code> function, and report the error with
a suitable message:</p>
<pre><code class="language-javascript">create: context =&gt; ({
  BinaryExpression(node) {
   if (node.operator !== &quot;==&quot;) return;

   context.report({
     node,
     message: &quot;Use strict equality instead of loose equality.&quot;,
   });
  },
}),
</code></pre>
</li>
</ol>
<h3>Implementing automatic fix</h3>
<p>Right now, all our rule does is detect any loose equalities and show the error
message for that line. Let us add some logic to provide an automatic fix for the
detected errors. To achieve this, include the <code>fix</code> attribute in the
<code>context.report()</code> method. We can create a string representing the corrected
code and utilize the <code>replaceText</code> function provided by the <code>context.fixer</code>
object to replace the specific <code>node</code> with the modified string. To know about
all such functions offered by the <code>fixer</code> object, please check this
<a href="https://eslint.org/docs/latest/extend/custom-rules#applying-fixes">documentation</a>,
on applying fixes.</p>
<p>Now, we need to create a string to replace the node with. Inspect this portion
of the AST we generated earlier:</p>
<pre><code class="language-javascript">&quot;type&quot;: &quot;BinaryExpression&quot;,
&quot;operator&quot;: &quot;==&quot;,
&quot;left&quot;: {
  &quot;type&quot;: &quot;Identifier&quot;,
  &quot;name&quot;: &quot;a&quot;
},
&quot;right&quot;: {
  &quot;type&quot;: &quot;Identifier&quot;,
  &quot;name&quot;: &quot;b&quot;
}
</code></pre>
<p>The LHS and RHS of the operands can be accessed as, <code>node.left</code> and <code>node.right</code>
respectively. The value of these operands can be fetched from the <code>name</code>
attribute and our fix string can be constructed like this:</p>
<pre><code class="language-js">`${node.left.name} === ${node.right.name}`;
</code></pre>
<p>Hence adding this logic to our rule:</p>
<pre><code class="language-javascript">module.exports = {
  meta: {
    // Other properties
    fixable: &quot;code&quot;, // Include this, when your rule provides a fix.
  },
  create: context =&gt; ({
    BinaryExpression(node) {
      if (node.operator !== &quot;==&quot;) return;

      context.report({
        node,
        message: &quot;Use strict equality instead of loose equality.&quot;,
        fix: fixer =&gt; fixer.replaceText(
          node,
          `${node.left.name} === ${node.right.name}`
        );
      });
    },
  }),
};
</code></pre>
<p>But, what if the LHS or RHS contains expressions, like these:</p>
<pre><code class="language-javascript">if(array[index].type == a)
</code></pre>
<p>In that case, <code>node.left</code> will have more nested nodes:</p>
<p><img src="https://www.bigbinary.com/blog/images/images_used_in_blog/2023/enhance-code-quality-and-performance-with-eslint/left_operator_ast.png" alt="Left Operator AST"></p>
<p>Now, we can't just proceed by using <code>node.left.name</code>. So, how do we make sure
that we don't lose any data? The <code>getSourceCode()</code> function is a utility
provided by ESLint that allows you to retrieve the source code corresponding to
a specific node in the <code>context</code>. We can obtain the source code as a string by
using <code>getText()</code> function on the node. So for the above example, we can write:</p>
<pre><code class="language-javascript">context.getSourceCode().getText(node.left); // Returns `array[index].type`
</code></pre>
<p>Now, let us modify our <code>create</code> function to handle this edge case and our
completed rule would look like this:</p>
<pre><code class="language-javascript">module.exports = {
  meta: {
    type: &quot;problem&quot;,
    docs: {
      description: &quot;Enforce the use of strict equality.&quot;,
      category: &quot;Best Practices&quot;,
    },
    fixable: &quot;code&quot;,
  },
  create: context =&gt; ({
    BinaryExpression(node) {
      if (node.operator !== &quot;==&quot;) return;

      context.report({
        node,
        message: &quot;Use strict equality instead of loose equality.&quot;,
        fix: fixer =&gt; {
          const leftNode = context.getSourceCode().getText(node.left);
          const rightNode = context.getSourceCode().getText(node.right);

          return fixer.replaceText(node, `${leftNode} === ${rightNode}`);
        },
      });
    },
  }),
};
</code></pre>
<h3>Adding tests for the rule</h3>
<p>In our earlier sections, you saw how to write tests for your custom rule. Now,
let us implement the same for our <code>strict-quality</code> rule. We need to add valid
and invalid cases as strings to the respective arrays. Inside, the <code>invalid</code>
array, you can make use of the <code>output</code> attribute to provide the expected fixed
code for that particular invalid case. So our tests will look like this:</p>
<pre><code class="language-javascript">const { RuleTester } = require(&quot;eslint&quot;);

const rule = require(&quot;../rules/strict-equality&quot;);

const ruleTester = new RuleTester({
  parserOptions: {
    ecmaFeatures: { jsx: true },
    ecmaVersion: 2020,
    sourceType: &quot;module&quot;,
  },
});

const message = &quot;Use strict equality instead of loose equality.&quot;;

ruleTester.run(&quot;strict-equality&quot;, rule, {
  valid: [
    &quot;if (a === b) {}&quot;,
    &quot;if (a === b) alert(1)&quot;,
    &quot;if (a === b) { alert(1) }&quot;,
  ],
  invalid: [
    {
      code: &quot;if (a == b) {}&quot;,
      errors: [{ message }],
      output: &quot;if (a === b) {}&quot;,
    },
    {
      code: &quot;if (getUserRole(user) == Roles.DEFAULT) grantAccess(user);&quot;,
      errors: [{ message }],
      output: &quot;if (getUserRole(user) === Roles.DEFAULT) grantAccess(user);&quot;,
    },
  ],
});

console.log(&quot;Completed all tests for strict-equality rule&quot;);
</code></pre>
<h2>Custom ESLint plugins</h2>
<p>In real-world scenarios, we will have multiple custom rules and configurations
that we want to enforce consistently across our projects. This is where custom
ESLint plugins become invaluable, as they allow us to bundle and package all
these elements into a single plugin. In the Neeto ecosystem, we use our custom
plugin, <code>eslint-plugin-neeto</code>, to maintain a uniformly structured codebase.</p>
<p>In this section, we will create a custom ESLint plugin for the custom rules we
created, and learn how to integrate it into our projects.</p>
<h3>Getting started with a custom plugin</h3>
<ol>
<li>
<p>Create a new directory and initialize a new npm package for your plugin. The
package name should always follow the naming format, <code>eslint-plugin-*</code> :</p>
<pre><code class="language-bash">mkdir eslint-plugin-custom
cd eslint-plugin-custom
npm init -y
</code></pre>
</li>
<li>
<p>Arrange our previously defined rules and tests in this folder structure:</p>
<pre><code class="language-javascript">eslint-plugin-custom
├── package.json
├── index.js
├── src
│   └── rules
│     └── no-var.js
│     └── strict-equality.js
│   └── tests
│     └── index.js
│     └── no-var.js
│     └── strict-equality.js
└── README.md
</code></pre>
</li>
<li>
<p>Let us add ESLint as a devDependency in our plugin.</p>
<pre><code class="language-bash">npm install -D eslint
</code></pre>
</li>
</ol>
<h3>Adding and exporting custom rules</h3>
<p>Copy the rules we created into <code>no-var.js</code> and <code>strict-equality.js</code>. Now, how do
we help the plugin find our rules? You can add the following to <code>index.js</code> in
the plugin's root directory:</p>
<pre><code class="language-javascript">module.exports = {
  rules: {
    &quot;no-var&quot;: require(&quot;./src/rules/no-var&quot;),
    &quot;strict-equality&quot;: require(&quot;./src/rules/strict-equality&quot;),
  },
};
</code></pre>
<p>By configuring the index file in this way, you ensure that ESLint recognizes and
associates your custom rule with the specified name, making it accessible in
ESLint configurations.</p>
<h3>Adding test files</h3>
<p>In a similar manner to how rules are handled, we can establish a unified entry
point for our tests in <code>src/tests/index.js</code>:</p>
<pre><code class="language-javascript">require(&quot;./no-var.js&quot;);
require(&quot;./strict-equality.js&quot;);
</code></pre>
<p>You can either set up any test framework of your choice to run the tests or run
them directly using:</p>
<pre><code class="language-bash">node src/tests
</code></pre>
<p>Explore the complete code for the custom plugin, containing both the rules and
their corresponding tests that we have developed this far, in
<a href="https://github.com/KrishnapriyaSkk/eslint-plugin-custom">eslint-plugin-custom</a>.</p>
<h3>Integrating the custom plugin</h3>
<p>You saw in earlier sections that, it is possible to test your rules using
<code>RuleTester</code>. While this method helps you specify all the edge cases and test
your rules against them, it is not that easy, to think of all possible edge
cases. For this, we need to run our rules in real projects and we will have to
achieve this without publishing our package to the remote registry right away.</p>
<ul>
<li>
<h4>Integrate and test locally using yalc</h4>
<p>Yalc acts as a very simple local repository for your locally developed
packages that you want to share across your local environment. Let us see how
we can use <code>yalc</code> to test our custom plugin on host projects.</p>
<ol>
<li>
<p>Install <code>yalc</code> globally:</p>
<pre><code class="language-bash">npm install -g yalc
</code></pre>
</li>
<li>
<p>Navigate to the root directory of your custom plugin and publish it to the
local <code>yalc</code> store:</p>
<pre><code class="language-bash">cd eslint-plugin-custom
yalc publish
</code></pre>
</li>
<li>
<p>Navigate to the root directory of the host project. Add the custom plugin
using <code>yalc</code>:</p>
<pre><code class="language-bash">cd my-host-project
yalc add eslint-plugin-custom
</code></pre>
</li>
<li>
<p>Update your ESLint configuration in the host project to include the plugin
and its rules in <code>.eslintrc.js</code>:</p>
<pre><code class="language-javascript">module.exports = {
  //Other configurations
  plugins: [&quot;custom&quot;],
  rules: {
    &quot;custom/no-var&quot;: &quot;error&quot;,
    &quot;custom/strict-equality&quot;: &quot;error&quot;,
    //Other rules
  },
};
</code></pre>
<p>Here, we have excluded the prefix <code>eslint-plugin-</code>, while specifying the
plugin name and used only the word <code>custom</code>. ESLint automatically
recognizes plugins without the <code>eslint-plugin-</code> prefix when specified in
the configuration file. Trimming off this prefix is a common practice to
simplify the plugin name and make it more user-friendly in the context of
the host project.</p>
<p>We also namespaced the rule under their respective plugins. By doing so, we
ensure that ESLint can distinguish between conflicting rule names if any,
and apply the correct rules based on your configuration.</p>
</li>
<li>
<p>Testing the custom plugin in the host project:</p>
<ul>
<li>
<p>This can be done by running ESLint rules for a specific file:</p>
<pre><code class="language-bash">npx eslint &lt;file_path&gt;
#or to apply and test fixes
npx eslint --fix &lt;file_path&gt;
</code></pre>
</li>
<li>
<p>You can use a glob pattern, such as <code>**/*.js</code>, to run ESLint on the
entire project by specifying the file path pattern that matches the
desired files to be linted:</p>
<pre><code class="language-bash">npx eslint &quot;./app/javascript/src/**/*.{js,jsx,json}&quot;
</code></pre>
</li>
<li>
<p>You can integrate ESLint to VSCode by installing the
<a href="https://marketplace.visualstudio.com/items?itemName=dbaeumer.vscode-eslint">ESLint extension</a>.
Once installed, to apply any changes made to ESLint configurations,
simply restart the ESLint server, by opening the Command Palette
(<code>Ctrl+Shift+P</code> or <code>Cmd+Shift+P</code>) and search for &quot;ESLint: Restart ESLint
Server&quot;. This will help you see red squiggly lines under the code
containing the error. It is a good visual representation of our ESLint
rule.</p>
<p><img src="https://www.bigbinary.com/blog/images/images_used_in_blog/2023/enhance-code-quality-and-performance-with-eslint/restart_eslint_server.gif" alt="Restart ESLint Server"></p>
</li>
</ul>
<p>Do not forget to note down any edge cases you come across, so that you can
refactor your rule's logic to cover those cases.</p>
</li>
<li>
<p>Every time you make a change in your plugin, you can push those changes to
your host projects by running the following command from your ESLint
plugin's root directory:</p>
<pre><code class="language-bash">yalc push
</code></pre>
</li>
<li>
<p>Once you are done with testing your plugin locally, remove it from the
<code>package.json</code> of your host project by running the following command from
your host project's root directory:</p>
<pre><code class="language-bash">yalc remove eslint-plugin-custom
</code></pre>
</li>
</ol>
</li>
<li>
<h4>Integrating published plugin package</h4>
<p>Once you publish the plugin into the remote registry, you can integrate it
into your host projects.</p>
<ol>
<li>
<p>Add the custom plugin as a devDependency to your project using the command:</p>
<pre><code class="language-bash">yarn add -D &quot;eslint-plugin-custom&quot;
</code></pre>
</li>
<li>
<p>Configure ESLint to enable your custom rules. We have already added the
necessary configurations in step 6, of integrating using <code>yalc</code>.</p>
</li>
</ol>
</li>
</ul>
<h3>Adding a recommended configuration</h3>
<p>When dealing with multiple host projects, it becomes a repetitive task to
include the same rules and error levels in each project. Any updates or
adjustments to these rules would then need to be applied across all projects
individually. To streamline this process, the recommended configuration lets us
keep all those configs within the ESLint plugin itself. This way, we can easily
maintain and modify the rules without the need for duplicating efforts in every
project.</p>
<p>Imagine we want to recommend using our current rules as warnings. In that case,
we can add a recommended config in our eslint-plugin-custom's <code>index.js</code>:</p>
<pre><code class="language-javascript">module.exports = {
  rules: {
    &quot;no-var&quot;: require(&quot;./src/rules/no-var&quot;),
    &quot;strict-equality&quot;: require(&quot;./src/rules/strict-equality&quot;),
  },
  configs: {
    recommended: {
      rules: {
        &quot;custom/no-var&quot;: &quot;warn&quot;,
        &quot;custom/strict-equality&quot;: &quot;warn&quot;,
      },
    },
  },
};
</code></pre>
<p>In the host project, where you want to use your custom plugin, you can install
the plugin and configure ESLint to extend the recommended configuration in
<code>.eslintrc.js</code>:</p>
<pre><code class="language-javascript">{
  &quot;extends&quot;: [
    &quot;eslint:recommended&quot;,
    &quot;plugin:custom/recommended&quot;
  ],
  // Other ESLint configurations for your project.
  &quot;rules&quot;: {
    // Other project-specific rules.
  }
}
</code></pre>
<h2>General tips on using ESLint</h2>
<p>In this section, we will explore some general tips and tricks that will empower
you to navigate through false positives, troubleshoot common pitfalls, and
handle ESLint warnings well.</p>
<h3>Handling false positives</h3>
<p>Sometimes, ESLint can be overzealous and flag code as incorrect even when it's
acceptable. Alternatively, there may be instances where we intentionally choose
to adopt a particular coding style and wish to prevent ESLint from throwing
errors. Here are a couple of strategies to address these errors:</p>
<ol>
<li>
<p>Disabling ESLint rules:</p>
<p>You can temporarily disable the rule responsible for the false alarm by
adding a comment above the code, like this:</p>
<pre><code class="language-javascript">// eslint-disable-next-line &lt;rule_name&gt;
</code></pre>
<p>Example:</p>
<pre><code class="language-javascript">// Reason for disabling the rule.
// eslint-disable-next-line no-console
console.log(&quot;All tests were executed&quot;);
</code></pre>
<p>Do not forget to specify the reason why you have disabled that particular
rule for that line, to avoid any future confusion.</p>
</li>
<li>
<p>Altering configuration:</p>
<p>ESLint provides an option to configure a rule as per your needs. Some rules
accept additional options to customize its behavior. An example is,
<a href="https://eslint.org/docs/latest/rules/camelcase">camelcase</a>. It enforces the
use of camel case for variable names. It accepts
<a href="https://eslint.org/docs/latest/rules/camelcase#options">options</a> to disable
enforcing camel casing for specific cases. In a case where, you want to use a
different naming convention, such as snake case, for object keys, you can set
the <code>properties</code> option to <code>never</code>:</p>
<pre><code class="language-javascript">// .eslintrc
{
  &quot;rules&quot;: {
    &quot;camelcase&quot;: [&quot;error&quot;, { &quot;properties&quot;: &quot;never&quot; }]
  }
}
</code></pre>
<p>This configuration tells ESLint to exclude properties (object keys) from the
camel case requirement.</p>
<p>We can accept options in our custom rules and access them inside our rules
via <code>context.options</code>. Then, you can perform the necessary logic to handle
such cases.</p>
</li>
</ol>
<h3>Common reasons for ESLint checks to crash</h3>
<p>While using ESLint, you might encounter situations where ESLint checks crash or
fail unexpectedly. Keep these in mind to avoid such crashes:</p>
<ol>
<li>
<p>If you update or switch ESLint configurations, make sure to run
<code>yarn install</code> or <code>npm install</code> to install any missing dependencies.</p>
</li>
<li>
<p>Ensure that your ESLint configuration has accurate parser options, like the
language version and ECMAScript features, as they are crucial for ESLint to
parse and analyze your code correctly.</p>
</li>
</ol>
<h3>Should we consider ESLint warnings?</h3>
<p>As we've seen in previous sections, ESLint allows us not only to report errors
but also to show warnings. When creating a rule, it may not always be possible
to cover every edge case and eliminate all false positives. In such situations,
we can configure these rules as warnings instead. Additionally, there are cases
where we don't want to enforce a specific coding style but rather suggest a more
optimized approach to the developer. In such scenarios as well, we avoid
throwing errors.</p>
<p>While ESLint warnings don't necessarily require disabling through comments, it's
recommended to review and address them whenever feasible. This practice improves
code quality, helps prevent future errors, and enhances the overall robustness
of the codebase. However, if you find that the suggestion does not apply to your
specific situation, you have the flexibility to disregard it or disable it by
including a comment.</p>
<h2>Conclusion</h2>
<p>Throughout this blog, we explored various aspects of ESLint, including
understanding its purpose and benefits, configuring rules on a project, writing
custom rules and plugins, and testing them effectively. We also discussed
general tips for using ESLint, such as handling false positive errors, dealing
with crashes, and considering warnings.</p>
<p>Remember to periodically review and update your ESLint configurations as your
project evolves, and stay up-to-date with the latest ESLint releases and rule
updates to take advantage of new features and improvements. To know more about
functionalities of ESLint, you can refer the
<a href="https://eslint.org/docs/">ESLint documentation</a>.</p>
]]></content>
    </entry>
  <entry>
      <title type="text"><![CDATA[Challenges faced while building Neeto commons frontend]]></title>
      <link rel="alternate" type="text/html" href="https://www.bigbinary.com/blog/neeto-commons-frontend"/>
      <link rel="enclosure" type="image/jpeg" href="https://www.bigbinary.com/blog/images/social_preview_images/neeto_commons_frontend_challenges.jpg"/>
      <id>https://www.bigbinary.com/blog/neeto-commons-frontend</id>
      <published>2023-07-11T00:00:00.000Z</published>
      <updated>2023-07-11T00:00:00.000Z</updated>
      <author>
        <name>Amaljith K</name>
        <uri>https://www.bigbinary.com/blog/authors/amaljith-k</uri>
      </author>
      <category term="JavaScript"/>
      <category term="ReactJS"/>
      <media:thumbnail url="https://www.bigbinary.com/blog/images/social_preview_images/neeto_commons_frontend_challenges.jpg" width="1200" height="627"/>
      <summary type="text"><![CDATA[At neeto, we are building a lot of products to simplify how we work. Many of these products share similar features, such as a 404 page, team member invitations, a sidebar, app switcher, Slack...]]></summary>
      <content type="html" xml:base="https://www.bigbinary.com/blog/neeto-commons-frontend"><![CDATA[<p>At <a href="https://www.neeto.com/">neeto</a>, we are building
<a href="https://blog.neeto.com/p/neeto-products-and-people">a lot of products</a> to
simplify how we work. Many of these products share similar features, such as a
404 page, team member invitations, a sidebar, app switcher, Slack integration,
etc. For consistency in both UI and functionality, these common business
requirements must remain uniform across all Neeto products.</p>
<p>To bring a new Neeto product to market, we used to copy the whole repo of an
already existing product and then we used to delete the previous product-specific
code from the new repo. This ensured that the visual design, application
initialization logic, code quality enforcement rules, etc. are the same in all
Neeto products. However, during active development, we noticed three big
problems with the consistency of Neeto products.</p>
<ul>
<li>Different teams implemented the same business requirements in different ways,
causing products to go out of sync.</li>
<li>Bringing an update to the common functionality required manual changes to
every repository.</li>
<li>Some teams made quick and dirty changes to the common copied logic to fix
coding inconveniences.</li>
</ul>
<p>To address these challenges, we needed a way to share the common code. Simply
copying the common code to each repository was not scalable. We built a ruby gem
named <code>neeto-commons-backend</code> and an NPM package named <code>neeto-commons-frontend</code>
to hold all our common code.</p>
<p>The implementation of the <code>neeto-commons-backend</code> gem was relatively easy, but
the implementation of the frontend package, <code>neeto-commons-frontend</code>, posed
several challenges. Let's discuss some of the challenges we faced while building
<code>neeto-commons-frontend</code>.</p>
<h3>public or private?</h3>
<p>Both <code>neeto-commons-backend</code> and <code>neeto-commons-frontend</code> contained a lot of
business logic specific to neeto. So having these two repos as &quot;private&quot; in
GitHub was an easy call.</p>
<p>When it comes to using <code>neeto-commons-backend</code> gem, we can directly use the gem
from GitHub if we configure the access tokens correctly in the host
applications. Recently, we have deployed a private gem server to host our gems.
However, for <code>neeto-commons-frontend</code>, things aren't that straightforward. If we
decide to serve the package directly from Github private repository, we will
have the following problems:</p>
<ul>
<li>
<p>Apart from <code>neeto-commons-frontend</code>, we have multiple other frontend packages.
To use <code>neeto-commons-frontend</code> as a dependency in them, we will need to
hardcode the GitHub access token in their <code>package.json</code> file. But, <code>package.json</code>
is considered to be a public file. So it is not safe to add any secret keys or
tokens to it. If we unknowingly publish any of those packages to npm, our
tokens would leak to the public.</p>
</li>
<li>
<p>We cannot directly use the ES6 source code in the host application. We need to
transpile the JS files before serving. If we were serving
<code>neeto-commons-frontend</code> directly from GitHub, we are limited to these
options:</p>
<ul>
<li>Add a <code>post_install</code> hook to the package: <code>post_install</code> command is said to
be executed at the time of running <code>yarn install</code> or <code>yarn add</code> on the host
project. We can add a command to transpile <code>neeto-commons-frontend</code> from
that hook. But the <code>post_install</code> hook isn't guaranteed to always run. So it
isn't a reliable strategy.</li>
<li>Another option is to maintain a copy of transpiled JS output in our GitHub
repo by using pre-commit and prepush hooks. But, keeping generated code in
version control isn't a good practice. Moreover, can't trust pre-commit and
prepush hooks because they can be skipped or can fail to run.</li>
</ul>
</li>
</ul>
<p>So, we decided to bundle <code>neeto-commons-frontend</code>'s JS code using
<a href="https://rollupjs.org">rollup</a> and release it to NPM as a public package. Even
though the source code will remain private in GitHub, it would make our bundle
available to the public. Anyone can do
<code>yarn add @bigbinary/neeto-commons-frontend</code> to obtain our JS bundle.</p>
<p>However, minified JavaScript bundles are nearly impossible to comprehend. Hence,
we think it's reasonable to make them public. We anyway need the JavaScript
bundle to be served publicly in the browsers while loading Neeto products. We
cannot keep the frontend JS code completely private.</p>
<h3>Release management</h3>
<p>In the initial stages of building <code>neeto-commons-frontend</code>, we used to split a
large feature into several small sub-issues. So, we raise many small PRs to
accomplish a single feature. For this reason, we didn't want to publish a new
version of <code>neeto-commons-frontend</code> after merging every PR. We needed manual
control over the publishing process.</p>
<p>Also, whenever we do decide to publish a new version, we wish to have an
automated mechanism to generate release notes explaining the changes from the
previous revision.</p>
<p>To satisfy these requirements, we decided to use
<a href="https://docs.github.com/en/repositories/releasing-projects-on-github/managing-releases-in-a-repository">GitHub releases</a>.
It offered the following benefits:</p>
<ul>
<li>GitHub can automatically generate release notes using the titles of the merged
PRs since the last release.</li>
<li>The generated release notes will contain a link to visualize code diff between
the current and previous releases.</li>
<li>We can run a GitHub action to automatically publish the package to npm when we
create a new release.</li>
</ul>
<p>We successfully followed that process for a long time. Later on,
<code>neeto-commons-frontend</code> became stable. Now, each PR is comprehensive and
requires an NPM publish. So, we changed our GitHub action to create a GitHub
release and publish the package to NPM on every PR merge.</p>
<h3>common initializers</h3>
<p>The <code>neeto-commons-backend</code> gem consists of various code components necessary
for initializing the Rails backend, such as configuring CORS, establishing
cache, and more.</p>
<p>Likewise, in the frontend, certain initialization tasks must be completed before
the React components can begin rendering. These tasks include configuring Axios
interceptors and headers, initializing Honeybadger and Mixpanel integrations,
setting up translation resources, and more.</p>
<p>Just like <code>neeto-commons-backend</code>, we wanted <code>neeto-commons-frontend</code> to perform
all these frontend initialization tasks on its own. But it wasn't as
straightforward as we anticipated. Here are some challenges we faced while
initializing the host application from <code>neeto-commons-frontend</code>:</p>
<h4>Modifying axios instance of the host application</h4>
<p>Axios lets us customize its default instance at runtime by adding custom
headers. With that, all network requests from our app will have those headers
set implicitly. Also, Axios lets us register request and response
interceptors to view and edit requests and responses before it is sent or
received.</p>
<p>All Neeto products use this feature to set the Auth token and CSRF token in the
headers. They also register interceptors for different use cases like showing
toaster messages, handling authorization errors, etc.</p>
<p>Since this logic is the same in all products, we decided to move it to
<code>neeto-commons-frontend</code>. Our requirement was to customize the host project's
Axios instance from <code>neeto-commons-frontend</code>, without having to write any code
from the host project.</p>
<p>For better clarity, let us assume that we are trying to initialize Axios in
<a href="https://www.neeto.com/neetocal">NeetoCal</a> using <code>neeto-commons-frontend</code>.</p>
<p>To use Axios in <code>neeto-commons-frontend</code>, just like any other JS project, we
need to add <code>axios</code> to its package.json. But if we were to add <code>axios</code> as a
dependency, rollup will pull out the source code from <code>axios</code> and include it in
the package's published bundle.</p>
<p>Similarly, since NeetoCal has both <code>neeto-commons-frontend</code> and <code>axios</code> as its
dependencies, <a href="https://webpack.js.org">webpack</a> will pull out both of their
source code and add it to the JS bundle of NeetoCal. It will cause NeetoCal's JS
bundle to have two copies of <code>axios</code> code. One from NeetoCal's dependencies and
another one from <code>neeto-commons-frontend</code>'s bundle.</p>
<p>When a browser loads NeetoCal's bundle, both those codes will get initialized
and we will have two separate instances of Axios. Any customizations done from
<code>neeto-commons-frontend</code> will be applicable only to its own Axios instance. We
won't be able to touch the NeetoCal's Axios instance from
<code>neeto-commons-frontend</code>.</p>
<p>As a solution for this, we defined <code>axios</code> as a <code>peerDependency</code> in
<code>neeto-commons-frontend</code>'s package.json. Since we use
<a href="https://www.npmjs.com/package/rollup-plugin-peer-deps-external">rollup-plugin-peer-deps-external</a>
plugin, rollup will consider <code>axios</code> as an external dependency while bundling.
That means rollup will not pull code from <code>axios</code> and add it to
<code>neeto-commons-frontend</code> bundle. Instead, it will keep the
<code>import axios from &quot;axios&quot;</code> statement as it is and assume that NeetoCal will
have this dependency installed and available at runtime.</p>
<p>Since both NeetoCal and <code>neeto-commons-frontend</code> are now importing Axios from
the same source, both of them will share the same instance. Any modifications
done from <code>neeto-commons-frontend</code> will reflect on the Axios instance used in
the project as well.</p>
<h4>Placement of initialization logic</h4>
<p>We were unsure of where to initialize the application from. We first tried
initializing the app from <code>useEffect</code> hook of the top-most component, <code>App.jsx</code>.</p>
<p>But, as per React's life cycle, the app will run one complete render cycle of
all nested components before <code>useEffect</code> gets called. Also, a parent component's
<code>useEffect</code> will be executed only after all the <code>useEffect</code>s registered in the
child components are completed.</p>
<p>This won't work for us due to the following reasons:</p>
<ul>
<li>We were using <code>i18next.t()</code> function in several constants to render locale
translations. For the translations to be available, we need to initialize
<code>i18next</code> before using it. But since constants get initialized immediately
after the bundle is loaded, all those calls will result in
<code>Translation not found</code> errors.</li>
<li>Some nested components were performing API calls from their <code>useEffect</code> hooks.
Since initialization is not completed by that time, the requests will fail due
to missing authentication keys.</li>
</ul>
<p>To avoid the problem with the delay in <code>useEffect</code> hook, we could have invoked
the initialization step directly from the rendering code of <code>App.jsx</code>, by
inlining it with the function definition. But, it is not a good practice to
introduce side effects from outside <code>useEffect</code> hooks. So, we didn't go with
that.</p>
<p>After some trials and errors, we finally decided to place the initialization
function call in <code>app/javascript/packs/application.js</code>. It is the file that gets
executed before React gets mounted. So our app will be fully initialized before
it starts to render.</p>
<h3>utility functions</h3>
<p>We created <code>neeto-commons-frontend</code> by copying common code from all neeto
products to it. We identified these categories of common code: application
initialization logic, react components and hooks, and general utility functions.</p>
<p>When copying utility functions, we realized that we could implement a new set of
utility functions to minimize boilerplate code in all Neeto products. There are
a lot of operations done using array functions like <code>map</code>, <code>filter</code>, <code>find</code>,
etc. We were using arrow functions to compare nested properties, which was the
most common boilerplate.</p>
<p>We decided to introduce a function <code>matches</code>, which checks whether the given
pattern is partially equal to the given object. It works like this: the pattern
<code>{ name: &quot;Oliver&quot; }</code> matches the object <code>{ name: &quot;Oliver&quot;, phone: 000000 }</code>
because the object contains the key <code>name</code> and its value is the same in both the
pattern and the object.</p>
<p>With this function as the foundation, we built several array functions like
<code>findBy</code>, <code>removeBy</code>, <code>replaceBy</code>, etc. All these functions check for the
element that <code>match</code>es the given pattern from an array and performs the required
operation on that element.</p>
<p>We also took inspiration from Ramda and implemented currying for such utility
functions. This shortened the JS code and made it more declarative.</p>
<pre><code class="language-js">// before
setUsers(users =&gt;
  users.map(user =&gt; (user.address.pincode === 600213 ? newUser : user))
);

// after
setUsers(replaceBy({ address: { pincode: 600213 } }, newUser));
</code></pre>
<pre><code class="language-js">// before
const defaultOrg = organizations.find(({ users }) =&gt;
  users.includes(DEFAULT_USER)
);

// after
const defaultOrg = findBy({ users: includes(DEFAULT_USER) }, organizations);
</code></pre>
<p>You can read our blog
<a href="https://www.bigbinary.com/blog/extending-pure-utility-functions-of-ramda">Extending pure utility functions of Ramda.js</a>
to learn more about how we built these utility functions.</p>
<h3>dependency management</h3>
<p>The utility functions exported by <code>neeto-commons-frontend</code> are like an extension
to Ramda. They can be used outside Neeto web applications as well. Several
frontend packages and even React Native team can use these utility functions.</p>
<p>Since we import multiple packages as external modules (to use the host project's
modules, for example, Axios), we cannot export <code>neeto-commons-frontend</code> as a
single bundle. This will force the host applications to have those packages in
their dependencies.</p>
<p>To avoid this problem, we decided to create separate bundles for each category.
We now have four independent bundles: <code>pure</code>, <code>utils</code>, <code>react-utils</code>, and
<code>initializers</code>.</p>
<p><code>pure</code> bundle contains all the pure functions we have discussed earlier. It
needs only Ramda as an external dependency. <code>utils</code> bundle encompasses general
utility functions which has dependencies on packages other than Ramda. An
example for that is <code>copyToClipboard</code> function. It shows a toaster message if
copying is successful. So it depends on <code>@bigbinary/neetoui</code> package as well.
<code>react-utils</code> and <code>initializers</code> contains several neeto-specific external
dependencies. They are designed to work only on Neeto web apps.</p>
<h3>IDE support &amp; types</h3>
<p>Initially, all frontend packages at BigBinary were serving UMD bundles. They are
compatible with every environment. So there is not much headache of having to
publish multiple bundles for different environments.</p>
<p>But UMD bundles do not assist IDEs well. That is, IDE can't provide auto-import,
autocompletion, and type support if we distribute UMD packages alone. IDEs even
give false positive errors when importing items from the package since they
can't detect such an export in the bundle.</p>
<p>The first workaround we tried is to serve ESM or CJS bundles instead of UMD.
Both ESM and CJS work well with imports. But imports from the bundle are
implicitly typed as <code>any</code> by the IDE. We won't get any predictions for function
parameters or component props. We were OK with this setup for a few weeks. This
at least does not give false positive errors.</p>
<p>But the problem with this setup is that the developer continuously needs to
refer to the docs to understand the parameters a function accepts. This
significantly degrades the development experience. To avoid this hassle, some
developers preferred not to use our functions and instead wrote lengthy vanilla
JS code.</p>
<p>Later, we found a solution to this problem. We added explicit type definition
using <code>.d.ts</code> files in <code>neeto-commons-frontend</code> package. They contain the type
definition of all our exports, written in typescript. We won't copy the JS
implementation code to it. It will only contain function declarations.</p>
<p>Since we were exporting four different bundles, we had to add four different
<code>.d.ts</code> files with the same name as the bundle. That is, we have <code>pure.d.ts</code>,
<code>utils.d.ts</code>, <code>react-utils.d.ts</code>, and <code>initializers.d.ts</code>. The IDE automatically
picks up the correct type definition file for the bundle we are importing and
uses it to give predictions.</p>
<p>The introduction of type declaration helped us improve the IDE support
significantly. It also allows us to add JSDoc comments and deprecation notices
for the exported items. Using these, the IDE can show documentation for the
functions while the developer types.</p>
<h3>People not knowing the available functions</h3>
<p>Even though we were exporting tons of functions from <code>neeto-commons-frontend</code>,
people were not aware of the existence of many of them. So we found that many
were reinventing the wheel or wasting their time writing the boilerplate.</p>
<p>As a solution for this, we decided to add some custom ESLint rules to
<code>eslint-plugin-neeto</code>, which shows warnings to the user about a possible Ramda or
<code>neeto-commons-frontend</code> alternative when we detect a corresponding boilerplate
code.</p>
<p>You can find the story behind <code>eslint-plugin-neeto</code> and the challenges faced
during its development on another blog here.</p>
]]></content>
    </entry>
  <entry>
      <title type="text"><![CDATA[Extending pure utility functions of Ramda.js]]></title>
      <link rel="alternate" type="text/html" href="https://www.bigbinary.com/blog/extending-pure-utility-functions-of-ramda"/>
      <link rel="enclosure" type="image/jpeg" href="https://www.bigbinary.com/blog/images/social_preview_images/extending_pure_utility_function.jpg"/>
      <id>https://www.bigbinary.com/blog/extending-pure-utility-functions-of-ramda</id>
      <published>2023-05-30T00:00:00.000Z</published>
      <updated>2023-05-30T00:00:00.000Z</updated>
      <author>
        <name>Neenu Chacko</name>
        <uri>https://www.bigbinary.com/blog/authors/neenu-chacko</uri>
      </author>
      <category term="JavaScript"/>
      <media:thumbnail url="https://www.bigbinary.com/blog/images/social_preview_images/extending_pure_utility_function.jpg" width="1200" height="627"/>
      <summary type="text"><![CDATA[Why and how we built custom pure JavaScript utility functions to extend Ramda.js]]></summary>
      <content type="html" xml:base="https://www.bigbinary.com/blog/extending-pure-utility-functions-of-ramda"><![CDATA[<h3>Introduction</h3>
<p>At BigBinary, we are always looking to improve our code.
<a href="https://ramdajs.com/docs/">Ramda</a>'s focus on functional-style programming with
immutable and side-effect-free functions aligns with this goal, making it our
preferred choice.</p>
<p>While working on <a href="https://www.neeto.com/">neeto</a>, we found the need for specific
functions that could be applied across a range of products but were not already
included in Ramda. We extended Ramda's functions to meet this need and created
our own pure utility functions.</p>
<p>In this blog, we'll explore our motivation for creating these functions and the
benefits they provide, showcasing how they can be generally applicable to a wide
range of products.</p>
<h3>The matches function: the core of our pure utility functions</h3>
<p>During the development of Neeto, we encountered instances where long conditional
chains were used to search for objects with deeply nested properties.</p>
<p>For example, consider this <code>userOrder</code> object:</p>
<pre><code class="language-javascript">const userOrder = {
  id: 12356,
  user: {
    id: 2345,
    name: &quot;John Smith&quot;,
    role: &quot;customer&quot;,
    type: &quot;standard&quot;,
    email: &quot;john@example.com&quot;,
  },
  amount: 25000,
  type: &quot;prepaid&quot;,
  status: &quot;dispatched&quot;,
  shipTo: {
    name: &quot;Bob Brown&quot;,
    address: &quot;456 Oak Lane&quot;,
    city: &quot;Pretendville&quot;,
    state: &quot;Oregon&quot;,
    zip: &quot;98999&quot;,
  },
};
</code></pre>
<p>We can check if this order is deliverable like this.</p>
<pre><code class="language-javascript">const isDeliverable =
  userOrder.type === &quot;prepaid&quot; &amp;&amp;
  useOrder.user.role === &quot;customer&quot; &amp;&amp;
  userOrder.status === &quot;dispatched&quot;;
</code></pre>
<p>This approach works but it can be simplified.</p>
<p>Our goal was to simplify the process by focusing on <strong>comparing all the keys of
the pattern to the corresponding keys in the data</strong>. If the pattern matches with
the object, the function should return true. With that in mind, we developed a
function named <code>matches</code> to determine if a given object matches a specified
pattern.</p>
<p>With <code>matches</code> we should be able to rewrite <code>isDeliverable</code> as:</p>
<pre><code class="language-javascript">const isDeliverable = matches(DELIVERABLE_ORDER_PATTERN, userOrder);
</code></pre>
<p>Here the <code>DELIVERABLE_ORDER_PATTERN</code> is defined as:</p>
<pre><code class="language-javascript">const DELIVERABLE_ORDER_PATTERN = {
  type: &quot;prepaid&quot;,
  status: &quot;dispatched&quot;,
  user: { role: &quot;customer&quot; },
};
</code></pre>
<p>This is how we implemented the <code>matches</code> function:</p>
<pre><code class="language-javascript">const matches = (pattern, object) =&gt; {
  if (object === pattern) return true;

  if (isNil(pattern) || isNil(object)) return false;

  if (typeof pattern !== &quot;object&quot;) return false;

  return Object.entries(pattern).every(([key, value]) =&gt;
    matches(value, object[key])
  );
};
</code></pre>
<p>Here, we noticed a limitation in this implementation of the <code>matches</code> function.
<strong>It compared the keys and values in the data and the pattern only for strict
equality</strong>. We were not able to use the <code>matches</code> function for a situation like
the one mentioned below.</p>
<p>To check if the <code>userOrder</code> is being shipped to the city of <code>Michigan</code> or
<code>Oregon</code>, we were not able to call <code>matches</code> function on the key <code>state</code>.
Instead, we had to use the following approach along with other conditions.</p>
<pre><code class="language-javascript">const isToBeShippedToMichiganOrOregon =
  [&quot;Michigan&quot;, &quot;Oregon&quot;].includes(userOrder.shipTo.state) &amp;&amp;
  // other long chain of conditions
</code></pre>
<p>To cover that, we decided to <strong>allow functions as key values in the pattern
object</strong>. With this change, we should be able to write the same as the
following.</p>
<pre><code class="language-javascript">matches(
  {
    shipTo: { state: state =&gt; [&quot;Michigan&quot;, &quot;Oregon&quot;].includes(state) },
    // ...other properties
  },
  userOrder
);
</code></pre>
<p>Here is the modification we have made to the <code>matches</code> function to accomplish
this feature:</p>
<pre><code class="language-javascript">const matches = (pattern, object) =&gt; {
  if (object === pattern) return true;

  if (typeof pattern === &quot;function&quot; &amp;&amp; pattern(object)) return true;

  if (isNil(pattern) || isNil(object)) return false;

  if (typeof pattern !== &quot;object&quot;) return false;

  return Object.entries(pattern).every(([key, value]) =&gt;
    matches(value, object[key])
  );
};
</code></pre>
<p>As a result of these improvements, the <code>matches</code> function can now handle a wider
range of patterns.</p>
<pre><code class="language-javascript">const user = {
  firstName: &quot;Oliver&quot;,
  address: { city: &quot;Miami&quot;, phoneNumber: &quot;389791382&quot; },
  cars: [{ brand: &quot;Ford&quot; }, { brand: &quot;Honda&quot; }],
};

matches({ cars: includes({ brand: &quot;Ford&quot; }) }, user); //true
matches({ firstName: startsWith(&quot;O&quot;) }, user); // true
</code></pre>
<p>Here, both <a href="https://ramdajs.com/docs/#includes">includes</a> and
<a href="https://ramdajs.com/docs/#startsWith">startsWith</a> are methods from Ramda and
they are both curried functions. We will be talking about <code>currying</code> of
functions in the upcoming section.</p>
<h2>Neeto's pure utility functions for array operations</h2>
<p>With the help of the <code>matches</code> function, it became easier for us to work on our
next task at hand: building utility functions that simplify array operations.</p>
<h3>*By functions</h3>
<p>Let's say we have an array of users:</p>
<pre><code class="language-javascript">const users = [
  {
    id: 1,
    name: &quot;Sam&quot;,
    age: 20,
    address: {
      street: &quot;First street&quot;,
      pin: 123456,
      contact: {
        phone: &quot;123-456-7890&quot;,
        email: &quot;sam@example.com&quot;,
      },
    },
  },
  {
    id: 2,
    name: &quot;Oliver&quot;,
    age: 40,
    address: {
      street: &quot;Second street&quot;,
      pin: 654321,
      contact: {
        phone: &quot;987-654-3210&quot;,
        email: &quot;oliver@example.com&quot;,
      },
    },
  },
];
</code></pre>
<p>If we need to retrieve the details of user with the name <code>Sam</code>, we will do it
like this in plain vanilla JS:</p>
<pre><code class="language-javascript">const sam = users.find(user =&gt; user.name === &quot;Sam&quot;);
</code></pre>
<p>Since we already have the <code>matches</code> function, we could easily create a utility
function that would return the same result as above while removing extra code.</p>
<p>That's how we came up with the <code>findBy</code> function that can be used to find the
first item that matches the given pattern from an array.</p>
<p>We defined <code>findBy</code> like this:</p>
<pre><code class="language-javascript">const findBy = (pattern, array) =&gt; array.find(item =&gt; matches(pattern, item));
</code></pre>
<p>Now we were able to rewrite our previous array operation as:</p>
<pre><code class="language-javascript">const sam = findBy({ name: &quot;Sam&quot; }, users);
</code></pre>
<p>It was also now possible for us to write nested conditions like these:</p>
<pre><code class="language-javascript">findBy({ age: 40, address: { pin: 654321 } }, users);
// returns details of the first user with age 40 whose pin is 654321
findBy({ address: { contact: { email: &quot;sam@example.com&quot; } } }, users);
// returns details of the first user whose contact email is &quot;sam@example.com&quot;
</code></pre>
<p>We adopted the concept of
<a href="https://javascript.info/currying-partials"><strong>currying</strong></a> from Ramda to shorten
our function definitions and their usage.</p>
<p>Currying is a technique in functional programming where a function that takes
multiple arguments is transformed into a sequence of functions, each taking a
single argument. Simply said, currying translates a function from callable as
<code>f(a, b, c)</code> into callable as <code>f(a)(b)(c)</code>. You can learn more about currying
and Ramda from our free
<a href="https://courses.bigbinaryacademy.com/learn-ramdajs/introduction/currying">Learn RamdaJS book</a>.</p>
<p>We wrapped the definition of <code>matches</code> inside the
<a href="https://ramdajs.com/docs/#curry">curry</a> function from Ramda as shown below:</p>
<pre><code class="language-javascript">const matches = curry((pattern, object) =&gt; {
  //...matches function logic
});
</code></pre>
<p>With this update, the <code>findBy</code> function could be simplified to:</p>
<pre><code class="language-javascript">const findBy = (pattern, array) =&gt; array.find(matches(pattern));
</code></pre>
<p>We also used <code>curry</code> wrapping for <code>findBy</code> function for the same reason:</p>
<pre><code class="language-javascript">const findBy = curry((pattern, array) =&gt; array.find(matches(pattern)));
</code></pre>
<p>Similar to <code>findBy</code> we also introduced the following functions to simplify
development:</p>
<ul>
<li><strong><code>findIndexBy(pattern, data):</code></strong> finds the first index of occurrence of an
item that matches the pattern from the given array.</li>
<li><strong><code>filterBy(pattern, data):</code></strong> returns the filtered array of items based on
pattern matching.</li>
<li><strong><code>findLastBy(pattern, data):</code></strong> finds the last item that matches the given
pattern.</li>
<li><strong><code>removeBy(pattern, data):</code></strong> removes all items that match the given pattern
from an array of items.</li>
<li><strong><code>countBy(pattern, data):</code></strong> returns the number of items that match the given
pattern.</li>
<li><strong><code>replaceBy(pattern, newItem, data):</code></strong> replaces all items that match the
given pattern with the given item.</li>
</ul>
<p>Here are some example usages of these functions:</p>
<pre><code class="language-javascript">findIndexBy({ name: &quot;Sam&quot; }, users);
//returns the array index of Sam in &quot;users&quot;

filterBy({ address: { street: &quot;First street&quot; } }, users);
//returns a list of &quot;users&quot; who lives on First street

removeBy({ name: &quot;Sam&quot; }, users); // removes Sam from &quot;users&quot;

countBy({ age: 20 }, users);
// returns the count of &quot;users&quot; who are exactly 20 years old.

findLastBy({ name: includes(&quot;e&quot;) }, users);
// returns the last user whose name contains the character 'e', from the array.

const newItem = { id: 2, name: &quot;John&quot; };
replaceBy({ name: &quot;Sam&quot; }, newItem, users);
/*
[
  { id: 2, name: &quot;John&quot; },
  { id: 2, name: &quot;Oliver&quot;, age: 40,
  //... Oliver's address attributes },
];
*/
</code></pre>
<h3>*ById functions</h3>
<p>Applications frequently rely on unique IDs for data retrieval. As a result, when
using <strong><code>By</code></strong> functions, pattern matching for the ID becomes necessary.</p>
<pre><code class="language-javascript">const defaultUser = findBy({ id: DEFAULT_USER_ID }, users);
</code></pre>
<p>To shorten this code, we developed a set of utility functions that can be
invoked directly based on the ID. Let us call them <code>ById</code> functions. With <code>ById</code>
functions, we can rewrite the previous code as:</p>
<pre><code class="language-javascript">const defaultUser = findById(DEFAULT_USER_ID, users);
</code></pre>
<p>Here are some of the <code>ById</code> functions we use:</p>
<ul>
<li><strong><code>findById(id, data):</code></strong> finds an object having the given <code>id</code> from an array.</li>
<li><strong><code>replaceById(id, newItem, data):</code></strong> returns a new array with the item having
the given <code>id</code> replaced with the given object.</li>
<li><strong><code>modifyById(id, modifier, data):</code></strong> applies a modifier function to the item
in an array that matches the given <code>id</code>. It then returns a new array where the
return value of the modifier function is placed in the index of the matching
item.</li>
<li><strong><code>findIndexById(id, data):</code></strong> finds the index of an item from an array of
items based on the <code>id</code> provided.</li>
<li><strong><code>removeById(id, data):</code></strong> returns a new array where the item with the given
<code>id</code> is removed.</li>
</ul>
<p>Here are a few examples:</p>
<pre><code class="language-javascript">findById(2, users); // returns the object with id=2 from &quot;users&quot;

const idOfItemToBeReplaced = 2;
const newItem = { id: 3, name: &quot;John&quot; };
replaceById(idOfItemToBeReplaced, newItem, users);
//[ { id: 1, name: &quot;Sam&quot;, age:20, ...}, { id: 3, name: &quot;John&quot; }]

const idOfItemToBeModified = 2;
const modifier = item =&gt; assoc(&quot;name&quot;, item.name.toUpperCase(), item);
modifyById(idOfItemToBeModified, modifier, users);
//[{ id: 1, name: &quot;Sam&quot;, ... }, { id: 2, name: &quot;OLIVER&quot;, ... }]

const idOfItemToBeRemoved = 2;
removeById(idOfItemToBeRemoved, users);
// [{ id: 1, name: &quot;Sam&quot;, ... }]
</code></pre>
<p><a href="https://courses.bigbinaryacademy.com/learn-ramdajs/association-methods/assoc"><strong>assoc</strong></a>
is a function from Ramda that makes a shallow clone of an object, setting or
overriding the specified property with the given value.</p>
<h2>Null-safe alternatives for pure functions</h2>
<p>The <code>By</code> and <code>ById</code> functions proved to be invaluable to us in improving the
code quality. However, when working with data in web applications, it is quite
common to come across scenarios where the data being processed can be
<code>null/undefined</code>. The above-mentioned implementations of the <code>By</code> and <code>ById</code>
functions will fail with an error if the <code>users</code> array passed into them is
<code>null/undefined</code>.</p>
<p>In such a case, to use the <code>filterBy</code> function, we need to adopt a method like
this:</p>
<pre><code class="language-javascript">users &amp;&amp; filterBy({ age: 20 }, users);
</code></pre>
<p>So we needed a fail-safe alternative that could be used in places where the data
array can be <code>null/undefined</code>. This null-safe alternative should avoid execution
&amp; return <code>users</code> if <code>users</code> is <code>null/undefined</code>. It should work the same as
<code>filterBy</code> otherwise.</p>
<p>Hence we created a <strong>wrapper function that would check for data nullity and
execute the child function conditionally</strong>. This is how we did it:</p>
<pre><code class="language-javascript">const nullSafe =
  func =&gt;
  (...args) =&gt; {
    const dataArg = args[func.length - 1];

    return isNil(dataArg) ? dataArg : func(...args);
  };
</code></pre>
<p>With the help of this <code>nullSafe</code> function, we created null-safe alternatives for
all our pure functions.</p>
<pre><code class="language-javascript">const _replaceById = nullSafe(replaceById);
const _modifyById = nullSafe(modifyById);
</code></pre>
<p>But with the <code>nullSafe</code> wrapping, currying ceased to work for these null-safe
alternative functions. To retain currying, we had to rewrite <code>nullSafe</code> using
the <a href="https://ramdajs.com/docs/#curryN">curryN</a> function from Ramda like this:</p>
<pre><code class="language-javascript">const nullSafe = func =&gt;
  curryN(func.length, (...args) =&gt; {
    const dataArg = args[func.length - 1];
    return isNil(dataArg) ? dataArg : func(...args);
  });
</code></pre>
<h2>Some other useful functions</h2>
<h3>keysToCamelCase</h3>
<p>Recursively converts the snake-cased object keys to camel case.</p>
<pre><code class="language-javascript">const snakeToCamelCase = string =&gt;
  string.replace(/(_\w)/g, letter =&gt; letter[1].toUpperCase());

const keysToCamelCase = obj =&gt;
  Object.fromEntries(
    Object.entries(obj).map(([key, value]) =&gt; [
      snakeToCamelCase(key),
      typeof value === &quot;object&quot; &amp;&amp; value !== null &amp;&amp; !Array.isArray(value)
        ? keysToCamelCase(value)
        : value,
    ])
  );

keysToCamelCase({
  first_name: &quot;Oliver&quot;,
  last_name: &quot;Smith&quot;,
  address: { city: &quot;Miami&quot;, phone_number: &quot;389791382&quot; },
});
/*
{ address: {city: 'Miami', phoneNumber: '389791382'},
  firstName: &quot;Oliver&quot;, lastName: &quot;Smith&quot;,
}
*/
</code></pre>
<h3>isNot</h3>
<p>Returns <code>true</code> if the given values (or references) are not equal. <code>false</code>
otherwise.</p>
<pre><code class="language-javascript">const isNot = curry((x, y) =&gt; x !== y);
</code></pre>
<p>Say, you have a task at hand - finding details about users, but specifically
excluding the user named &quot;Sam&quot;. In such a scenario, you can retrieve the
information as shown below:</p>
<pre><code class="language-javascript">filterBy({ name: name =&gt; name != &quot;Sam&quot; }, users);
</code></pre>
<p>But this could be made more readable and concise if we have a function that
finds the non-identical matches from <code>users</code> list. For this, you can use the
<code>isNot</code> function.</p>
<pre><code class="language-javascript">filterBy({ name: isNot(&quot;Sam&quot;) }, users);
// returns an array of all users except &quot;Sam&quot;
</code></pre>
]]></content>
    </entry>
  <entry>
      <title type="text"><![CDATA[Detecting component visibility changes while scrolling]]></title>
      <link rel="alternate" type="text/html" href="https://www.bigbinary.com/blog/how-to-detect-changes-in-component-visibility-when-scrolling"/>
      <link rel="enclosure" type="image/png" href="https://www.bigbinary.com/blog/images/social_preview_images/generated/how-to-detect-changes-in-component-visibility-when-scrolling.png"/>
      <id>https://www.bigbinary.com/blog/how-to-detect-changes-in-component-visibility-when-scrolling</id>
      <published>2022-09-27T00:00:00.000Z</published>
      <updated>2022-09-27T00:00:00.000Z</updated>
      <author>
        <name>Amaljith K</name>
        <uri>https://www.bigbinary.com/blog/authors/amaljith-k</uri>
      </author>
      <category term="JavaScript"/>
      <media:thumbnail url="https://www.bigbinary.com/blog/images/social_preview_images/generated/how-to-detect-changes-in-component-visibility-when-scrolling.png" width="1200" height="630"/>
      <summary type="text"><![CDATA[Learn how to detect an element being scrolled into and scrolled out of the parent element's visible area in React using IntersectionObserver.]]></summary>
      <content type="html" xml:base="https://www.bigbinary.com/blog/how-to-detect-changes-in-component-visibility-when-scrolling"><![CDATA[<p>When there is a need to display a large set of data, most of the web applications
split the whole set into several smaller chunks and then serve them on demand. This
technique is called pagination.</p>
<p>Earlier, pagination looked like this:</p>
<p><img src="https://user-images.githubusercontent.com/85148587/191435753-53aa1d13-3d55-42f2-b95d-922b6e0e3b7f.png" alt="image"></p>
<p>Here, loading the next set of data required the user to click on the next page button.</p>
<p>These days, we use the infinite scroll technique, which automatically loads the next set
of data when the user scrolls to the bottom of the list. This is more user-friendly:</p>
<p><img src="https://user-images.githubusercontent.com/85148587/191432751-89eef3dc-5c5e-4939-8150-38dc98cee262.gif" alt="image"></p>
<p>Several JS libraries are available to facilitate infinite scroll. But to quench
our curiosity about how things work under the hood, it is best to try to
implement it from scratch.</p>
<p>To implement infinite scroll, we need to know when the user has scrolled to the
bottom of the list to load the next page's data. To know if the user has reached
the bottom, we can watch the last element of the list. That is, when the list is
scrolled and the last element becomes visible, we know that we are at the
bottom.</p>
<p>Detecting the visibility of elements during scroll was a hard problem until
recently. We had to hook onto <code>onscroll</code> events of the element and check the
boundaries of the elements using
<a href="https://developer.mozilla.org/en-US/docs/Web/API/Element/getBoundingClientRect">getBoundingClientRect</a>
function.</p>
<p>Since <code>onscroll</code> event gets fired around 40-50 times per second, performing the
operations inside it will become expensive. Moreover, the <code>onscroll</code> function
gets executed from the main UI thread. All these together make our web
application sluggish.</p>
<p>But now, we have a much more performant alternative for this problem.
<a href="https://developer.mozilla.org/en-US/docs/Web/API/Intersection_Observer_API#browser_compatibility">All popular web browsers</a>
support a new API named
<a href="https://developer.mozilla.org/en-US/docs/Web/API/Intersection_Observer_API">IntersectionObserver</a>
from 2019 onwards.</p>
<p>The advantages of <code>IntersectionObserver</code> API are:</p>
<ul>
<li>It doesn't grab the resources from the UI thread. It accepts a callback
function that will be fired <strong>asynchronously</strong>.</li>
<li>The supplied callback is triggered only when a change in visibility is
detected. We can save 40-50 repetitions per second during the scroll.</li>
<li>We don't need to worry about maintaining boilerplate code for detecting the
boundaries &amp; calculating the visibility. We get all useful data as a parameter
to the callback function.</li>
</ul>
<p>The introduction of <code>IntersectionObserver</code> simplified a whole set of
requirements like:</p>
<ul>
<li>Infinite loading.</li>
<li>Improving page load time by not fetching resources (like images) that aren't
visible until the user scrolls to it. This is called lazy loading.</li>
<li>Track whether the user has scrolled to and viewed an ad posted on the web
page.</li>
<li>UX improvements like dimming animation for the components that aren't fully
visible.</li>
</ul>
<p>In this blog, we are going to discuss how we can use <code>IntersectionObserver</code> in a
React application as hooks.</p>
<h2>Creating a hook for detecting visibility changes</h2>
<p>We will create a custom hook that will update whenever the specified component
scrolls into view and scrolls out of view. Let us name the hook
<code>useIsElementVisible</code>. Obviously, it will accept a reference to the component of
which visibility need to be monitored as its argument.</p>
<p>It will have a state to store the visibility status of the specified element. It
will have a useEffect hook from which we will bind the <code>IntersectionObserver</code> to
the specified component.</p>
<p>Here is the basic implementation:</p>
<pre><code class="language-js">import { useEffect, useState } from &quot;react&quot;;

const useIsElementVisible = target =&gt; {
  const [isVisible, setIsVisible] = useState(false); // store visibility status

  useEffect(() =&gt; {
    // bind IntersectionObserver to the target element
    const observer = new IntersectionObserver(onVisibilityChange);
    observer.observe(target);
  }, [target]);

  // handle visibility changes
  const onVisibilityChange = entries =&gt; setIsVisible(entries[0].isIntersecting);

  return isVisible;
};

export default useIsElementVisible;
</code></pre>
<p>We can use <code>useIsElementVisible</code> like this:</p>
<pre><code class="language-jsx">const ListItem = () =&gt; {
  const elementRef = useRef(null); // to hold a reference to the component we need to track

  const isElementVisible = useIsElementVisible(elementRef.current);

  return (
    &lt;div ref={elementRef} id=&quot;list-item&quot;&gt;
      {/* your component jsx */}
    &lt;/div&gt;
  );
};
</code></pre>
<p>The component <code>ListItem</code> will get updated whenever the user scrolls to see
the div <code>&quot;list-item&quot;</code>. We can use the value of <code>isElementVisible</code> to load the
contents of the next page from a <code>useEffect</code> hook:</p>
<pre><code class="language-js">useEffect(() =&gt; {
  if (isElementVisible &amp;&amp; nextPageNotLoadedYet()) {
    loadNextPage();
  }
}, [isElementVisible]);
</code></pre>
<p><strong>This works in theory.</strong> But if you try it, you will notice that this doesn't
work as expected. We missed an edge case.</p>
<h2>The real-life edge case</h2>
<p>We use a <code>useRef</code> hook for referencing the <code>div</code>. During the initial render,
<code>elementRef</code> was just initialized with <code>null</code> as its value. So,
<code>elementRef.current</code> will be null and as a result, the call
<code>useIsElementVisible(elementRef.current)</code> won't attach our observer to the
element for the first time.</p>
<p>Unfortunately, useRef hook won't re-render when a value is set to it after DOM
is prepared. Also, there are no state updates or anything that requests a
re-render inside our example component. In short, our component will render only
once.</p>
<p>With these in place, <code>useIsElementVisible</code> will never get a reference to the
<code>&quot;list-item&quot;</code> div in our previous example.</p>
<p>But there is a workaround for our problem. We can force render the component
twice during the first mount.</p>
<p>To make it possible, we will add a dummy state. When our hook is called for the
first time (when <code>ListItem</code> mounts), we will update our state once, thereby
requesting React to repeat the component render steps again. During the second
render, we will already have our DOM ready and we will have the target element
attached to <code>elementRef</code>.</p>
<h2>Force re-rendering the component</h2>
<p>To keep our code clean and modular, let us create a dedicated custom hook for
managing force re-renders:</p>
<pre><code class="language-js">import { useState } from &quot;react&quot;;

const useForceRerender = () =&gt; {
  const [, setValue] = useState(0); // we don't need the value of this state.
  return () =&gt; setValue(value =&gt; value + 1);
};

export default useForceRerender;
</code></pre>
<p>Now, we can use it in our <code>useIsElementVisible</code> hook this way:</p>
<pre><code class="language-js">const useIsElementVisible = target =&gt; {
  const [isVisible, setIsVisible] = useState(false);

  const forceRerender = useForceRerender();

  useEffect(() =&gt; {
    forceRerender();
  }, []);

  // previous code to register observer

  return isIntersecting;
};
</code></pre>
<p>With this change, our hook is now self-sufficient and fully functional. In our
<code>ListItem</code> component, <code>isElementVisible</code> will update to <code>false</code> and trigger
component re-render whenever our <code>&quot;list-item&quot;</code> div goes outside visible zone
during scroll. It will also update to <code>true</code> when it is scrolled into visibility
again.</p>
<h2>Possible improvements on useIsElementVisible hook</h2>
<p>The <code>useIsElementVisible</code> hook shown in the previous sections serves only the
basic use case. It is not optimal to use in a production world.</p>
<p>These are the scopes for improvement for our hook:</p>
<ul>
<li>We can let in
<a href="https://developer.mozilla.org/en-US/docs/Web/API/Intersection_Observer_API#intersection_observer_options">configurations for IntersectionObserver</a>
to customize its behavior.</li>
<li>We can prevent initializing observer when the <code>target</code> is not ready yet (when
it is <code>null</code>).</li>
<li>We can add a cleanup function to stop observing the element when our component
gets unmounted.</li>
</ul>
<p>Here is what the optimum code for the hook should look like:</p>
<pre><code class="language-js">import { useEffect, useState } from &quot;react&quot;;

export const useForceRerender = () =&gt; {
  const [, setValue] = useState(0); // we don't need the value of this state.
  return () =&gt; setValue(value =&gt; value + 1);
};

export const useIsElementVisible = (target, options = undefined) =&gt; {
  const [isVisible, setIsVisible] = useState(false);
  const forceUpdate = useForceRerender();

  useEffect(() =&gt; {
    forceUpdate(); // to ensure that ref.current is attached to the DOM element
  }, []);

  useEffect(() =&gt; {
    if (!target) return;

    const observer = new IntersectionObserver(handleVisibilityChange, options);
    observer.observe(target);

    return () =&gt; observer.unobserve(target);
  }, [target, options]);

  const handleVisibilityChange = ([entry]) =&gt;
    setIsVisible(entry.isIntersecting);

  return isVisible;
};
</code></pre>
]]></content>
    </entry>
  <entry>
      <title type="text"><![CDATA[Copying an element to the clipboard as an image in JS]]></title>
      <link rel="alternate" type="text/html" href="https://www.bigbinary.com/blog/copy-generated-image-clipboard-javascript"/>
      <link rel="enclosure" type="image/png" href="https://www.bigbinary.com/blog/images/social_preview_images/generated/copy-generated-image-clipboard-javascript.png"/>
      <id>https://www.bigbinary.com/blog/copy-generated-image-clipboard-javascript</id>
      <published>2021-12-22T00:00:00.000Z</published>
      <updated>2021-12-22T00:00:00.000Z</updated>
      <author>
        <name>Rishi Mohan</name>
        <uri>https://www.bigbinary.com/blog/authors/rishimohan</uri>
      </author>
      <category term="JavaScript"/>
      <media:thumbnail url="https://www.bigbinary.com/blog/images/social_preview_images/generated/copy-generated-image-clipboard-javascript.png" width="1200" height="630"/>
      <summary type="text"><![CDATA[Learn how to generate an image from an element and copy it to the clipboard using native browser APIs that work in Safari and Chrome]]></summary>
      <content type="html" xml:base="https://www.bigbinary.com/blog/copy-generated-image-clipboard-javascript"><![CDATA[<p>While most browsers support <code>navigator.clipboard.writeText</code> property
which is used to write a string to the clipboard,
it gets a little tricky when you want
to copy an image to the clipboard.
There's no common way to copy
a blob image to the clipboard for all browsers.</p>
<p>While working on an app that <a href="https://kizie.co/tools/twitter-image">generates image from a tweet</a>
and lets you save it, I wanted to add the ability to
let users copy the image directly to clipboard.
The implementation seemed simple until
I started working on it.
The problem is that browsers have different specs
for writing a blob to the clipboard.</p>
<p>In this article, we'll learn to write a function
that generates an image from an element
and saves it in the clipboard.
Also since browsers handle things differently,
we'll see how to copy an image to the clipboard
work on Safari and Chrome(and its variants).</p>
<h2>Things to know before we start</h2>
<ul>
<li>Unfortunately, there's no way(or I haven't found one)
to copy a blob image to clipboard in Firefox.</li>
<li>There's no way to copy multiple images
in one go.</li>
</ul>
<h2>Creating an image from an element</h2>
<p>Below is a function that utilises <code>domtoimage</code> library
to return an image blob from the element <code>screenshotRef.current</code>.</p>
<p>We can use <code>yarn add dom-to-image</code> to install the package.</p>
<p>Instead of <code>screenshotRef.current</code> used in the function,
we can pass the <code>id</code> or <code>className</code>
of the element we want to generate the image from.
More about how domtoimage works
can be learned <a href="https://github.com/tsayen/dom-to-image">here</a>.</p>
<pre><code class="language-js">const snapshotCreator = () =&gt; {
  return new Promise((resolve, reject) =&gt; {
    try {
      const scale = window.devicePixelRatio;
      const element = screenshotRef.current; // You can use element's ID or Class here
      domtoimage
        .toBlob(element, {
          height: element.offsetHeight * scale,
          width: element.offsetWidth * scale,
          style: {
            transform: &quot;scale(&quot; + scale + &quot;)&quot;,
            transformOrigin: &quot;top left&quot;,
            width: element.offsetWidth + &quot;px&quot;,
            height: element.offsetHeight + &quot;px&quot;,
          },
        })
        .then((blob) =&gt; {
          resolve(blob);
        });
    } catch (e) {
      reject(e);
    }
  });
};
</code></pre>
<h2>Copying an image to clipboard in Safari</h2>
<p>First, we'll need a check to see if the browser
is Safari. You can use below check to detect Safari.</p>
<pre><code class="language-js">const isSafari = /^((?!chrome|android).)*safari/i.test(
  navigator?.userAgent
);
</code></pre>
<p>Now that we have the check, we can use the function
to copy the image to clipboard.</p>
<pre><code class="language-js">const copyImageToClipBoardSafari = () =&gt; {
  if(isSafari) {
    navigator.clipboard
      .write([
        new ClipboardItem({
          &quot;image/png&quot;: new Promise(async (resolve, reject) =&gt; {
            try {
              const blob = await snapshotCreator();
              resolve(new Blob([blob], { type: &quot;image/png&quot; }));
            } catch (err) {
              reject(err);
            }
          }),
        }),
      ])
      .then(() =&gt;
        // Success
      )
      .catch((err) =&gt;
        // Error
        console.error(&quot;Error:&quot;, err)
      );
  }
}
</code></pre>
<p>We're using <code>navigation.clipboard.write</code> property
to write an image blob to clipboard. Inside it,
we're creating a new ClipboardItem from the blob
of the element which is generated from <code>snapshotCreator()</code>
function which we created in first step.</p>
<h2>Copying an image to clipboard in other browsers</h2>
<p>Since this method doesn't work in Firefox, we'll need a check
to make sure we're not running it on Firefox.
Below condition takes care of that.</p>
<pre><code class="language-js">const isNotFirefox = navigator.userAgent.indexOf(&quot;Firefox&quot;) &lt; 0;
</code></pre>
<p>Now that we have the check, we'll use
the same technique as we used for Safari,
but this time we'll need to ask the browser
for the <code>navigator</code> permissions.</p>
<p>Below is the function that does that
and then copies the blob image to the clipboard
in Chrome browser and its variants.</p>
<pre><code class="language-js">const copyImageToClipBoardOtherBrowsers = () =&gt; {
  if(isNotFirefox) {
    navigator?.permissions
      ?.query({ name: &quot;clipboard-write&quot; })
      .then(async (result) =&gt; {
        if (result.state === &quot;granted&quot;) {
          const type = &quot;image/png&quot;;
          const blob = await snapshotCreator();
          let data = [new ClipboardItem({ [type]: blob })];
          navigator.clipboard
            .write(data)
            .then(() =&gt; {
              // Success
            })
            .catch((err) =&gt; {
              // Error
              console.error(&quot;Error:&quot;, err)
            });
        }
    });
  } else {
    alert(&quot;Firefox does not support this functionality&quot;);
  }
}
</code></pre>
<p>The difference is not much except that
Chrome and its variants require asking for
<code>navigator.permissions</code> before we can
write the blob content to clipboard.
The above function uses the same <code>snapshotCreator()</code>
function from the first step to
create an image from the element.</p>
<p>We can combine both the functions
together to have this functionality work
in Safari and Chrome browser.
You can check how it works on <a href="https://kizie.co/tools/twitter-image">this page</a>,
just click on &quot;Copy Image&quot; button
and then you'll be able paste the image anywhere.</p>
]]></content>
    </entry>
  <entry>
      <title type="text"><![CDATA[Debug Node.js app running in a Docker container]]></title>
      <link rel="alternate" type="text/html" href="https://www.bigbinary.com/blog/debug-nodejs-app-running-in-a-docker-container"/>
      <link rel="enclosure" type="image/png" href="https://www.bigbinary.com/blog/images/social_preview_images/generated/debug-nodejs-app-running-in-a-docker-container.png"/>
      <id>https://www.bigbinary.com/blog/debug-nodejs-app-running-in-a-docker-container</id>
      <published>2021-05-25T00:00:00.000Z</published>
      <updated>2021-05-25T00:00:00.000Z</updated>
      <author>
        <name>Preveen Raj</name>
        <uri>https://www.bigbinary.com/blog/authors/preveenraj</uri>
      </author>
      <category term="JavaScript"/>
      <media:thumbnail url="https://www.bigbinary.com/blog/images/social_preview_images/generated/debug-nodejs-app-running-in-a-docker-container.png" width="1200" height="630"/>
      <summary type="text"><![CDATA[By using the Docker VSCode extension and VSCode-debug launch configuration, debugging the node.js app in docker can be achieved.]]></summary>
      <content type="html" xml:base="https://www.bigbinary.com/blog/debug-nodejs-app-running-in-a-docker-container"><![CDATA[<p>A Docker container is a standard unit of software that packages up code and all
its dependencies so the application runs quickly and reliably from one computing
environment to another. One who have dealt with it would have wanted to debug
their application like they do it normally, but it often feels difficult to
configure. Let's do it in a simple way.</p>
<h3>1. Install <a href="https://marketplace.visualstudio.com/items?itemName=ms-azuretools.vscode-docker">Docker Extension</a> for VSCode</h3>
<img width="1791" alt="VSCode_Docker_Extension" src="https://www.bigbinary.com/blog/images/images_used_in_blog/2021/debug-nodejs-app-running-in-a-docker-container/vscode_docker_extension.png">
<p>This extension will be responsible for VSCode to debug an app inside the Docker
container. It will also enable us to manage Docker images and containers.</p>
<h3>2. Expose port 9229 in the docker-compose.yml</h3>
<p>Port <code>9229</code> is the default node.js debugging port.</p>
<p>This will bind the port of the container with that of the host machine enabling
the VSCode debugger to attach to the port.</p>
<pre><code class="language-yml">version: &quot;3.9&quot;
services:
  backend:
    container_name: nodejs
    restart: always
    build:
      context: .
    ports:
      - &quot;80:3000&quot;
      - &quot;5678:5678&quot;
      - &quot;9229:9229&quot;
    command: yarn dev
</code></pre>
<h5>OR</h5>
<blockquote>
<p>If you are directly running the app from command line, then you can append:
<code>-p 9229:9229</code> to the docker-run command. Example:</p>
</blockquote>
<pre><code class="language-bash">docker run -d -p 80:3000 -p 9229:9229 node:15.0.1-alpine
</code></pre>
<h3>3. Add the inspect switch to the npm script</h3>
<pre><code class="language-bash">nodemon --inspect=0.0.0.0:9229 --watch server server/bin/www
</code></pre>
<p>Make sure you add the address and port to the inspect switch. When started with
the --inspect switch, a node.js process listens for a debugging client. By
default, it will listen to the host and port <code>127.0.0.1:9229</code>. For Docker, we
would have to update it to <code>0.0.0.0:9229</code>.</p>
<h3>4. Create a VSCode launch.json</h3>
<p>You can generate a <code>launch.json</code> from the Debug tab of VSCode. Click on the drop
down and select <strong>Add Configuration</strong>.</p>
<img width="381" alt="VSCode_Debugger" src="https://www.bigbinary.com/blog/images/images_used_in_blog/2021/debug-nodejs-app-running-in-a-docker-container/vscode_debugger.png">
<p>This action would generate a default JSON configuration. Replace the content
with the below:</p>
<pre><code class="language-JSON">{
  &quot;version&quot;: &quot;0.2.0&quot;,
  &quot;configurations&quot;: [
    {
      &quot;name&quot;: &quot;Docker: Attach to Node&quot;,
      &quot;type&quot;: &quot;node&quot;,
      &quot;request&quot;: &quot;attach&quot;,
      &quot;restart&quot;: true,
      &quot;port&quot;: 9229,
      &quot;address&quot;: &quot;localhost&quot;,
      &quot;localRoot&quot;: &quot;${workspaceFolder}&quot;,
      &quot;remoteRoot&quot;: &quot;/usr/src/app&quot;,
      &quot;protocol&quot;: &quot;inspector&quot;
    }
  ]
}
</code></pre>
<h3>5. Start the docker container and attach the debugger.</h3>
<p>After your Docker container has been successfully launched, you can attach the
debugger to it at any time by clicking the play button in the same Debug tab
where we built the <code>launch.json</code> configuration.</p>
<p>VSCode will now adjust the color of its bottom status bar to indicate that it is
in debugging mode, and you are ready to go.</p>
<p>You can put breakpoints anywhere in your file and get your work done faster and
better than before.</p>
<h4>Bonus Tip</h4>
<blockquote>
<p>Since the debugger has full access to the Node.js execution environment, a
malicious agent who can bind to this port will be able to execute arbitrary
code on the Node.js process's behalf. It is important to understand the
security implications of exposing the debugger port on public and private
networks. Make sure you are not exposing the debugging port in production
environment.</p>
</blockquote>
]]></content>
    </entry>
  <entry>
      <title type="text"><![CDATA[Helping Babel move to ES Modules]]></title>
      <link rel="alternate" type="text/html" href="https://www.bigbinary.com/blog/helping-babel-move-to-esm"/>
      <link rel="enclosure" type="image/png" href="https://www.bigbinary.com/blog/images/social_preview_images/generated/helping-babel-move-to-esm.png"/>
      <id>https://www.bigbinary.com/blog/helping-babel-move-to-esm</id>
      <published>2021-05-18T00:00:00.000Z</published>
      <updated>2021-05-18T00:00:00.000Z</updated>
      <author>
        <name>Karan Sapolia Sharma</name>
        <uri>https://www.bigbinary.com/blog/authors/karansapolia</uri>
      </author>
      <category term="JavaScript"/>
      <media:thumbnail url="https://www.bigbinary.com/blog/images/social_preview_images/generated/helping-babel-move-to-esm.png" width="1200" height="630"/>
      <summary type="text"><![CDATA[Migrating from CommonJS to ESM in babel internals and the challenges faced]]></summary>
      <content type="html" xml:base="https://www.bigbinary.com/blog/helping-babel-move-to-esm"><![CDATA[<p>The Babel project recently moved to running builds on Node.js 14, which means
that Babel can now use
<a href="https://nodejs.org/api/esm.html#esm_modules_ecmascript_modules">ES Modules</a>
(ESM) instead of CommonJS (CJS) to import/export modules for internal scripts.</p>
<p>Also, with the upcoming Babel 8.0.0 release, the team is aiming to
<a href="https://github.com/babel/babel/issues/11701">ship Babel as native ES Modules</a>.
With this goal in mind, the team is shifting all CommonJS imports/exports to ESM
ones. This is where I got the opportunity to contribute to Babel recently.</p>
<h2>Why ES Modules though?</h2>
<p>For a very long time, JS (or ECMAScript) did not have a standardized module
import/export syntax. Various independent packages introduced formats to help
work with modules in JS. Most browsers used the AMD API (Asynchronous Module
Definition) implemented in the Require.js package, which had its own syntax and
quirks.</p>
<p>CommonJS on the other hand was the standard used by Node.js, and it was no less
quirky. Inconsistent formatting and
<a href="https://nodejs.org/api/esm.html#esm_interoperability_with_commonjs">poor interoperability between packages</a>
irked JS developers enough to demand a standard format.</p>
<p>Lately, the ECMAScript Standardization body (TC39) has adopted ESM (ECMAScript
modules) as the standard format for Javascript. Most web browsers already
support this format and Node.js 14 now provides
<a href="https://nodejs.org/api/esm.html#esm_modules_ecmascript_modules">stable support for it</a>.</p>
<h2>The task at hand</h2>
<p>The next task was to convert all internal top-level scripts from using CommonJS
to ESM. The finer details of the implementation, along with interoperability
issues with non-ESM files, would trouble CommonJS for some time though.</p>
<p>The simplest of changes was to replace <code>require()</code> statements in each file with
<code>import</code> statements. For example, files starting like:</p>
<pre><code class="language-javascript">&quot;use strict&quot;;

const plumber = require(&quot;gulp-plumber&quot;);
const through = require(&quot;through2&quot;);
const chalk = require(&quot;chalk&quot;);
</code></pre>
<p>would be modified like here:</p>
<pre><code class="language-javascript">import plumber from &quot;gulp-plumber&quot;;
import through from &quot;through2&quot;;
import chalk from &quot;chalk&quot;;
</code></pre>
<p>to allow modules to be imported as ES modules.</p>
<p>In the above example also note that because ES modules are in strict mode by
default, so <code>&quot;use strict&quot;;</code> declarations were removed from the beginning of
these top-level scripts.</p>
<p>Almost all current NPM packages are CommonJS packages, exposing their
functionalities using the <code>module.exports</code> syntax.</p>
<p>In case a file/package exports more than one value, we need to use named imports
instead:</p>
<pre><code class="language-javascript">import { chalk } from &quot;chalk&quot;;
</code></pre>
<p>Where the default export object from a CommonJS module was named differently, it
had to be aliased during import to avoid breaking pre-existing variables' names
in the files being converted to ESM. For example,</p>
<pre><code class="language-javascript">const rollupBabel = require(&quot;@rollup/plugin-babel&quot;).default;
</code></pre>
<p>had to be replaced with:</p>
<pre><code class="language-javascript">import { babel as rollupBabel } from &quot;@rollup/plugin-babel&quot;;
</code></pre>
<p>so we could keep using the variable <code>rollupBabel</code> in the file.</p>
<p>For instances where <code>require()</code> statements needed to be replaced by the dynamic
<code>import()</code> statements</p>
<pre><code class="language-javascript">const getPackageJson = (pkg) =&gt; require(join(packageDir, pkg, &quot;package.json&quot;));

// replaced by
const getPackageJson = (pkg) =&gt; import(join(packageDir, pkg, &quot;package.json&quot;));
</code></pre>
<p>the subsequent calls everywhere now needed to be awaited:</p>
<pre><code class="language-javascript">   .forEach(id =&gt; {
      const { name, description } = getPackageJson(id);
   })

   //await added
   .forEach(id =&gt; {
      const { name, description } = await getPackageJson(id);
   })
</code></pre>
<p>Other things like importing JSON modules are currently only supported in
CommonJS mode.
<a href="https://nodejs.org/api/esm.html#esm_no_json_module_loading">Those imports were left as-is</a>.</p>
<h2>Blockers</h2>
<p>With all the changes made and committed, we bumped into the next big roadblock:
package dependencies. Babel uses Yarn 2 internally, and particularly the PnP
feature of Yarn 2. Unfortunately, the ESM loader API was experimental at the
time and not being used by PnP. The Babel and Yarn teams
<a href="https://github.com/babel/babel/pull/12296#discussion_r546301877">coordinated to implement it</a>
soon after.</p>
<p>Similarly, Jest has its own custom loader for ESM, which meant it could not
support testing ESM modules with Babel.
<a href="https://github.com/facebook/jest/issues/9430">That issue</a> was side-stepped for
the time being.</p>
<h2>Network effects</h2>
<p>The good thing about the whole grind of shifting from CommonJS to ESM is that a
lot of other major packages are also considering and implementing ESM support.
The shift to ESM-only by Babel is already building confidence in others to do
the same. Special thanks to the Babel maintainers for setting a great example
and
<a href="https://twitter.com/NicoloRibaudo/status/1356030492546650115?s=20">encouraging others to move to ESM</a>.</p>
<h2>Conclusion</h2>
<p>All told, it was a great experience adding a new feature into a well-maintained
and widely-used package. The biggest lesson from this has to be how changes made
in Babel affect and influence other major packages, and how maintainers of
various major open source packages work in tandem to avoid breaking each other's
code. It is a very open and collaborative ecosystem with people discussing and
working through github issues, comments, and even twitter threads.</p>
<p>Check out the <a href="https://github.com/babel/babel/pull/12296">pull request</a> for more
details.</p>
]]></content>
    </entry>
  <entry>
      <title type="text"><![CDATA[Prettier's Prose Wrap and eslint maximum-line-length error]]></title>
      <link rel="alternate" type="text/html" href="https://www.bigbinary.com/blog/prettier-prose-wrap-option"/>
      <link rel="enclosure" type="image/png" href="https://www.bigbinary.com/blog/images/social_preview_images/generated/prettier-prose-wrap-option.png"/>
      <id>https://www.bigbinary.com/blog/prettier-prose-wrap-option</id>
      <published>2021-02-09T00:00:00.000Z</published>
      <updated>2021-02-09T00:00:00.000Z</updated>
      <author>
        <name>Mazahir B Haroon</name>
        <uri>https://www.bigbinary.com/blog/authors/mazahir-b-haroon</uri>
      </author>
      <category term="JavaScript"/>
      <media:thumbnail url="https://www.bigbinary.com/blog/images/social_preview_images/generated/prettier-prose-wrap-option.png" width="1200" height="630"/>
      <summary type="text"><![CDATA[A walk-through about prettier's proseWrap option and eslint maximum-line-length error]]></summary>
      <content type="html" xml:base="https://www.bigbinary.com/blog/prettier-prose-wrap-option"><![CDATA[<p>If you go through the Prettier's Prose Wrap documentation, you can see that it
provides 3 options, that is</p>
<ul>
<li><code>&quot;always&quot;</code> - Wrap prose if it exceeds the print width.</li>
<li><code>&quot;never&quot;</code> - Do not wrap prose.</li>
<li><code>&quot;preserve&quot;</code> - Wrap prose as-is. (First available in v1.9.0)</li>
</ul>
<p>Now, this does not exactly give a clear idea on what each feature does, and it
could be a little confusing especially between the <code>&quot;never&quot;</code> and <code>&quot;preserve&quot;</code>
options.</p>
<p>In the below video we walk you through these options and tries to get you a
clear idea on Prettier's Prose Wrap and its use-case.</p>
<div class="youtube-video-container">
  <p><a href="https://www.youtube.com/watch?v=2LN3JfopqTY"><img src="https://img.youtube.com/vi/2LN3JfopqTY/hqdefault.jpg" alt="Watch on YouTube" width="480" height="360"></a><br><a href="https://www.youtube.com/watch?v=2LN3JfopqTY">Watch on YouTube</a></p>
</div>
<h2>Links to the pages mentioned in the above video</h2>
<ul>
<li><a href="https://prettier.io/docs/en/options.html#prose-wrap">Prose Wrap Documentation</a></li>
<li><a href="https://prettier.io/docs/en/option-philosophy.html">Prettier's Philosophy</a></li>
<li><a href="https://prettier.io/playground/">Prettier's Playground</a></li>
<li><a href="https://github.com/isaacs/github/issues/1013">Github comments not compliant with GFM soft line breaks?</a></li>
</ul>
]]></content>
    </entry>
  <entry>
      <title type="text"><![CDATA[Migrating Gumroad from RequireJS to webpack]]></title>
      <link rel="alternate" type="text/html" href="https://www.bigbinary.com/blog/migrating-gumroad-from-requirejs-to-webpack"/>
      <link rel="enclosure" type="image/png" href="https://www.bigbinary.com/blog/images/social_preview_images/generated/migrating-gumroad-from-requirejs-to-webpack.png"/>
      <id>https://www.bigbinary.com/blog/migrating-gumroad-from-requirejs-to-webpack</id>
      <published>2018-12-12T00:00:00.000Z</published>
      <updated>2018-12-12T00:00:00.000Z</updated>
      <author>
        <name>Sharang Dashputre</name>
        <uri>https://www.bigbinary.com/blog/authors/sharang</uri>
      </author>
      <category term="JavaScript"/>
      <media:thumbnail url="https://www.bigbinary.com/blog/images/social_preview_images/generated/migrating-gumroad-from-requirejs-to-webpack.png" width="1200" height="630"/>
      <summary type="text"><![CDATA[How we migrated from RequireJS to webpack and Bower to NPM in Gumroad in order to simplify the build process while using modern tools]]></summary>
      <content type="html" xml:base="https://www.bigbinary.com/blog/migrating-gumroad-from-requirejs-to-webpack"><![CDATA[<p><em>BigBinary has been working with <a href="https://gumroad.com">Gumroad</a> for a while.
Following blog post has been posted with permission from Gumroad and we are very
grateful to <a href="https://twitter.com/shl">Sahil</a> for allowing us to discuss the work
in such an open environment.</em></p>
<p>This application is a JavaScript-heavy application as most consumer-oriented
applications are these days. We recently changed the JavaScript build system for
Gumroad from <a href="https://requirejs.org/">RequireJS</a> to
<a href="https://webpack.js.org/">webpack</a>. We'd like to talk about how we went about
doing this.</p>
<p>Gumroad's web application is built using Ruby on Rails. The project was started
way back in 2011 as
<a href="https://news.ycombinator.com/item?id=2406614">this hacker news post</a> suggests.
When we began working on the code it was building JavaScript assets through two
systems <a href="https://github.com/rails/sprockets">Sprockets</a> and RequireJS. From what
we could tell, all the code which was using a new(at the time) frontend
framework was processed by RequireJS first and then sprockets whereas the
JavaScript files which are usually present under <code>app/javascrips/assets</code> and
<code>vendor/assets/javascripts</code> in a typical Rails application were present as well
but they were not being processed by RequireJS. Also, there were some libraries
which were sourced using <a href="https://bower.io/">Bower</a>.</p>
<p>We were tasked with the work of migrating the RequireJS build system over to
webpack and replacing Bower with NPM. The reason behind this was that we wanted
to use newer tools with wider community support. Another reason was that we
wanted to be able to take advantage of all the goodies that webpack comes with
though that was not a strong motivation at that point.</p>
<p>We decided to break down the task into small pieces which could be worked on in
iterations and, more importantly, could be shipped in iterations. This would
enable us to work on other tasks in the application in parallel and not be
blocked on a big chunk of work. Keeping that in mind we split the task in three
different steps.</p>
<p>Step 1: Migrate from RequireJS to webpack with the minimal amount of changes in
the actual code.</p>
<p>Step 2: Use NPM packages in place of Bower components.</p>
<p>Step 3: Use NPM packages in place of libraries present under
<code>vendor/assets/javascripts</code>.</p>
<h2>Step 1: Migrate from RequireJS to webpack with the minimal amount of changes in the actual code</h2>
<p>The first thing we did here was create a new <code>webpack.config.js</code> configuration
file which would be used by webpack. We did our best to accurately translate the
configuration from the RequireJS configuration file using multiple resources
available online.</p>
<p>Here is how most JavaScript files which were to be processed by RequireJS looked
like.</p>
<pre><code class="language-javascript">&quot;use strict&quot;;

define([&quot;braintree&quot;, &quot;$app/ui/product/edit&quot;, &quot;$app/data/product&quot;], function (
  Braintree,
  ProductEditUI,
  ProductData
) {
  // Do something with Braintree, ProductEditUI, and ProductData
});
</code></pre>
<p>As you can see, the code did not use the newer
<a href="https://developer.mozilla.org/en-US/docs/Web/JavaScript/Reference/Statements/import">import</a>
statements which you'd see in comparatively newer JavaScript code. As we've
mentioned earlier, our goal was to have minimal code changes so we did not want
to change to <code>import</code> just yet. Luckily for us, webpack supports the
<a href="https://github.com/amdjs/amdjs-api/wiki/AMD#define-function-">define API</a> for
specifying dependencies. This meant that we would not need to change how
dependencies were specified in any of the JavaScript files.</p>
<p>In this step we also changed the build system configuration (The
webpack.config.js file in this case) to use NPM packages where possible instead
of using libraries from the <code>vendor/</code> directory. This meant that we would need
to have aliases in place for instances where the package name was different from
the names we had aliased the libraries to.</p>
<p>For example, this is how the 'braintree' alias was set earlier in order to refer
to the Braintree SDK. Now all the code had to do was to mention that <code>braintree</code>
was a dependency.</p>
<pre><code class="language-javascript">require.config({
  paths: {
    braintree: &quot;/vendor/assets/javascripts/braintree-2.16.0&quot;,
  },
});
</code></pre>
<p>With the change to use the NPM package in place of the JavaScript file the
dependency sourcing did not work as expected because the NPM package name was
'braintree-web' and the source code was trying to load 'braintree' which was not
known to the build system(webpack). In order to avoid making changes to source
code we used the
<a href="https://webpack.js.org/configuration/resolve/#resolve-alias">&quot;alias&quot; feature</a>
provided by webpack as shown below.</p>
<pre><code class="language-javascript">module.exports = {
  resolve: {
    alias: {
      braintree: &quot;braintree-web&quot;,
    },
  },
};
</code></pre>
<p>We did this for all the dependencies which had been given an alias in the
RequireJS configuration and we got dependency resolution to work as expected.</p>
<p>As a part of this step, we also created a new common chunk and used it to
improve caching. You can read more about this feature
<a href="https://webpack.js.org/plugins/split-chunks-plugin/#split-chunks-example-1">here</a>.
Note that we would tweak this iteratively later but we thought it would be good
to get started with the basic configuration right away.</p>
<h2>Step 2: Use NPM packages in place of Bower components</h2>
<p>Another goal of the migration was to remove Bower so as to make the build system
simpler. The first reason behind this was that all Bower packages which we were
using were available as NPM packages. The second reason was that Bower itself is
recommending users to migrate to Yarn/webpack for a while now.</p>
<p>What we did here was simple. We removed Bower and the Bower configuration file.
Then, we sourced the required Bower components as NPM packages instead by adding
them to <code>package.json</code>. We also removed the aliases added to source them from
the webpack configuration.</p>
<p>For example, here's the change required to the configuration file after sourcing
<code>clipboard</code> as an NPM package instead of a Bower component.</p>
<pre><code class="language-diff">resolve: {
  alias: {
    // Other Code

    $app:           path.resolve(__dirname, '../../app/javascript'),
    $lib:           path.resolve(__dirname, '../../lib/assets/javascripts')
-   clipboard:      path.resolve(__dirname, '../../vendor/assets/javascripts/clipboard.min.js')
  }
}
</code></pre>
<h2>Step 3: Use NPM packages in place of libraries present under <code>vendor/assets/javascripts</code></h2>
<p>We had a lot of javascript libraries present under <code>vendor/assets/javascripts</code>
which were sourced in the required javascript files. We deleted those files from
the project and sourced them as NPM packages instead. This way we could have
better visibility and control over the versions of these packages.</p>
<p>As part of this migration we also did some asset-related cleanups. These
included removing unused JavaScript files, including JavaScript files only where
required instead of sourcing them into the global scope, etc.</p>
<p>We were continuously measuring the performance of the application before and
after applying changes to make sure that we were not worsening the performance
during the migration. In the end, we found that we had improved the page load
speeds by an average of 2%. Note that this task was not undertaken to improve
the performance of the application. We are now planning to leverage webpack
features and try to improve on this metric further.</p>
]]></content>
    </entry>
  <entry>
      <title type="text"><![CDATA[Optimize Google map multi-route loading with B-spline]]></title>
      <link rel="alternate" type="text/html" href="https://www.bigbinary.com/blog/using-bspline-curves-to-draw-sampled-route-points-on-google-maps"/>
      <link rel="enclosure" type="image/png" href="https://www.bigbinary.com/blog/images/social_preview_images/generated/using-bspline-curves-to-draw-sampled-route-points-on-google-maps.png"/>
      <id>https://www.bigbinary.com/blog/using-bspline-curves-to-draw-sampled-route-points-on-google-maps</id>
      <published>2018-12-04T00:00:00.000Z</published>
      <updated>2018-12-04T00:00:00.000Z</updated>
      <author>
        <name>Ashish Gaur</name>
        <uri>https://www.bigbinary.com/blog/authors/ashish</uri>
      </author>
      <category term="JavaScript"/>
      <media:thumbnail url="https://www.bigbinary.com/blog/images/social_preview_images/generated/using-bspline-curves-to-draw-sampled-route-points-on-google-maps.png" width="1200" height="630"/>
      <summary type="text"><![CDATA[Optimize loading multiple routes on Google map using B-spline]]></summary>
      <content type="html" xml:base="https://www.bigbinary.com/blog/using-bspline-curves-to-draw-sampled-route-points-on-google-maps"><![CDATA[<p>Applications use Google maps for showing routes from point A to B. For one of
our clients we needed to show delivery routes on Google maps so that user can
select multiple deliveries and then consolidate them as one single delivery.
This meant we needed to show around 30 to 500 deliveries on a single map.</p>
<h2>Using Google Map polylines</h2>
<p>We used polylines to draw individual routes on Google maps.</p>
<p>Polyline is composed of line segments connecting a list of points on the map.
The more points we use for drawing a polyline the more detailed the final curve
will be. Here's how we added route points to the map.</p>
<pre><code class="language-javascript">// List of latitude and longitude
let path = points.map(point =&gt; [point.lat, point.lng]);

let route_options = {
  path: path,
  strokeColor: color,
  strokeOpacity: 1.0,
  strokeWeight: mapAttributes.strokeWeight || 3,
  map: map, // google.maps.Map
};

new google.maps.Polyline(route_options);
</code></pre>
<p>Here's an example of a polyline on a Google map. We used 422 latitude and
longitude points to draw these routes which makes it look more contiguous.</p>
<p><img src="https://www.bigbinary.com/blog/images/images_used_in_blog/2018/using-bspline-curves-to-draw-sampled-route-points-on-google-maps/polyline_example.png" alt="Polyline example"></p>
<p>We needed to show 200 deliveries in that map. On an average a delivery contains
around 500 route points. This means we need to load 1,00,000 route points. Let's
measure and see how much time the whole process takes.</p>
<h2>Loading multiple routes on a map</h2>
<p>Plotting a single route on a map can be done in less than a second. However as
we increase the number of routes to plot, the payload size increases which
affects the load time. This is because we've around 500 route points per
delivery. If we want to show 500 deliveries on the map then we need to load
500 * 500 = 2,50,000 routes points. Let's benchmark the load time it takes to
show deliveries on a map.</p>
<p>No. of deliveries | Load Time | Payload Size | 500 | 8.77s | 12.3MB | 400 |
7.76s | 10.4MB | 300 | 6.68s | 7.9MB | 200 | 5.88s | 5.3MB | 100 | 5.47s | 3.5MB
|</p>
<p>The load time is more than 5 seconds which is high. What if we could decrease
the payload size and still be able to plot the routes.</p>
<h2>Sampling route points for decreased payload size</h2>
<p>For each delivery we've around 500 route points. If we drop a few route points
in between on a regular interval then we'll be able to decrease the payload
size. Latitude and longitude have at least 5 decimal points. We rounded them off
to 1 decimal point and then we picked unique values.</p>
<pre><code class="language-ruby">  def route_lat_lng_points
    return '' unless delivery.route_lat_lng_points

    delivery.route_lat_lng_points.
        chunk{ |point| [point.first.round(1), point.second.round(1)] }.
        map(&amp;:first).join(',')
  end
</code></pre>
<p>Now let's check the payload size and the load time.</p>
<p>No. of deliveries | Load Time | Payload Size | 500 | 6.52s | 6.7MB | 400 | 5.97s
| 5.5MB | 300 | 5.68s | 4.2MB | 200 | 4.88s | 2.9MB | 100 | 4.07s | 2.0MB |</p>
<p>The payload size decreased by 50 percent. However since we sampled the data the
routes are not contiguous anymore. Here's how it looks now.</p>
<p><img src="https://www.bigbinary.com/blog/images/images_used_in_blog/2018/using-bspline-curves-to-draw-sampled-route-points-on-google-maps/sampled_routes.png" alt="Sampled routes">
<img src="https://www.bigbinary.com/blog/images/images_used_in_blog/2018/using-bspline-curves-to-draw-sampled-route-points-on-google-maps/contiguous_routes.png" alt="Contiguous routes"></p>
<p>Note that we sampled route points till single decimal point. Notice that the
routes in which we did sampling appears to be jagged instead of contiguous. We
can solve this by using a curve fitting method to create a curve from the
discrete points we have.</p>
<h2>Curve fitting using B-spline function</h2>
<p><a href="https://en.wikipedia.org/wiki/B-spline">B-spline</a> or basis spline is a spline
function which can be used for creating smooth curves best fitted to a set of
control points. Here's an example of a B-spline curve created from a set of
control points.</p>
<p><img src="https://www.bigbinary.com/blog/images/images_used_in_blog/2018/using-bspline-curves-to-draw-sampled-route-points-on-google-maps/bspline_example.png" alt="Bspline example"></p>
<p>We changed our previous example to use B-spline function to generate latitude
and longitude points.</p>
<pre><code class="language-javascript">// List of latitude and longitude
let lats = points.map(point =&gt; point.lat);
let lngs = points.map(point =&gt; point.lng);
let path = bspline(lats, lngs);

let route_options = {
  path: path,
  strokeColor: color,
  strokeOpacity: 1.0,
  strokeWeight: mapAttributes.strokeWeight || 3,
  map: map, // instance of google.maps.Map
};

new google.maps.Polyline(route_options);
</code></pre>
<pre><code class="language-javascript">function bspline(lats, lngs) {
  let i, t, ax, ay, bx, by, cx, cy, dx, dy, lat, lng, points;
  points = [];

  for (i = 2; i &lt; lats.length - 2; i++) {
    for (t = 0; t &lt; 1; t += 0.2) {
      ax = (-lats[i - 2] + 3 * lats[i - 1] - 3 * lats[i] + lats[i + 1]) / 6;
      ay = (-lngs[i - 2] + 3 * lngs[i - 1] - 3 * lngs[i] + lngs[i + 1]) / 6;

      bx = (lats[i - 2] - 2 * lats[i - 1] + lats[i]) / 2;
      by = (lngs[i - 2] - 2 * lngs[i - 1] + lngs[i]) / 2;

      cx = (-lats[i - 2] + lats[i]) / 2;
      cy = (-lngs[i - 2] + lngs[i]) / 2;

      dx = (lats[i - 2] + 4 * lats[i - 1] + lats[i]) / 6;
      dy = (lngs[i - 2] + 4 * lngs[i - 1] + lngs[i]) / 6;

      lat =
        ax * Math.pow(t + 0.1, 3) +
        bx * Math.pow(t + 0.1, 2) +
        cx * (t + 0.1) +
        dx;

      lng =
        ay * Math.pow(t + 0.1, 3) +
        by * Math.pow(t + 0.1, 2) +
        cy * (t + 0.1) +
        dy;

      points.push(new google.maps.LatLng(lat, lng));
    }
  }
  return points;
}
</code></pre>
<p>Source:
<a href="https://johan.karlsteen.com/2011/07/30/improving-google-maps-polygons-with-b-splines/">https://johan.karlsteen.com/2011/07/30/improving-google-maps-polygons-with-b-splines</a></p>
<p>After the change the plotted routes are much better. Here's how it looks now.</p>
<p><img src="https://www.bigbinary.com/blog/images/images_used_in_blog/2018/using-bspline-curves-to-draw-sampled-route-points-on-google-maps/bspline_routes.png" alt="Bspline routes">
<img src="https://www.bigbinary.com/blog/images/images_used_in_blog/2018/using-bspline-curves-to-draw-sampled-route-points-on-google-maps/contiguous_routes.png" alt="Contiguous routes"></p>
<p>The only downside here is that if we zoom in the map we'll notice that the
routes are not exactly overlapping the Google map paths. Otherwise we're able to
plot almost same routes with sampled route points. However we still need 6.5
seconds to load 500 deliveries. How do we fix that ?</p>
<h2>Loading deliveries in batches</h2>
<p>Sometimes users have up to 500 deliveries but they want to change only a few
deliveries and then use the application. Right now the way application is setup
users have no choice but to wait until all 500 deliveries are loaded and then
only they would be able to change a few deliveries. This is not ideal.</p>
<p>We want to show deliveries as soon as they're loaded. We added a polling
mechanism that would load batches of 20 deliveries and as soon as a batch is
loaded we would plot them on the map. This way user could interact with the
loaded deliveries while the remaining deliveries are still being loaded.</p>
<pre><code class="language-javascript">  loadDeliveriesWindow(updatedState = {}, lastPage = 0, currentWindow = 1) {
    // windowSize: Size of the batch to be loaded
    // perPage: No of deliveries per page
    const { perPage, windowSize } = this.state;

    if (currentWindow &gt; perPage / windowSize) {
      // Streaming deliveries ended
      this.setState($.extend(updatedState, { windowStreaming: false }));
      return;
    }

    if (currentWindow === 1) {
      // Streaming deliveries started
      this.setState({ windowStreaming: true });
    }

    // Gets delivery data from backend
    this.fetchDeliveries(currentWindow + (lastPage * windowSize), queryParams).complete(() =&gt; {
      // Plots deliveries on map
      this.loadDeliveries();

      // Load the next batch of deliveries
      setTimeout((() =&gt; {
        this.loadDeliveriesWindow(updatedState, lastPage, currentWindow + 1);
      }).bind(this, currentWindow, updatedState, lastPage), 100);
    });
  }
</code></pre>
<p>Here's a comparison of how the user experience changed.</p>
<p><img src="https://www.bigbinary.com/blog/images/images_used_in_blog/2018/using-bspline-curves-to-draw-sampled-route-points-on-google-maps/streaming_deliveries.gif" alt="Streaming deliveries">
<img src="https://www.bigbinary.com/blog/images/images_used_in_blog/2018/using-bspline-curves-to-draw-sampled-route-points-on-google-maps/normal_loading.gif" alt="Normal loading"></p>
<p>Notice that loaded deliveries are instantly plotted and user can start
interacting with them. While if we load all the deliveries before plotting them
the user has to wait for all of them to be loaded. This made the user experience
much better if the user loaded more than 100 deliveries.</p>
<h2>Serializing route points list without brackets</h2>
<p>One more optimization we did was to change how route points are being
serialized.</p>
<p>The route points after serialization contained opening and closing square
brackets. So let's say the route points are</p>
<p><code>[[25.57167, -80.421271], [25.676544, -80.388611], [25.820025, -80.386488],...]</code>.</p>
<p>After serialization they looked like</p>
<p><code>[[25.57167,-80.421271], [25.676544,-80.388611], [25.820025,-80.386488],...]</code>.</p>
<p>For each route point we've an extra opening and closing square bracket which can
be avoided.</p>
<p>We could get rid of the brackets by concatenating the route points array and
converting it to a string. After conversion it looked like this.</p>
<p><code>&quot;25.57167,-80.421271|25.676544,-80.388611|25.820025,-80.386488|...&quot;</code></p>
<p>At the client side we converted it back to an array. This reduced the payload
size by 0.2MB for dense routes.</p>
<p>Note this is a trade off between client side processing and network bandwidth.
In modern computers the client side processing will be negligible. For our
clients, network bandwidth was a crucial resource so we optimized it for network
bandwidth.</p>
]]></content>
    </entry>
  <entry>
      <title type="text"><![CDATA[Inline Installation of Firefox Extension]]></title>
      <link rel="alternate" type="text/html" href="https://www.bigbinary.com/blog/inline-installation-of-firefox-extension"/>
      <link rel="enclosure" type="image/png" href="https://www.bigbinary.com/blog/images/social_preview_images/generated/inline-installation-of-firefox-extension.png"/>
      <id>https://www.bigbinary.com/blog/inline-installation-of-firefox-extension</id>
      <published>2018-09-27T00:00:00.000Z</published>
      <updated>2018-09-27T00:00:00.000Z</updated>
      <author>
        <name>Chirag Shah</name>
        <uri>https://www.bigbinary.com/blog/authors/chiraggshah</uri>
      </author>
      <category term="JavaScript"/>
      <category term="Misc"/>
      <media:thumbnail url="https://www.bigbinary.com/blog/images/social_preview_images/generated/inline-installation-of-firefox-extension.png" width="1200" height="630"/>
      <summary type="text"><![CDATA[The blog explains how to enable inline installation of a Firefox extension's latest version]]></summary>
      <content type="html" xml:base="https://www.bigbinary.com/blog/inline-installation-of-firefox-extension"><![CDATA[<h2>Inline Installation</h2>
<p>Firefox extensions,
similar to Chrome extensions,
help us modify
and
personalize our browsing experience
by adding new features
to the existing sites.</p>
<p>Once we've published
our extension to the
<a href="https://addons.mozilla.org/">Mozilla's Add-on store(AMO)</a>,
users who browse the AMO
can find the extension
and install it with one-click.
But,
if a user is already on our site
where a link is provided
to the extension's AMO listing page,
they would need to
navigate away from our
website to the AMO,
complete the install process,
and then return back to our site.
That is a bad user experience.</p>
<p>The inline installation enables us to
initiate the extension installation
from our site.
The extension can still be hosted on the AMO
but users
would no longer have to
leave our site to install it.</p>
<p>We had to try out a few suggested approaches
before we got it working.</p>
<h2>InstallTrigger</h2>
<p><code>InstallTrigger</code> (Link is not available)
is an interface
included in the Mozilla's Apps API
for installing extensions.
Using JavaScript,
the <code>install</code> method
of <code>InstallTrigger</code> can be used
to start the download and installation
of an extension (or anything packaged in a .xpi file)
from a Web page.</p>
<p>A XPI(pronounced as &quot;zippy&quot;)
is similar to a zip file,
which contains manifest file and
the install script for the extension.</p>
<p>So, let's try to install the
Grammarly Extension for Firefox.
To use it,
we first need its .xpi file's location.
Once we have published our extension on the AMO,
we can navigate to the listings page
for it and get the link for the .xpi.</p>
<p>For our present example,
here's the listing page for
<a href="https://addons.mozilla.org/en-US/firefox/addon/grammarly-1/">Grammarly Extension</a>.</p>
<p>Here,
we can get the .xpi file's location
by right clicking on the
<code>+ Add to Firefox</code> button
and clicking on <code>Copy Link Location</code>.
Note that the <code>+ Add to Firefox</code> button
would only be visible
if we browse the link on a Firefox browser.
Otherwise, it would be replaced by
a <code>Get Firefox Now</code> button.</p>
<p>Once we have the URL,
we can trigger the installation via JavaScript
on our web page.</p>
<pre><code class="language-javascript">InstallTrigger.install({
  &quot;Name of the Extension&quot;: {
    URL: &quot;url pointing to the .xpi file's location on AMO&quot;,
  },
});
</code></pre>
<h2>Pointing to the latest version of the Extension</h2>
<p>When we used the URL in the above code,
the .xpi file's URL
was specific to the extension's current version.
If the extension has an update,
the installed extensions for existing users
would be updated automatically.
But the URL to the .xpi on our website
would be pointing to the older version.
Although the old link would still work,
we would always want new users to download
the latest version.</p>
<p>To do that,
we can either fetch the listing page
in the background and parse the HTML
to get the latest link.
But that approach can break if the HTML changes.</p>
<p>Or we can query the Addons Services API,
which returns the information for the extension in XML format.</p>
<p>For the Grammarly Extension, we first need its slug-id.
We can get it by looking at its listing page's URL.
From <code>https://addons.mozilla.org/en-US/firefox/addon/grammarly-1/</code>,
we can note down the slug which is <code>grammarly-1</code></p>
<p>Using this slug id, we can now get the extension details using
<code>https://services.addons.mozilla.org/en-US/firefox/api/1.5/addon/grammarly-1</code>.
It returns the info for the Grammarly Extension.
What we are particularly interested in is the value in the <code>&lt;install&gt;</code> node.
That is what the desired value is for the latest version for our .xpi.</p>
<p>Let's see how we can implement the whole thing using React.</p>
<pre><code class="language-javascript">import axios from &quot;axios&quot;;
import cheerio from &quot;cheerio&quot;;

const FALLBACK_GRAMMARLY_EXTENSION_URL =
  &quot;https://addons.mozilla.org/firefox/downloads/file/1027073/grammarly_for_firefox-8.828.1757-an+fx.xpi&quot;;
const URL_FOR_FETCHING_XPI = `https://services.addons.mozilla.org/en-US/firefox/api/1.5/addon/grammarly-1`;

export default class InstallExtension extends Component {
  state = {
    grammarlyExtensionUrl: FALLBACK_GRAMMARLY_EXTENSION_URL,
  };

  componentWillMount() {
    axios.get(URL_FOR_FETCHING_XPI).then((response) =&gt; {
      const xml = response.data;
      const $ = cheerio.load(xml);
      const grammarlyExtensionUrl = $(&quot;addon install&quot;).text();
      this.setState({ grammarlyExtensionUrl });
    });
  }

  triggerInlineInstallation = (event) =&gt; {
    InstallTrigger.install({
      Grammarly: { URL: this.state.grammarlyExtensionUrl },
    });
  };

  render() {
    return (
      &lt;Button onClick={this.triggerInlineInstallation}&gt;
        Install Grammarly Extension
      &lt;/Button&gt;
    );
  }
}
</code></pre>
<p>In the above code,
we are using the npm packages
<a href="https://github.com/axios/axios">axios</a>
for fetching the xml and
<a href="https://github.com/cheeriojs/cheerio">cheerio</a>
for parsing the xml.
Also, we have set a fallback URL as the initial value
in case the fetching of the new URL
from the xml response fails.</p>
]]></content>
    </entry>
  <entry>
      <title type="text"><![CDATA[How to upload source maps to Honeybadger]]></title>
      <link rel="alternate" type="text/html" href="https://www.bigbinary.com/blog/how-to-upload-source-maps-to-honeybadger"/>
      <link rel="enclosure" type="image/png" href="https://www.bigbinary.com/blog/images/social_preview_images/generated/how-to-upload-source-maps-to-honeybadger.png"/>
      <id>https://www.bigbinary.com/blog/how-to-upload-source-maps-to-honeybadger</id>
      <published>2018-07-16T00:00:00.000Z</published>
      <updated>2018-07-16T00:00:00.000Z</updated>
      <author>
        <name>Arbaaz</name>
        <uri>https://www.bigbinary.com/blog/authors/arbaaz</uri>
      </author>
      <category term="JavaScript"/>
      <media:thumbnail url="https://www.bigbinary.com/blog/images/social_preview_images/generated/how-to-upload-source-maps-to-honeybadger.png" width="1200" height="630"/>
      <summary type="text"><![CDATA[The BigBinary team's lesson on how to upload source maps to Honeybadger.]]></summary>
      <content type="html" xml:base="https://www.bigbinary.com/blog/how-to-upload-source-maps-to-honeybadger"><![CDATA[<p>During the development of a chrome extension, debugging was difficult because
line number of minified JavaScript file is of no use without a source map.
Previously, Honeybadger could only download the source map files which were
public and our source maps were inside the <code>.crx</code> package which was inaccessible
to honeybadger.</p>
<p>Recently, Honeybadger released a new
<a href="http://blog.honeybadger.io/source-map-upload/">feature</a> to upload the source
maps to Honeybadger. We have written a grunt plugin to upload the source maps to
Honeybadger.</p>
<p>Here is how we can upload source map to Honeybadger.</p>
<p>First, install the grunt plugin.</p>
<pre><code class="language-bash">npm install --save-dev grunt-honeybadger-sourcemaps
</code></pre>
<p>Configure the gruntfile.</p>
<pre><code class="language-javascript">grunt.initConfig({
  honeybadger_sourcemaps: {
    default_options:{
      options: {
        appId: &quot;xxxx&quot;,
        token: &quot;xxxxxxxxxxxxxx&quot;,
        urlPrefix: &quot;http://example.com/&quot;,
        revision: &quot;&lt;app version&gt;&quot;
        prepareUrlParam: function(fileSrc){
          // Here we can manipulate the filePath
          return filesrc.replace('built/', '');
        },
      },
      files: [{
        src: ['@path/to/**/*.map']
      }],
    }
  },
});
grunt.loadNpmTasks('grunt-honeybadger-sourcemaps');
grunt.registerTask('upload_sourcemaps', ['honeybadger_sourcemaps']);
</code></pre>
<pre><code class="language-plaintext">
We can get the `appId` and `token` from Honeybadger project settings.


~~~plaintext
grunt upload_sourcemaps
</code></pre>
<p>Now, we can upload the source maps to Honeybadger and get better error stack
trace.</p>
<h2>Testing</h2>
<p>Clone the following repo.</p>
<pre><code class="language-bash">git clone https://github.com/bigbinary/grunt-honeybadger-sourcemaps
</code></pre>
<p>Replace <code>appId</code> and <code>token</code> in Gruntfile.js and run <code>grunt test</code>. It should
upload the sample source maps to your project.</p>
]]></content>
    </entry>
  <entry>
      <title type="text"><![CDATA[Higher Order Component to render spinner React Native]]></title>
      <link rel="alternate" type="text/html" href="https://www.bigbinary.com/blog/higher-order-component-for-rendering-spinner-in-react-native-app"/>
      <link rel="enclosure" type="image/png" href="https://www.bigbinary.com/blog/images/social_preview_images/generated/higher-order-component-for-rendering-spinner-in-react-native-app.png"/>
      <id>https://www.bigbinary.com/blog/higher-order-component-for-rendering-spinner-in-react-native-app</id>
      <published>2017-11-15T00:00:00.000Z</published>
      <updated>2017-11-15T00:00:00.000Z</updated>
      <author>
        <name>Chirag Shah</name>
        <uri>https://www.bigbinary.com/blog/authors/chiraggshah</uri>
      </author>
      <category term="React Native"/>
      <category term="JavaScript"/>
      <media:thumbnail url="https://www.bigbinary.com/blog/images/social_preview_images/generated/higher-order-component-for-rendering-spinner-in-react-native-app.png" width="1200" height="630"/>
      <summary type="text"><![CDATA[How we wrote our own Higher Order Component for rendering spinner in react native app]]></summary>
      <content type="html" xml:base="https://www.bigbinary.com/blog/higher-order-component-for-rendering-spinner-in-react-native-app"><![CDATA[<p>In one of our
<a href="https://bigbinary.com/blog/using-recompose-to-build-higher-order-components">previous blogs</a>,
we mentioned how
<a href="https://github.com/acdlite/recompose">recompose</a>
improves both
the readability
and the
maintainability
of the code.</p>
<p>We also saw
how <a href="https://github.com/acdlite/recompose/blob/master/docs/API.md#branch">branch</a>
and
<a href="https://github.com/acdlite/recompose/blob/master/docs/API.md#rendercomponent">renderComponent</a>
functions
from <code>recompose</code>
help us
in deciding
which component to render
based on a condition.</p>
<p>We can use the code from
<a href="https://github.com/acdlite/recompose/blob/master/docs/API.md#rendercomponent">renderComponent documentation</a>
to render a
spinner component when
the data is being fetched
in a ReactJS application.</p>
<h2>Initial Code</h2>
<pre><code class="language-javascript">// PatientsList.js

import React, { Component } from 'react';
import LoadingIndicator from './LoadingIndicator';

export default class PatientsList extends Component {

  state = {
    isLoading: true,
    patientsList: [],
  }

  componentDidMount() {
    api.getPatientsList().then(responseData =&gt; {
      this.setState({
        patientsList: responseData,
        isLoading: false,
      })
    })
  }

  render() {
    const { isLoading } = this.state;
    if (isLoading) {
      return &lt;LoadingIndicator isLoading={isLoading} /&gt;
    } else {
      return (
        &lt;ScrollView&gt;
          // Some header component
          // View rendering the patients
        &lt;/ScrollView&gt;
      )
    }
  }
</code></pre>
<p>In the above code,
when the PatientsList component mounts,
it fetches
the list of patients from the API.
During this time,
the <code>isLoading</code> state is <code>true</code>,
so we render
the <code>LoadingIndicator</code> component.</p>
<p>Once the API call
returns with the response,
we set
the <code>isLoading</code> state to <code>false</code>.
This renders
<code>ScrollView</code> component,
with our list of patients.</p>
<p>The above code works fine,
but
if our app has multiple screens,
which show
the loading indicator
and fetch data,
the above way
of handling it
becomes repetitive
and hard to maintain.</p>
<h2>Building a higher order component</h2>
<p>Here's where
Higher Order Components(HOC)
are very useful.
We can extract the logic
for the ability
to show the loading indicator
in a HOC.</p>
<pre><code class="language-javascript">// withSpinner.js

import React from &quot;react&quot;;
import { ScrollView } from &quot;react-native&quot;;
import LoadingIndicator from &quot;./LoadingIndicator&quot;;

const withSpinner = (Comp) =&gt; ({ isLoading, children, ...props }) =&gt; {
  if (isLoading) {
    return &lt;LoadingIndicator isLoading={isLoading} /&gt;;
  } else {
    return &lt;Comp {...props}&gt;{children}&lt;/Comp&gt;;
  }
};

export default withSpinner;
</code></pre>
<p>Here,
we created a HOC component
which accepts a component
and the <code>isLoading</code> prop.</p>
<p>If <code>isLoading</code> is true,
we show the <code>LoadingIndicator</code>.
If <code>isLoading</code> is false,
we show the supplied component
with its children,
and pass in the props.</p>
<p>Now,
we can use the above HOC
in our PatientsList.js file.
The supplied component
can be any React Native component
based on the use case.
Here in our case,
its a ScrollView.</p>
<pre><code class="language-javascript">// PatientsList.js

import { ScrollView } from 'react-native';
import withSpinner from './withSpinner';
const ScrollViewWithSpinner = withSpinner(ScrollView);

export default class PatientsList extends Component {

  state = {
    isLoading: true,
    patientsList: [],
  }

  componentDidMount() {
    api.getPatientsList().then(responseData =&gt; {
      this.setState({
        patientsList: responseData,
        isLoading: false,
      })
    })
  }

  render() {
    const { isLoading } = this.state;
    return(
      &lt;ScrollViewWithSpinner
        isLoading={isLoading}
        // other props
      &gt;
        // Some header component
        // View rendering the patients
      &lt;/ScrollViewWithSpinner&gt;
    )
  }
</code></pre>
<h2>Conclusion</h2>
<p>Because of the above
extraction of logic to a HOC,
we can now use the same HOC
in all our components
which render a loading indicator
while the data is being fetched.</p>
<p>The logic
to show a loading indicator
now resides in a HOC.
This makes the code easier
to maintain and less repetitive.</p>
]]></content>
    </entry>
  <entry>
      <title type="text"><![CDATA[Optimize JavaScript code for composability with Ramda.js]]></title>
      <link rel="alternate" type="text/html" href="https://www.bigbinary.com/blog/optimize-javascript-code-for-composability-with-ramdajs"/>
      <link rel="enclosure" type="image/png" href="https://www.bigbinary.com/blog/images/social_preview_images/generated/optimize-javascript-code-for-composability-with-ramdajs.png"/>
      <id>https://www.bigbinary.com/blog/optimize-javascript-code-for-composability-with-ramdajs</id>
      <published>2017-10-06T00:00:00.000Z</published>
      <updated>2017-10-06T00:00:00.000Z</updated>
      <author>
        <name>Neeraj Singh</name>
        <uri>https://www.bigbinary.com/blog/authors/neerajsingh0101</uri>
      </author>
      <category term="JavaScript"/>
      <media:thumbnail url="https://www.bigbinary.com/blog/images/social_preview_images/generated/optimize-javascript-code-for-composability-with-ramdajs.png" width="1200" height="630"/>
      <summary type="text"><![CDATA[In this blog R stands for Ramda.js. More on this later. Here is code without R. Code with R. Is the refactored code better ? What is R? What's invoker? What's pipe? The "code without R" reads fine...]]></summary>
      <content type="html" xml:base="https://www.bigbinary.com/blog/optimize-javascript-code-for-composability-with-ramdajs"><![CDATA[<p>In this blog <code>R</code> stands for <a href="http://ramdajs.com/">Ramda.js</a>. More on this later.</p>
<p>Here is code without R.</p>
<pre><code class="language-javascript">function isUnique(element, selector) {
  const parent = element.parentNode;
  const elements = parents.querySelectorAll(selector);
  return elements.length === 1 &amp;&amp; elements[0] === element;
}
</code></pre>
<p>Code with R.</p>
<pre><code class="language-javascript">function isUnique(element, selector) {
  const querySelectorAll = R.invoker(1, 'querySelectorAll')(selector);

  return R.pipe(
    R.prop('parentNode'),
    querySelectorAll,
    elements =&gt; R.both(
                  R.equals(R.length(elements), 1),
                  R.equals(elements[0], element)
                );
  )();
}
</code></pre>
<p>Is the refactored code better ?</p>
<p>What is R? What's invoker? What's pipe?</p>
<p>The &quot;code without R&quot; reads fine and even a person who has just started learning
JavaScript can understand it. Then why take all this extra complexity. Shouldn't
we be writing code that is easier to understand ?</p>
<p>Good questions. Who could be against writing code that is easier to understand.</p>
<p>If all I'm writing is a function called <code>isUnique</code> then of course the &quot;before
version&quot; is simpler. However this function is part of a bigger thousands of
lines of code software.</p>
<p>A big software is nothing but a collection of smaller pieces of code. We compose
code together to make code work.</p>
<p>We need to optimize for composability and as we write code that is more
composable, we are finding that composable code is also easier to read.</p>
<p>At BigBinary we have been experimenting with composability. We previously
<a href="https://blog.bigbinary.com/2017/09/12/using-recompose-to-build-higher-order-components.html">wrote a blog</a>
on how using <a href="https://github.com/acdlite/recompose">Recompose</a> is making our
React components more composable.</p>
<p>Now we are trying same techniques at pure JavaScript level using Ramda.js.</p>
<p>Let's take a look at another examples.</p>
<h3>Example 2</h3>
<p>We have a list of users with name and status.</p>
<pre><code class="language-javascript">var users = [
  { name: &quot;John&quot;, status: &quot;Active&quot; },
  { name: &quot;Mike&quot;, status: &quot;Inactive&quot; },
  { name: &quot;Rachel&quot;, status: &quot;Active&quot; },
];
</code></pre>
<p>We need to find all active users. Here is a version without R.</p>
<p><a href="https://jsfiddle.net/neerajsingh0101/wuLc4gqL/5">jsfiddle</a>{:.code-link}</p>
<pre><code class="language-javascript">var activeUsers = function (users) {
  return users.filter(function (user) {
    var status = user.status;
    return status === &quot;Active&quot;;
  });
};
</code></pre>
<p>Here is code with R.</p>
<p><a href="https://jsfiddle.net/neerajdotname/9gvsf92g/7/">jsfiddle</a>{:.code-link}</p>
<pre><code class="language-javascript">var isStatusActive = R.propSatisfies(R.equals(&quot;Active&quot;), &quot;status&quot;);
var active = R.filter(isStatusActive);
var result = active(users);
</code></pre>
<p>Now let's say that user data changes and we have a user with an empty name. We
don't want to include such users. Now data looks like this.</p>
<pre><code class="language-javascript">var users = [
  { name: &quot;John&quot;, status: &quot;Active&quot; },
  { name: &quot;Mike&quot;, status: &quot;Inactive&quot; },
  { name: &quot;Rachel&quot;, status: &quot;Active&quot; },
  { name: &quot;&quot;, status: &quot;Active&quot; },
];
</code></pre>
<p>Here is modified code without R.</p>
<p><a href="https://jsfiddle.net/neerajdotname/wuLc4gqL/6">jsfiddle</a>{:.code-link}</p>
<pre><code class="language-javascript">var activeUsers = function (users) {
  return users.filter(function (user) {
    var status = user.status;
    var name = user.name;
    return (
      name !== null &amp;&amp;
      name !== undefined &amp;&amp;
      name.length !== 0 &amp;&amp;
      status === &quot;Active&quot;
    );
  });
};
</code></pre>
<p>Here is modified code with R.</p>
<p><a href="https://jsfiddle.net/neerajdotname/9gvsf92g/8/">jsfiddle</a>{:.code-link}</p>
<pre><code class="language-javascript">var isStatusActive = R.propSatisfies(R.equals(&quot;Active&quot;), &quot;status&quot;);
var active = R.filter(isStatusActive);
var isNameEmpty = R.propSatisfies(R.isEmpty, &quot;name&quot;);
var rejectEmptyNames = R.reject(isNameEmpty);
var result = R.pipe(active, rejectEmptyNames)(users);
log(result);
</code></pre>
<p>Notice that change we needed to do to accommodate this request.</p>
<p>In the none R version, we had to get into the gut of the function and add logic.
In the with R version we added new function and we just composed this new
function with old function using <a href="http://ramdajs.com/docs/#pipe">pipe</a>. We did
not change the existing function.</p>
<p>Now let's say that we don't want all the users but just the first two users. We
know what need to change in the without R version. In the with R version all we
need to do is add <code>R.take(2)</code> and no existing function changes at all.</p>
<p>Here is the final code.</p>
<p><a href="https://jsfiddle.net/neerajdotname/9gvsf92g/9">jsfiddle</a>{:.code-link}</p>
<pre><code class="language-javascript">var isStatusActive = R.propSatisfies(R.equals(&quot;Active&quot;), &quot;status&quot;);
var active = R.filter(isStatusActive);
var isNameEmpty = R.propSatisfies(R.isEmpty, &quot;name&quot;);
var rejectEmptyNames = R.reject(isNameEmpty);

var result = R.pipe(active, rejectEmptyNames, R.take(2))(users);
log(result);
</code></pre>
<h2>Data comes at the end</h2>
<p>Another thing to notice is that in the R version nowhere we have said that we
are acting on the users. All the functions have no mention of <code>users</code>. In fact
all the functions do not take any argument explicitly since the functions are
curried. When we want result then we are passing <code>users</code> as the argument but it
could be <code>articles</code> and our code will still hold.</p>
<p>This is
<a href="http://randycoulman.com/blog/2016/06/21/thinking-in-ramda-pointfree-style/">pointfree programming</a>.
We do not need to know about &quot;pointfree&quot; since this comes naturally when write
with R.</p>
<h2>I'm still not convinced that Ramda.js is solving any real problem</h2>
<p>No problem.</p>
<p>Please watch
<a href="https://www.youtube.com/watch?v=m3svKOdZijA">Hey Underscore, You're doing it wrong</a>
video by <a href="https://twitter.com/drboolean">Brian Lonsdorf</a>. Hopefully that will
convince you to give Ramda.js a try.</p>
<p><a href="https://www.youtube.com/watch?v=m3svKOdZijA"><img src="https://img.youtube.com/vi/m3svKOdZijA/hqdefault.jpg" alt="Watch on YouTube" width="480" height="360"></a><br><a href="https://www.youtube.com/watch?v=m3svKOdZijA">Watch on YouTube</a></p>
<p>If you are still not convinced then, the author of Ramda.js has written a series
of blogs called
<a href="http://randycoulman.com/blog/categories/thinking-in-ramda/">Thinking in Ramda</a>.
Please read the blogs. Slowly.</p>
<h2>Ramda brings functional concepts to JavaScript</h2>
<p>Functional programming is another way of thinking about the code. When we move
to Elm, Haskell or Elixir to get functional concepts then we are wrestling with
two things at once - a new language and functional concepts.</p>
<p>Ramda.js brings functional concepts to JavaScript. In this way we can slowly
start using functional concepts in our day to day JavaScript code.</p>
<p>The best part is that if you write any JavaScript code then you can start using
Ramda.js today. Whether you are using React.js or Angular.js, it's all
JavaScript and you can use Ramda.js.</p>
]]></content>
    </entry>
  <entry>
      <title type="text"><![CDATA[Prettier & rubocop in Rails to format JS, CSS & Ruby]]></title>
      <link rel="alternate" type="text/html" href="https://www.bigbinary.com/blog/using-prettier-and-rubocop-in-ruby-on-rails-to-format-javascript-css-ruby-files"/>
      <link rel="enclosure" type="image/png" href="https://www.bigbinary.com/blog/images/social_preview_images/generated/using-prettier-and-rubocop-in-ruby-on-rails-to-format-javascript-css-ruby-files.png"/>
      <id>https://www.bigbinary.com/blog/using-prettier-and-rubocop-in-ruby-on-rails-to-format-javascript-css-ruby-files</id>
      <published>2017-06-12T00:00:00.000Z</published>
      <updated>2017-06-12T00:00:00.000Z</updated>
      <author>
        <name>Neeraj Singh</name>
        <uri>https://www.bigbinary.com/blog/authors/neerajsingh0101</uri>
      </author>
      <category term="JavaScript"/>
      <media:thumbnail url="https://www.bigbinary.com/blog/images/social_preview_images/generated/using-prettier-and-rubocop-in-ruby-on-rails-to-format-javascript-css-ruby-files.png" width="1200" height="630"/>
      <summary type="text"><![CDATA[Using prettier and rubocop in Ruby on Rails application to format JavaScript, CSS and Ruby files]]></summary>
      <content type="html" xml:base="https://www.bigbinary.com/blog/using-prettier-and-rubocop-in-ruby-on-rails-to-format-javascript-css-ruby-files"><![CDATA[<p>Recently we started using <a href="https://github.com/prettier/prettier">prettier</a> and
<a href="https://github.com/bbatsov/rubocop">rubocop</a> to automatically format our code
on git commit. Here is how we got started with setting up both <code>prettier</code> and
<code>rubocop</code> in our Ruby on Rails applications.</p>
<h4>Generate package.json</h4>
<p>If you don't already have a <code>package.json</code> file then execute the following
command to create a <code>package.json</code> file with value <code>{}</code>.</p>
<pre><code class="language-bash">echo &quot;{}&quot; &gt; package.json
</code></pre>
<h4>Install prettier</h4>
<p>Now execute following command to install prettier.</p>
<pre><code class="language-bash">npm install --save-dev lint-staged husky prettier

# Ignore `node_modules`
echo &quot;/node_modules&quot; &gt;&gt; .gitignore
echo &quot;/package-lock.json &gt;&gt; .gitignore
</code></pre>
<h4>Add scripts &amp; ignore node_modules</h4>
<p>Now open <code>package.json</code> and replace the whole file with following content.</p>
<pre><code class="language-ruby">{
  &quot;scripts&quot;: {
    &quot;precommit&quot;: &quot;lint-staged&quot;
  },
  &quot;lint-staged&quot;: {
    &quot;app/**/*.{js,es6,jsx}&quot;: [
      &quot;./node_modules/prettier/bin/prettier.js --trailing-comma --single-quote es5 --write&quot;,
      &quot;git add&quot;
    ]
  },
  &quot;devDependencies&quot;: {
    &quot;husky&quot;: &quot;^0.13.4&quot;,
    &quot;lint-staged&quot;: &quot;^3.6.0&quot;,
    &quot;prettier&quot;: &quot;^1.4.2&quot;
  }
}
</code></pre>
<p>Note that if you send pull request with your changes and circleCI or such tools
run <code>npm install</code> then downgrade <code>husky</code> to <code>^0.13.4</code> and that will solve the
problem.</p>
<p>In Ruby on Rails applications third party vendor files are stored in <code>vendor</code>
folder and we do not want to format JavaScript code in those files. Hence we
have applied the rule to run prettier only on files residing in <code>app</code> directory.</p>
<p>Here at BigBinary we store all JavaScript files using ES6 features with
extension <code>.es6</code>. Hence we are running such files through <code>prettier</code>. Customize
this to match with your application requirements.</p>
<p>Note that &quot;pre-commit&quot; hook is powered by
<a href="https://www.npmjs.com/package/husky">husky</a>. Read up &quot;husky&quot; documentation to
learn about &quot;prepush&quot; hook and other features.</p>
<h4>Commit the change</h4>
<pre><code class="language-bash">git add .
git commit -m &quot;Added support for prettier for JavaScript files&quot;
</code></pre>
<h3>Execute prettier on current code</h3>
<pre><code class="language-bash">./node_modules/prettier/bin/prettier.js --single-quote --trailing-comma es5 --write &quot;{app,__{tests,mocks}__}/**/*.{js,es6,jsx,scss,css}&quot;
</code></pre>
<h2>We want more</h2>
<p>We were thrilled to see prettier format our JavaScript code. We wanted more of
it at more places. We found that prettier can also format CSS files. We changed
our code to also format CSS code. It was an easy change. All we had to do was
change one line.</p>
<p>Before : <code>&quot;app/**/*.{js,es6,jsx}&quot;</code></p>
<p>After : <code>&quot;app/**/*.{js,es6,jsx,scss,css}&quot;</code></p>
<h2>Inspired by prettier we welcomed rubocop</h2>
<p>Now that JavaScript and CSS files are covered we started looking at other places
where we can get this productivity gain.</p>
<p>Since we write a lot of Ruby code we turned our attention to
<a href="https://github.com/bbatsov/rubocop">rubocop</a>.</p>
<p>It turned out that &quot;rubocop&quot; already had a feature to automatically format the
code.</p>
<p>Open <code>package.json</code> and change <code>lint-staged</code> section to following</p>
<pre><code class="language-ruby">&quot;app/**/*.{js,es6,jsx,scss,css}&quot;: [
  &quot;./node_modules/prettier/bin/prettier.js --single-quote --trailing-comma es5 --write&quot;,
  &quot;git add&quot;
],
&quot;{app,test}/**/*.rb&quot;: [
  &quot;bundle exec rubocop -a&quot;,
  &quot;git add&quot;
]
</code></pre>
<p>Open <code>Gemfile</code> and add following line.</p>
<pre><code class="language-ruby">group :development do
  gem &quot;rubocop&quot;
end
</code></pre>
<p>The behavior of <code>rubocop</code> can be controlled by <code>.rubocop.yml</code> file. If you want
to get started with the rubocop file that Rails uses then just execute following
command at the root of your Rails application.</p>
<pre><code class="language-bash">wget https://raw.githubusercontent.com/rails/rails/master/.rubocop.yml
</code></pre>
<p>Open the downloaded file and change the <code>TargetRubyVersion</code> value to match with
the ruby version the project is using. ` value to match with the ruby version
the project is using.</p>
<p>Execute rubocop in all ruby files.</p>
<pre><code class="language-bash">bundle install
bundle exec rubocop -a &quot;{app}/**/*.rb&quot;
</code></pre>
<h2>Code is changed on git commit and not on git add</h2>
<p>We notice that some people were a bit confused when <code>git add</code> did not format the
code.</p>
<p>Code is formatted when <code>git commit</code> is done.</p>
<h2>npm install is important</h2>
<p>It's important to note that users need to do <code>npm install</code> for all this to work.
Otherwise <code>prettier</code> or <code>rubocop</code> won't be activated and they will silently
fail.</p>
<h2>Full package.json file</h2>
<p>After all the changes are done then <code>package.json</code> should be like as shown
below.</p>
<pre><code class="language-ruby">{
  &quot;scripts&quot;: {
    &quot;precommit&quot;: &quot;lint-staged&quot;
  },
  &quot;lint-staged&quot;: {
    &quot;app/**/*.{js,es6,jsx,scss,css}&quot;: [
      &quot;./node_modules/prettier/bin/prettier.js --trailing-comma es5 --write&quot;,
      &quot;git add&quot;
    ],
    &quot;{app,test}/**/*.rb&quot;: [
      &quot;bundle exec rubocop -a&quot;,
      &quot;git add&quot;
    ]
  },
  &quot;devDependencies&quot;: {
    &quot;husky&quot;: &quot;^0.13.4&quot;,
    &quot;lint-staged&quot;: &quot;^3.6.0&quot;,
    &quot;prettier&quot;: &quot;^1.4.2&quot;
  }
}
</code></pre>
]]></content>
    </entry>
  <entry>
      <title type="text"><![CDATA[Introduction to ES6 generators]]></title>
      <link rel="alternate" type="text/html" href="https://www.bigbinary.com/blog/introduction-to-es6-generators"/>
      <link rel="enclosure" type="image/png" href="https://www.bigbinary.com/blog/images/social_preview_images/generated/introduction-to-es6-generators.png"/>
      <id>https://www.bigbinary.com/blog/introduction-to-es6-generators</id>
      <published>2016-08-01T00:00:00.000Z</published>
      <updated>2016-08-01T00:00:00.000Z</updated>
      <author>
        <name>Arbaaz</name>
        <uri>https://www.bigbinary.com/blog/authors/arbaaz</uri>
      </author>
      <category term="JavaScript"/>
      <media:thumbnail url="https://www.bigbinary.com/blog/images/social_preview_images/generated/introduction-to-es6-generators.png" width="1200" height="630"/>
      <summary type="text"><![CDATA[In this blog, we will explore ES6 generators with examples.]]></summary>
      <content type="html" xml:base="https://www.bigbinary.com/blog/introduction-to-es6-generators"><![CDATA[<p><strong>Generators</strong> in JavaScript are the functions that can be <strong>paused</strong> and
<strong>resumed</strong>.</p>
<pre><code class="language-javascript">function* genFunc(){...}
</code></pre>
<p>Calling <code>genFunc()</code> <em>doesn't execute the body</em> of the function.</p>
<pre><code class="language-javascript">const genObj = genFunc();
</code></pre>
<p>Instead, it returns <strong>generator object</strong> which can be used to control the
execution of the generator.</p>
<p><code>genObj.next()</code> will start executing the function and it will execute <strong>till</strong>
it reaches <code>yield</code> keyword.</p>
<p>We can think of <code>yield</code> as <code>return for now</code>. It is similar to C#
<a href="https://msdn.microsoft.com/en-us/library/9k7k7cf0.aspx">yield</a>.</p>
<pre><code class="language-javascript">function* genFunc() {
  console.log(&quot;First&quot;);
  yield;
  console.log(&quot;Second&quot;);
}
const genObj = genFunc();
genObj.next();

/*
output

First
*/
</code></pre>
<p>Calling <code>genObj.next()</code> again will <strong>resume</strong> the further execution after yield.</p>
<pre><code class="language-javascript">function* genFunc() {
  console.log(&quot;First&quot;);
  yield;
  console.log(&quot;Second&quot;);
}
const genObj = genFunc();
genObj.next();
genObj.next();

/*
output

First
Second
*/
</code></pre>
<p>Here's how the execution looks like:</p>
<p><img src="https://www.bigbinary.com/blog/images/images_used_in_blog/2016/introduction-to-es6-generators/generator.gif" alt="Generator"></p>
<p><code>yield</code> is not allowed inside non-generator functions. That is, yielding in
callbacks doesn't work.</p>
<p>We can also pass the data to generator function via <code>next</code>.</p>
<pre><code class="language-javascript">function* genFunc() {
  console.log(&quot;First&quot;);
  const input = yield;
  console.log(input);
  console.log(&quot;Second&quot;);
}
const genObj = genFunc();
genObj.next();
genObj.next(&quot;Third&quot;);

/*
output

First
Third
Second
*/
</code></pre>
<p>We can retrieve the yielded values via the generator object <code>genObj</code>:</p>
<pre><code class="language-javascript">function* genFunc() {
  console.log(&quot;First&quot;);
  const input = yield;
  console.log(input);
  console.log(&quot;Second&quot;);
  yield &quot;Forth&quot;;
}
const genObj = genFunc();
genObj.next();
const result = genObj.next(&quot;Third&quot;);
console.log(result);

/*
output

First
Third
Second
{
  done: false,
  value: &quot;Forth&quot;
}
*/
</code></pre>
<p>We can have multiple <code>yield</code> in the function as shown in the above example.</p>
<p>Once, the execution of the generator function is completed, further calls to
<code>genObj.next()</code> will have <strong>no effect</strong>.</p>
<h3>Further reading</h3>
<p>We highly recommend
<a href="http://exploringjs.com/es6/ch_generators.html">Exploring ES6</a> by Dr. Axel
Rauschmayer to go deeper on this topic.</p>
]]></content>
    </entry>
  <entry>
      <title type="text"><![CDATA[Optimize JavaScript code using BabelJS]]></title>
      <link rel="alternate" type="text/html" href="https://www.bigbinary.com/blog/code-optimize-javascript-code-using-babeljs"/>
      <link rel="enclosure" type="image/png" href="https://www.bigbinary.com/blog/images/social_preview_images/generated/code-optimize-javascript-code-using-babeljs.png"/>
      <id>https://www.bigbinary.com/blog/code-optimize-javascript-code-using-babeljs</id>
      <published>2015-08-26T00:00:00.000Z</published>
      <updated>2015-08-26T00:00:00.000Z</updated>
      <author>
        <name>Prathamesh Sonpatki</name>
        <uri>https://www.bigbinary.com/blog/authors/prathamesh</uri>
      </author>
      <category term="JavaScript"/>
      <media:thumbnail url="https://www.bigbinary.com/blog/images/social_preview_images/generated/code-optimize-javascript-code-using-babeljs.png" width="1200" height="630"/>
      <summary type="text"><![CDATA[Use BabelJS to optimize JavaScript code. In reality you might not use it to optimize code but this blog will show you tricks BabelJS is capable of.]]></summary>
      <content type="html" xml:base="https://www.bigbinary.com/blog/code-optimize-javascript-code-using-babeljs"><![CDATA[<p>Though <a href="http://babeljs.io/">Babel</a> is a transpiler to convert ESNext code to ES5,
it can be used to optimize the code as well.</p>
<p>Let's say we want to convert following ES6 code using Babel.</p>
<pre><code class="language-javascript">let a = 10;
let b = 42;

if (a &lt; b) {
  console.log(&quot;a is less than b&quot;);
} else {
  console.log(&quot;b is less than a&quot;);
}
</code></pre>
<p>It will get translated to:</p>
<pre><code class="language-javascript">&quot;use strict&quot;;

var a = 10;
var b = 42;

if (a &lt; b) {
  console.log(&quot;a is less than b&quot;);
} else {
  console.log(&quot;b is less than a&quot;);
}
</code></pre>
<p>All good so far.
Let's try Babel's
constant folding plugin (Link is not available).
I am compiling the ES6 code from command line this time.</p>
<pre><code class="language-bash">
babel --plugins constant-folding index.js --out-file bundle.js -w

</code></pre>
<p>This gives us following output:</p>
<pre><code class="language-javascript">&quot;use strict&quot;;

var a = 10;
var b = 42;

if (true) {
  console.log(&quot;a is less than b&quot;);
} else {
  console.log(&quot;b is less than a&quot;);
}
</code></pre>
<p>If condition changed from <code>(a &lt; b)</code> to <code>(true)</code>.
The <code>constant-folding</code> plugin has smartly evaluated the conditional expression <code>a &lt; b</code> and
replaced the code with the result of that expression.</p>
<p>This plugin can also optimize other expressions as shown below.</p>
<pre><code class="language-javascript">// Unary operators
console.log(!true);

// Binary expression
console.log(20 + 22);

// Function calls
console.log(Math.min(91, 2 + 20));
</code></pre>
<p>Which gets optimized to:</p>
<pre><code class="language-javascript">// Unary operators
console.log(false);

// Binary expression
console.log(42);

// Function calls
console.log(22);
</code></pre>
<h2>How does this actually work?</h2>
<p>Though we are using a &quot;constant folding plugin&quot;
to achieve this optimization, the real work happens in Babel itself.</p>
<p>For every expression in the code, the constant folding plugin calls <code>evaluate</code> function from Babel source code.
This function checks whether it can <em>confidently</em> find end value for a given expression.</p>
<p>The <code>evaluate</code> function returns <strong>confidence level</strong> and <strong>end value</strong> for any given expression. Based on this &quot;confidence level&quot;, constant folding plugin replaces the expression with their end values altering our original code as follows.</p>
<h2>How evaluate handles different cases</h2>
<p>For code <code>Math.min(10, 20)</code>, evaluate will return</p>
<p><code>{ confident: true, value: 10 }</code></p>
<p>For code <code>a &lt; b</code>, evaluate will return</p>
<p><code>{ confident: true, value: true }</code>.</p>
<p>But for user defined function like <code>foo('bar')</code> or browser defined <code>console.log('hello')</code>, evaluate will return</p>
<p><code>{ confident: false, value: undefined }</code>.</p>
<p>In the above case &quot;confident&quot; value will be &quot;false&quot; even if function returns a constant value. For example
for code <code>foo(100)</code>, evaluate will return</p>
<p><code>{ confident: false, value: undefined }</code>.</p>
<p>In the above case function <code>foo</code> will always return <code>100</code>. Still Babel has low confidence level. Why? That's because
Babel sees that it is a function and it bails out. It does not even look inside to try to figure things out.</p>
<p><a href="https://github.com/babel/babel/blob/e2b39084a4a48c48ff3441aab35b22d9efc3c8d6/packages/babel/src/traversal/path/evaluation.js#L43">Here is</a>
evaluate code in Babel. You should check it out.</p>
<h2>How much optimization is possible?</h2>
<p>How much help we will get from Babel for optimizing our code? Will it optimize everything?</p>
<p>The answer is unfortunately no.</p>
<p>As of now, Babel optimizes logical, binary, conditional expressions. It can also evaluate function calls on literals like <code>&quot;babel&quot;.length</code> confidently if the literal is string or number.</p>
<p>For function calls, it supports only certain <a href="https://github.com/babel/babel/blob/master/packages/babel/src/traversal/path/evaluation.js#L3">callees</a> like <code>String</code>, <code>Number</code> and <code>Math</code>. So call to a user defined function, even if it's returning a fixed value, will not be optimized.</p>
<h2>Experimental feature</h2>
<p>This feature looks great. But it's available as <strong>experimental</strong> feature.
If you use the plugin you will get
following warning. unless you enable <code>experimental</code> flag.</p>
<pre><code class="language-plaintext">$ babel --plugins constant-folding index.js --out-file bundle.js -w

[BABEL] index.js: THE TRANSFORMER constant-folding HAS BEEN MARKED AS EXPERIMENTAL AND IS WIP. USE AT YOUR OWN RISK. THIS WILL HIGHLY LIKELY BREAK YOUR CODE SO USE WITH **EXTREME** CAUTION. ENABLE THE `experimental` OPTION TO IGNORE THIS WARNING.
</code></pre>
<p>In order to get rid of warning you need to pass <code>--experimental</code> flag
like this.</p>
<pre><code class="language-plaintext">$ babel --plugins constant-folding index.js --out-file bundle.js -w
--experimental
</code></pre>
<h2>Eliminating dead code</h2>
<p>In above code example, we know that the result of <code>if (a &lt; b)</code> is <code>true</code> based on values of a and b.
Since the result is not going to change no matter what
there is no need
to have the <code>if</code> and <code>else</code> clauses.</p>
<p>That's <em>dead code</em>.</p>
<p>Can Babel help us eliminate dead code?</p>
<p>Yes with the help of <code>minification.deadCodeElimination</code> option.</p>
<pre><code class="language-bash">
babel --optional minification.deadCodeElimination index.js --out-file bundle.js -w

</code></pre>
<p>Which converts earlier code to:</p>
<pre><code class="language-javascript">&quot;use strict&quot;;

console.log(&quot;a is less than b&quot;);
</code></pre>
<p>I will talk about how Babel can eliminate dead code in a later post.</p>
]]></content>
    </entry>
  <entry>
      <title type="text"><![CDATA[Obtain current timezone in Selenium IDE using JS]]></title>
      <link rel="alternate" type="text/html" href="https://www.bigbinary.com/blog/how-to-obtain-current-time-from-a-different-timezone-in-selenium-ide-using-javascript"/>
      <link rel="enclosure" type="image/png" href="https://www.bigbinary.com/blog/images/social_preview_images/generated/how-to-obtain-current-time-from-a-different-timezone-in-selenium-ide-using-javascript.png"/>
      <id>https://www.bigbinary.com/blog/how-to-obtain-current-time-from-a-different-timezone-in-selenium-ide-using-javascript</id>
      <published>2015-01-08T00:00:00.000Z</published>
      <updated>2015-01-08T00:00:00.000Z</updated>
      <author>
        <name>Prabhakar Battula</name>
        <uri>https://www.bigbinary.com/blog/authors/prabhakarbattula</uri>
      </author>
      <category term="JavaScript"/>
      <media:thumbnail url="https://www.bigbinary.com/blog/images/social_preview_images/generated/how-to-obtain-current-time-from-a-different-timezone-in-selenium-ide-using-javascript.png" width="1200" height="630"/>
      <summary type="text"><![CDATA[Obtaining current time from a different timezone using javascript in selenium IDE]]></summary>
      <content type="html" xml:base="https://www.bigbinary.com/blog/how-to-obtain-current-time-from-a-different-timezone-in-selenium-ide-using-javascript"><![CDATA[<p>I had encountered a problem in one of our projects where it was required to
obtain the current time from a different timezone and then use it. I am in IST
(Indian Standard Timezone - 5.50) and was required to get the time in EST
(Eastern Standard Timezone + 5.00)</p>
<p>These are the set of commands I used to achieve that.</p>
<pre><code class="language-javascript">
Command : storeEval
Target  : var d = new Date();
          d.setTime(new Date( (d.getTime() + (d.getTimezoneOffset() * 60000))            + (3600000 * (-5) ) ));
          d.toLocaleTimeString();
Value   : timeEst

Command : echo
Target  : ${timeEst}
Value   :

</code></pre>
<p><strong><code>storeEval</code></strong> command is used to store the value in the variable <code>timeEst</code>
after evaluating the javascript code.</p>
<p><strong><code>var d = new Date();</code></strong> a new date object is created.</p>
<p><strong><code>d.getTime()</code></strong> method returns the number of <em>milliseconds</em> between midnight
of January 1, 1970 and the specified date (as is present in the variable &quot;d&quot;).</p>
<p><strong><code>d.getTimezoneOffset()</code></strong> method returns the time difference between UTC
(Coordinated Universal Time) time and local time from the variable &quot;d&quot;, in
<em>minutes</em>. For example, If our time zone is GMT-5.50, -330 will be returned.</p>
<p>Since <code>getTime()</code> is in milliseconds and <code>getTimezoneOffset()</code> is in minutes;
<code>getTimezoneOffset()</code> is multiplied with 60000 to make it into milliseconds.</p>
<p>The expression <strong><code>3600000 * (- 5)</code></strong> is required to make the time from UTC to
EST. The difference between UTC and EST is -5 hours. So, to make the hours to
milliseconds we need to multiply with 3600000 (60 min x 60 sec x 1000 millisec).</p>
<p><strong><code>d.setTime()</code></strong> method is used to set the time of variable &quot;d&quot; after
evaluating the expression.</p>
<p>With the above, the variable &quot;d&quot; is set with the date and time of the EST time.</p>
<p><strong><code>d.toLocaleTimeString()</code></strong> method returns the time portion of a Date object as
a string, using locale conventions.</p>
<p>The time string obtained above is stored in the variable <code>timeEst</code>.</p>
<p><strong><code>echo ${timeEst}</code></strong>, the time string is displayed in the console.</p>
<hr>
<p><strong><code>Using est time</code></strong></p>
<p><img src="https://www.bigbinary.com/blog/images/images_used_in_blog/2015/how-to-obtain-current-time-from-a-different-timezone-in-selenium-ide-using-javascript/selenium_javascript_time.jpg" alt="Selenkum javascript EST time"></p>
<hr>
<p><strong><code>Using est date</code></strong></p>
<p><img src="https://www.bigbinary.com/blog/images/images_used_in_blog/2015/how-to-obtain-current-time-from-a-different-timezone-in-selenium-ide-using-javascript/selenium_javascript_date.jpg" alt="Selenkum javascript EST date"></p>
<hr>
]]></content>
    </entry>
  <entry>
      <title type="text"><![CDATA[emberjs mixin]]></title>
      <link rel="alternate" type="text/html" href="https://www.bigbinary.com/blog/emberjs-mixin"/>
      <link rel="enclosure" type="image/png" href="https://www.bigbinary.com/blog/images/social_preview_images/generated/emberjs-mixin.png"/>
      <id>https://www.bigbinary.com/blog/emberjs-mixin</id>
      <published>2012-08-27T00:00:00.000Z</published>
      <updated>2012-08-27T00:00:00.000Z</updated>
      <author>
        <name>Neeraj Singh</name>
        <uri>https://www.bigbinary.com/blog/authors/neerajsingh0101</uri>
      </author>
      <category term="JavaScript"/>
      <media:thumbnail url="https://www.bigbinary.com/blog/images/social_preview_images/generated/emberjs-mixin.png" width="1200" height="630"/>
      <summary type="text"><![CDATA[How to properly use EmberJS mixin.]]></summary>
      <content type="html" xml:base="https://www.bigbinary.com/blog/emberjs-mixin"><![CDATA[<p>emberjs has mixin feature which allows code reuse and keep code modular. It also
support <code>_super()</code> method.</p>
<h2>mixin using apply</h2>
<pre><code class="language-javascript">m = Ember.Mixin.create({
  skill: function () {
    return &quot;JavaScript &amp; &quot; + this._super();
  },
});
main = {
  skill: function () {
    return &quot;Ruby&quot;;
  },
};
o = m.apply(main);
console.log(o.skill());

result: JavaScript &amp; Ruby;
</code></pre>
<h2>mixin in create and extend</h2>
<p>Now lets see usage of mixin in <code>create</code> and <code>extend</code>. Since <code>create</code> and
<code>extend</code> work similarly I am only going to discuss <code>create</code> scenario .</p>
<pre><code class="language-javascript">skillJavascript = Ember.Mixin.create({
  skill: function () {
    return &quot;JavaScript &quot;;
  },
});
main = {
  skill: function () {
    return &quot;Ruby &amp; &quot; + this._super();
  },
};
p = Ember.Object.create(skillJavascript, main);
console.log(p.skill());

result: Ruby &amp; JavaScript;
</code></pre>
<p>Notice that in the first case the mixin code was executed first. In the second
case the mixin code was execute later.</p>
<h2>Here is how it works</h2>
<p><a href="https://github.com/emberjs/ember.js/blob/master/packages/ember-metal/lib/mixin.js#L65">Here is mergeMixins code</a>
which accepts the mixins and the base class. In the first case the mixins list
is just the mixin and the base class is the main class.</p>
<p>At run time all the mixin properties are looped through. In the first case the
mixin <code>m</code> has a property called <code>skill</code> .</p>
<pre><code class="language-javascript">m.mixins[0].properties.skill

function () {
    return 'JavaScript &amp; ' + this._super()
  }
</code></pre>
<p>Runtime detects that both mixin and the base class has a property called <code>skill</code>
. Since base class has the first claim to the property a call is made to link
the <code>_super</code> of the second function to the first function.</p>
<p>That works is done by
<a href="https://github.com/emberjs/ember.js/blob/master/packages/ember-metal/lib/utils.js#L287-316">wrap</a>
function.</p>
<p>So at the end of the execution the mixin code points to base code as <code>_super</code>.</p>
<h2>It reveres itself in case of create</h2>
<p>In the second case the mixin <code>skillJavaScript</code> and the <code>main</code> are the mixins to
base class of <code>Class</code>. The mixin is the first in the looping order. So the mixin
has the first claim to key <code>skill</code> since it was unclaimed by base class to begin
with.</p>
<p>Next comes the main function and since the key is already taken the wrap
function is used to map <code>_super</code> of main to point to the mixin .</p>
<h2>Remember in Create and Extend it is the last one that executes first</h2>
<p>Here is an example with two mixins.</p>
<pre><code class="language-javascript">skillHaskell = Ember.Mixin.create({
  skill: function () {
    return &quot;Haskell&quot;;
  },
});
skillJavascript = Ember.Mixin.create({
  skill: function () {
    return &quot;JavaScript &amp; &quot; + this._super();
  },
});
p = Ember.Object.create(skillHaskell, skillJavascript, {
  skill: function () {
    return &quot;Ruby &amp; &quot; + this._super();
  },
});
console.log(p.skill());

result: Ruby &amp; JavaScript &amp; Haskell;
</code></pre>
<p>In this case the haskell mixin first claimed the key. So the javascript mixin's
<code>_super</code> points to haskell and the main code's <code>_super</code> points to Javascript.</p>
<h2>Embjers makes good use of mixin</h2>
<p>emberjs has features like <code>comparable</code>, <code>freezable</code>, <code>enumerable</code>, <code>sortable</code>,
<code>observable</code>. Take a look at this (Link is not available) to checkout their
code.</p>
]]></content>
    </entry>
  <entry>
      <title type="text"><![CDATA[Understanding bind and bindAll in Backbone.js]]></title>
      <link rel="alternate" type="text/html" href="https://www.bigbinary.com/blog/understanding-bind-and-bindall-in-backbone"/>
      <link rel="enclosure" type="image/png" href="https://www.bigbinary.com/blog/images/social_preview_images/generated/understanding-bind-and-bindall-in-backbone.png"/>
      <id>https://www.bigbinary.com/blog/understanding-bind-and-bindall-in-backbone</id>
      <published>2011-08-18T00:00:00.000Z</published>
      <updated>2011-08-18T00:00:00.000Z</updated>
      <author>
        <name>Neeraj Singh</name>
        <uri>https://www.bigbinary.com/blog/authors/neerajsingh0101</uri>
      </author>
      <category term="JavaScript"/>
      <media:thumbnail url="https://www.bigbinary.com/blog/images/social_preview_images/generated/understanding-bind-and-bindall-in-backbone.png" width="1200" height="630"/>
      <summary type="text"><![CDATA[Backbone.js makes extensive use of bind and bindAll.  Internally these methods use some clever techniques. This blog deep dives into those methods to see how they work.]]></summary>
      <content type="html" xml:base="https://www.bigbinary.com/blog/understanding-bind-and-bindall-in-backbone"><![CDATA[<p><a href="https://github.com/jashkenas/backbone/">Backbone.js</a> users use
<a href="https://underscorejs.org/#bind">bind</a> and
<a href="https://underscorejs.org/#bindAll">bindAll</a> methods provide by
<a href="https://github.com/jashkenas/underscore">underscore.js</a> a lot. In this blog I
am going to discuss why these methods are needed and how it all works.</p>
<h2>It all starts with apply</h2>
<p>Function <code>bindAll</code> internally uses <code>bind</code> . And <code>bind</code> internally uses <code>apply</code>.
So it is important to understand what <code>apply</code> does.</p>
<pre><code class="language-javascript">var func = function beautiful() {
  alert(this + &quot; is beautiful&quot;);
};
func();
</code></pre>
<p>If I execute above code then I get <code>[object window] is beautiful</code>. I am getting
that message because when function is invoked then <code>this</code> is <code>window</code>, the
default global object.</p>
<p>In order to change the value of <code>this</code> we can make use of method <code>apply</code> as
given below.</p>
<pre><code class="language-javascript">var func = function beautiful() {
  alert(this + &quot; is beautiful&quot;);
};
func.apply(&quot;Internet&quot;);
</code></pre>
<p>In the above case the alert message will be <code>Internet is beautiful</code> . Similarly
following code will produce <code>Beach is beautiful</code> .</p>
<pre><code class="language-javascript">var func = function beautiful() {
  alert(this + &quot; is beautiful&quot;);
};
func.apply(&quot;Beach&quot;); //Beach is beautiful
</code></pre>
<p>In short, <code>apply</code> lets us control the value of <code>this</code> when the function is
invoked.</p>
<h2>Why bind is needed</h2>
<p>In order to understand why <code>bind</code> method is needed first let's look at following
example.</p>
<pre><code class="language-javascript">function Developer(skill) {
  this.skill = skill;
  this.says = function () {
    alert(this.skill + &quot; rocks!&quot;);
  };
}
var john = new Developer(&quot;Ruby&quot;);
john.says(); //Ruby rocks!
</code></pre>
<p>Above example is pretty straight forward. <code>john</code> is an instance of <code>Developer</code>
and when <code>says</code> function is invoked then we get the right alert message.</p>
<p>Notice that when we invoked <code>says</code> we invoked like this <code>john.says()</code>. If we
just want to get hold of the function that is returned by <code>says</code> then we need to
do <code>john.says</code>. So the above code could be broken down to following code.</p>
<pre><code class="language-javascript">function Developer(skill) {
  this.skill = skill;
  this.says = function () {
    alert(this.skill + &quot; rocks!&quot;);
  };
}
var john = new Developer(&quot;Ruby&quot;);
var func = john.says;
func(); // undefined rocks!
</code></pre>
<p>Above code is similar to the code above it. All we have done is to store the
function in a variable called <code>func</code>. If we invoke this function then we should
get the alert message we expected. However if we run this code then the alert
message will be <code>undefined rocks!</code>.</p>
<p>We are getting <code>undefined rocks!</code> because in this case <code>func</code> is being invoked
in the global context. <code>this</code> is pointing to global object called <code>window</code> when
the function is executed. And <code>window</code> does not have any attribute called
<code>skill</code> . Hence the output of <code>this.skill</code> is <code>undefined</code>.</p>
<p>Earlier we saw that using <code>apply</code> we can fix the problem arising out of <code>this</code>.
So lets try to use <code>apply</code> to fix it.</p>
<pre><code class="language-javascript">function Developer(skill) {
  this.skill = skill;
  this.says = function () {
    alert(this.skill + &quot; rocks!&quot;);
  };
}
var john = new Developer(&quot;Ruby&quot;);
var func = john.says;
func.apply(john);
</code></pre>
<p>Above code fixes our problem. This time the alert message we got was
<code>Ruby rocks!</code>. However there is an issue and it is a big one.</p>
<p>In JavaScript world functions are first class citizens. The reason why we create
function is so that we can easily pass it around. In the above case we created a
function called <code>func</code>. However along with the function <code>func</code> now we need to
keep passing <code>john</code> around. That is not a good thing. Secondly the
responsibility of rightly invoking this function has been shifted from the
function creator to the function consumer. That's not a good API.</p>
<p>We should try to create functions which can easily be called by the consumers of
the function. This is where <code>bind</code> comes in.</p>
<h2>How bind solves the problem</h2>
<p>First lets see how using <code>bind</code> solves the problem.</p>
<pre><code class="language-javascript">function Developer(skill) {
  this.skill = skill;
  this.says = function () {
    alert(this.skill + &quot; rocks!&quot;);
  };
}
var john = new Developer(&quot;Ruby&quot;);
var func = _.bind(john.says, john);
func(); // Ruby rocks!
</code></pre>
<p>To solve the problem regarding <code>this</code> issue we need a function that is already
mapped to <code>john</code> so that we do not need to keep carrying <code>john</code> around. That's
precisely what <code>bind</code> does. It returns a new function and this new function has
<code>this</code> bound to the value that we provide.</p>
<p>Here is a snippet of code from <code>bind</code> method</p>
<pre><code class="language-javascript">return function () {
  return func.apply(obj, args.concat(slice.call(arguments)));
};
</code></pre>
<p>As you can see <code>bind</code> internally uses <code>apply</code> to set <code>this</code> to the second
parameter we passed while invoking <code>bind</code>.</p>
<p>Notice that <code>bind</code> does not change existing function. It returns a new function
and that new function should be used.</p>
<h2>How bindAll solves the problem</h2>
<p>Instead of <code>bind</code> we can also use <code>bindAll</code> . Here is solution with <code>bindAll</code>.</p>
<pre><code class="language-javascript">function Developer(skill) {
  this.skill = skill;
  this.says = function () {
    alert(this.skill + &quot; rocks!&quot;);
  };
}
var john = new Developer(&quot;Ruby&quot;);
_.bindAll(john, &quot;says&quot;);
var func = john.says;
func(); //Ruby rocks!
</code></pre>
<p>Above code is similar to <code>bind</code> solution but there are some big differences.</p>
<p>The first big difference is that we do not have to worry about the returned
value of <code>bindAll</code> . In case of <code>bind</code> we must use the returned function. In
<code>bindAll</code> we do not have to worry about the returned value but it comes with a
price. <code>bindAll</code> actually mutates the function. What does that mean.</p>
<p>See <code>john</code> object has an attribute called <code>says</code> which returns a function .
<code>bindAll</code> goes and changes the attribute <code>says</code> so that when it returns a
function, that function is already bound to <code>john</code>.</p>
<p>Here is a snippet of code from <code>bindAll</code> method.</p>
<pre><code class="language-javascript">function(f) { obj[f] = _.bind(obj[f], obj); }
</code></pre>
<p>Notice that <code>bindAll</code> internally calls <code>bind</code> and it overrides the existing
attribute with the function returned by <code>bind</code>.</p>
<p>The other difference between <code>bind</code> and <code>bindAll</code> is that in <code>bind</code> first
parameter is a function <code>john.says</code> and the second parameter is the value of
this <code>john</code>. In <code>bindAll</code> first parameter is value of this <code>john</code> and the second
parameter is not a function but the attribute name.</p>
<h2>Things to watch out for</h2>
<p>While developing a Backbone.js application someone had code like this</p>
<pre><code class="language-javascript">window.ProductView = Backbone.View.extend({
  initialize: function () {
    _.bind(this.render, this);
    this.model.bind(&quot;change&quot;, this.render);
  },
});
</code></pre>
<p>Above code will not work because the returned value of <code>bind</code> is not being used.
The correct usage will be</p>
<pre><code class="language-javascript">window.ProductView = Backbone.View.extend({
  initialize: function () {
    this.model.bind(&quot;change&quot;, _.bind(this.render, this));
  },
});
</code></pre>
<p>Or you can use <code>bindAll</code> as given below.</p>
<pre><code class="language-javascript">window.ProductView = Backbone.View.extend({
  initialize: function () {
    _.bindAll(this, this.render);
    this.model.bind(&quot;change&quot;, this.render);
  },
});
</code></pre>
<h2>Recommended videos</h2>
<p>If you like this blog then most likely you will also like our videos series on
&quot;Understanding this in JavaScript&quot; at
<a href="https://www.bigbinary.com/videos/learn-javascript">Learn JavaScript</a> .</p>
]]></content>
    </entry>
  <entry>
      <title type="text"><![CDATA[Variable declaration at the top is not just pretty thing]]></title>
      <link rel="alternate" type="text/html" href="https://www.bigbinary.com/blog/variable-hoisting-is-not-just-pretty-thing"/>
      <link rel="enclosure" type="image/png" href="https://www.bigbinary.com/blog/images/social_preview_images/generated/variable-hoisting-is-not-just-pretty-thing.png"/>
      <id>https://www.bigbinary.com/blog/variable-hoisting-is-not-just-pretty-thing</id>
      <published>2010-11-22T00:00:00.000Z</published>
      <updated>2010-11-22T00:00:00.000Z</updated>
      <author>
        <name>Neeraj Singh</name>
        <uri>https://www.bigbinary.com/blog/authors/neerajsingh0101</uri>
      </author>
      <category term="JavaScript"/>
      <media:thumbnail url="https://www.bigbinary.com/blog/images/social_preview_images/generated/variable-hoisting-is-not-just-pretty-thing.png" width="1200" height="630"/>
      <summary type="text"><![CDATA[In JavaScript code we declare variables at the top. It is not just to make the code look better. This blog discusses why it is done.]]></summary>
      <content type="html" xml:base="https://www.bigbinary.com/blog/variable-hoisting-is-not-just-pretty-thing"><![CDATA[<p>I was discussing JavaScript code with a friend and he noticed that I had
declared all the variables at the top.</p>
<p>He likes to declare the variable where they are used to be sure that the
variable being used is declared with var otherwise that variable will become
global variable. This fear of accidentally creating a global variables wants him
to see variable declaration next to where it is being used.</p>
<h2>Use the right tool</h2>
<pre><code class="language-javascript">var payment;
payment = soldPrice + shippingCost;
</code></pre>
<p>In the above case user has declared payment variable in the middle so that he is
sure that payment is declared. However if there is a typo as given below then he
has accidentally created a global variable &quot;payment&quot;.</p>
<pre><code class="language-javascript">var payment; //there is a typo
payment = soldPrice + shippingCost;
</code></pre>
<p>Having variable declaration next to where variable is being used is not a safe
way of guaranteeing that variable is declared. Use the right tool and that would
be <a href="http://www.jslint.com/">jslint</a> validation. I use MacVim and I use
<a href="http://www.javascriptlint.com/">Javascript Lint</a>. So every time I save a
JavaScript file validation is done and I get warning if I am accidentally
creating a global variable.</p>
<p>You can configure such that JSLint validation runs when you check your code into
git or when you push to github. Or you can have a custom rake task. Many
solutions are available choose the one that fits you. But do not rely on manual
inspection.</p>
<h2>Variable declaration are being moved to the top by the browser</h2>
<p>Take a look at following code. One might expect that console.log will print
&quot;Neeraj&quot; but the output will be &quot;undefined&quot; . That is because even though you
have declaration variables next to where they are being used, browsers lift
those declarations to the very top.</p>
<pre><code class="language-javascript">name = &quot;Neeraj&quot;;
function lab() {
  console.log(name);
  var name = &quot;John&quot;;
  console.log(name);
}
lab();
</code></pre>
<p>Browser converts above code into one shown below.</p>
<pre><code class="language-javascript">name = &quot;Neeraj&quot;;
function lab() {
  var name = undefined;
  console.log(name);
  name = &quot;John&quot;;
  console.log(name);
}
lab();
</code></pre>
<p>In order to avoid this kind of mistakes it is preferred to declared variables at
the top like this.</p>
<pre><code class="language-javascript">name = &quot;Neeraj&quot;;
function lab() {
  var name = &quot;John&quot;;
  console.log(name);
  console.log(name);
}
lab();
</code></pre>
<p>Looking at the first set of code a person might think that</p>
<p>Also remember that scope of variable in JavaScript at the function level.</p>
<h2>Implications on how functions are declared</h2>
<p>There are two ways of declaring a function.</p>
<pre><code class="language-javascript">var myfunc = function () {};
function myfunc2() {}
</code></pre>
<p>In the first case only the variable declaration <code>myfunc</code> is getting hoisted up.
The definition of myfunc is <em>NOT</em> getting hoisted. In the second case both
variable declaration and function definition is getting hoisted up. For more
information on this refer to my
<a href="https://www.bigbinary.com/blog/two-ways-of-declaring-functions">previous blog on the same topic</a>.</p>
]]></content>
    </entry>
  <entry>
      <title type="text"><![CDATA[Singleton function in JavaScript]]></title>
      <link rel="alternate" type="text/html" href="https://www.bigbinary.com/blog/singleton-function-in-javascript"/>
      <link rel="enclosure" type="image/png" href="https://www.bigbinary.com/blog/images/social_preview_images/generated/singleton-function-in-javascript.png"/>
      <id>https://www.bigbinary.com/blog/singleton-function-in-javascript</id>
      <published>2010-04-11T00:00:00.000Z</published>
      <updated>2010-04-11T00:00:00.000Z</updated>
      <author>
        <name>Neeraj Singh</name>
        <uri>https://www.bigbinary.com/blog/authors/neerajsingh0101</uri>
      </author>
      <category term="JavaScript"/>
      <media:thumbnail url="https://www.bigbinary.com/blog/images/social_preview_images/generated/singleton-function-in-javascript.png" width="1200" height="630"/>
      <summary type="text"><![CDATA[Creating a singleton function in JavaScript could be tricky. This blog discusses how to do it and when it should be done.]]></summary>
      <content type="html" xml:base="https://www.bigbinary.com/blog/singleton-function-in-javascript"><![CDATA[<p>Recently I was discussed with a friend how to create a singleton function in
JavaScript. I am putting the same information here in case it might help someone
understand JavaScript better.</p>
<h2>Creating an Object</h2>
<p>Simplest solution is creating an instance of the object.</p>
<pre><code class="language-javascript">var Logger = function (path) {
  this.path = path;
};

l1 = new Logger(&quot;/home&quot;);
console.log(l1);

l2 = new Logger(&quot;/dev&quot;);
console.log(l2);

console.log(l1 === l2);
</code></pre>
<p>Above solution works. However <code>l2</code> is a new instance of <code>Logger</code> .</p>
<h2>Singleton solution using a global variable</h2>
<pre><code class="language-javascript">window.global_logger = null;
var Logger = function (path) {
  if (global_logger) {
    console.log(&quot;global logger already present&quot;);
  } else {
    this.path = path;
    window.global_logger = this;
  }
  return window.global_logger;
};

l1 = new Logger(&quot;/home&quot;);
console.log(l1);

l2 = new Logger(&quot;/dev&quot;);
console.log(l2);

console.log(l1 === l2);
</code></pre>
<p>Above solution works. However this solution relies on creating a global
variable. To the extent possible it is best to avoid polluting global namespace.</p>
<h2>Single solution without polluting global namespace</h2>
<pre><code class="language-javascript">var Logger = (function () {
  var _instance;

  return function (path) {
    if (_instance) {
      console.log(&quot;an instance is already present&quot;);
    } else {
      this.path = path;
      _instance = this;
    }

    return _instance;
  };
})(); //note that it is self invoking function

var l1 = new Logger(&quot;/root&quot;);
console.log(l1);

var l2 = new Logger(&quot;/dev&quot;);
console.log(l2);

console.log(l1 === l2);
</code></pre>
<p>This solution does not pollute global namespace.</p>
]]></content>
    </entry>
  <entry>
      <title type="text"><![CDATA[Regular expression in JavaScript]]></title>
      <link rel="alternate" type="text/html" href="https://www.bigbinary.com/blog/regular-expressions-in-javascript"/>
      <link rel="enclosure" type="image/png" href="https://www.bigbinary.com/blog/images/social_preview_images/generated/regular-expressions-in-JavaScript.png"/>
      <id>https://www.bigbinary.com/blog/regular-expressions-in-JavaScript</id>
      <published>2010-03-31T00:00:00.000Z</published>
      <updated>2010-03-31T00:00:00.000Z</updated>
      <author>
        <name>Neeraj Singh</name>
        <uri>https://www.bigbinary.com/blog/authors/neerajsingh0101</uri>
      </author>
      <category term="JavaScript"/>
      <media:thumbnail url="https://www.bigbinary.com/blog/images/social_preview_images/generated/regular-expressions-in-JavaScript.png" width="1200" height="630"/>
      <summary type="text"><![CDATA[Regular expression in JavaScript could be confusing. This blog discusses a few basic techniqutes.]]></summary>
      <content type="html" xml:base="https://www.bigbinary.com/blog/regular-expressions-in-javascript"><![CDATA[<p>Regular expressions is a powerful tool in any language. Here I am discussing how
to use regular expression in JavaScript.</p>
<h2>Defining regular expressions</h2>
<p>In JavaScript regular expression can be defined two ways.</p>
<pre><code class="language-javascript">var regex = /hello/gi; // i is for ignore case. g is for global.
var regex = new RegExp(&quot;hello&quot;, &quot;ig&quot;);
</code></pre>
<p>If I am defining regular expression using
<a href="https://developer.mozilla.org/en/Core_JavaScript_1.5_Reference/Global_Objects/RegExp#Properties_2">RegExp</a>
then I need to add escape character in certain cases.</p>
<pre><code class="language-javascript">var regex = /hello_\w*/gi;
var regex = new RegExp(&quot;hello_\\w*&quot;, &quot;ig&quot;); //notice the extra backslash before \w
</code></pre>
<p>When I am defining regular expression using RegExp then <code>\w</code> needs to be escaped
otherwise it would be taken literally.</p>
<h2>test method</h2>
<p><a href="https://developer.mozilla.org/en/Core_JavaScript_1.5_Reference/Global_Objects/RegExp/test">test method</a>
is to check if a match is found or not. This method returns true or false.</p>
<pre><code class="language-javascript">var regex = /hello/gi;
var text = &quot;hello_you&quot;;
var bool = regex.test(text);
</code></pre>
<h2>exec method</h2>
<p><a href="https://developer.mozilla.org/en/Core_JavaScript_1.5_Reference/Global_Objects/RegExp/exec">exec method</a>
finds if a match is found or not. It returns an array if a match is found.
Otherwise it returns null.</p>
<pre><code class="language-javascript">var regex = /hello_\w*/gi;
var text = &quot;hello_you&quot;;
var matches = regex.exec(text);
console.log(matches); //=&gt; hello_you
</code></pre>
<h2>match method</h2>
<p><a href="https://developer.mozilla.org/en/Core_JavaScript_1.5_Reference/Global_Objects/String/match">match method</a>
acts exactly like exec method if no <code>g</code> parameter is passed. When global flag is
turned on the match returns an Array containing all the matches.</p>
<p>Note that in <code>exec</code> the syntax was <code>regex.exec(text)</code> while in <code>match</code> method
the syntax is <code>text.match(regex)</code> .</p>
<pre><code class="language-javascript">var regex = /hello_\w*/i;
var text = &quot;hello_you and hello_me&quot;;
var matches = text.match(regex);
console.log(matches); //=&gt; ['hello_you']
</code></pre>
<p>Now with global flag turned on.</p>
<pre><code class="language-javascript">var regex = /hello_\w*/gi;
var text = &quot;hello_you and hello_me&quot;;
var matches = text.match(regex);
console.log(matches); //=&gt; ['hello_you', 'hello_me']
</code></pre>
<h2>Getting multiple matches</h2>
<p>Once again both <code>exec</code> and <code>match</code> method without <code>g</code> option do not get all the
matching values from a string. If you want all the matching values then you need
to iterate through the text. Here is an example.</p>
<p>Get both the bug numbers in the following case.</p>
<pre><code class="language-javascript">var matches = [];
var regex = /#(\d+)/gi;
var text = &quot;I fixed bugs #1234 and #5678&quot;;
while ((match = regex.exec(text))) {
  matches.push(match[1]);
}
console.log(matches); // ['1234', '5678']
</code></pre>
<p>Note that in the above case global flag <code>g</code>. Without that above code will run
forever.</p>
<pre><code class="language-javascript">var matches = [];
var regex = /#(\d+)/gi;
var text = &quot;I fixed bugs #1234 and #5678&quot;;
matches = text.match(regex);
console.log(matches);
</code></pre>
<p>In the above case match is used instead of regex . However since match with
global flag option brings all the matches there was no need to iterate in a
loop.</p>
<h2>match attributes</h2>
<p>When a match is made then an array is returned. That array has two methods.</p>
<ul>
<li>index: This tells where in the string match was done</li>
<li>input: the original string</li>
</ul>
<pre><code class="language-javascript">var regex = /#(\d+)/i;
var text = &quot;I fixed bugs #1234 and #5678&quot;;
var match = text.match(regex);
console.log(match.index); //13
console.log(match.input); //I fixed bugs #1234 and #5678
</code></pre>
<h2>replace</h2>
<p><a href="https://developer.mozilla.org/en/Core_JavaScript_1.5_Reference/Global_Objects/String/replace">replace method</a>
takes both regexp and string as argument.</p>
<pre><code class="language-javascript">var text = &quot;I fixed bugs #1234 and #5678&quot;;
var output = text.replace(&quot;bugs&quot;, &quot;defects&quot;);
console.log(output); //I fixed defects #1234 and #5678
</code></pre>
<p>Example of using a function to replace text.</p>
<pre><code class="language-javascript">var text = &quot;I fixed bugs #1234 and #5678&quot;;
var output = text.replace(/\d+/g, function (match) {
  return match * 2;
});
console.log(output); //I fixed bugs #2468 and #11356
</code></pre>
<p>Another case.</p>
<pre><code class="language-javascript">// requirement is to change all like within &lt;b&gt; &lt;/b&gt; to love.
var text = &quot; I like JavaScript. &lt;b&gt; I like JavaScript&lt;/b&gt; &quot;;
var output = text.replace(/&lt;b&gt;.*?&lt;\/b&gt;/g, function (match) {
  return match.replace(/like/g, &quot;love&quot;);
});
console.log(output); //I like JavaScript. &lt;b&gt; I love JavaScript&lt;/b&gt;
</code></pre>
<p>Example of using special variables.</p>
<pre><code class="language-plaintext">$&amp; -	the matched substring.
$` -  the portion of the string that precedes the matched substring.
$' -  the portion of the string that follows the matched substring.
$n -  $0, $1, $2 etc where number means the captured group.
</code></pre>
<pre><code class="language-javascript">var regex = /(\w+)\s(\w+)/;
var text = &quot;John Smith&quot;;
var output = text.replace(regex, &quot;$2, $1&quot;);
console.log(output); //Smith, John
</code></pre>
<pre><code class="language-javascript">var regex = /JavaScript/;
var text = &quot;I think JavaScript is awesome&quot;;
var output = text.replace(regex, &quot;before:$` after:$' full:$&amp;&quot;);
console.log(output); //I think before:I think after: is awesome full:JavaScript is awesome
</code></pre>
<p>Replace method also accepts captured groups as parameters in the function. Here
is an example;</p>
<pre><code class="language-javascript">var regex = /#(\d*)(.*)@(\w*)/;
var text = &quot;I fixed bug #1234 and twitted to @javascript&quot;;
text.replace(regex, function (_, a, b, c) {
  log(_); //#1234 and twitted to @javascript
  log(a); //1234
  log(b); //  and twitted to
  log(c); // javascript
});
</code></pre>
<p>As you can see the very first argument to function is the fully matched text.
Other captured groups are subsequent arguments. This strategy can be applied
recursively.</p>
<pre><code class="language-javascript">var bugs = [];
var regex = /#(\d+)/g;
var text = &quot;I fixed bugs #1234 and #5678&quot;;
text.replace(regex, function (_, f) {
  bugs.push(f);
});
log(bugs); //[&quot;1234&quot;, &quot;5678&quot;]
</code></pre>
<h2>Split method</h2>
<p><a href="https://developer.mozilla.org/en/Core_JavaScript_1.5_Reference/Global_Objects/String/split">split method</a>
can take both string or a regular expression.</p>
<p>An example of split using a string.</p>
<pre><code class="language-javascript">var text = &quot;Jan,Feb,Mar,Apr,May,Jun,Jul,Aug,Sep,Oct,Nov,Dec&quot;;
var output = text.split(&quot;,&quot;);
log(output); // [&quot;Jan&quot;, &quot;Feb&quot;, &quot;Mar&quot;, &quot;Apr&quot;, &quot;May&quot;, &quot;Jun&quot;, &quot;Jul&quot;, &quot;Aug&quot;, &quot;Sep&quot;, &quot;Oct&quot;, &quot;Nov&quot;, &quot;Dec&quot;]
</code></pre>
<p>An example of split using regular expression.</p>
<pre><code class="language-javascript">var text = &quot;Harry Trump ;Fred Barney; Helen Rigby ; Bill Abel ;Chris Hand &quot;;
var regex = /\s*;\s*/;
var output = text.split(regex);
log(output); // [&quot;Harry Trump&quot;, &quot;Fred Barney&quot;, &quot;Helen Rigby&quot;, &quot;Bill Abel&quot;, &quot;Chris Hand &quot;]
</code></pre>
<h2>Non capturing Group</h2>
<p>The requirement given to me states that I should strictly look for word <code>java</code>,
<code>ruby</code> or <code>rails</code> within word boundary. This can be done like this.</p>
<pre><code class="language-javascript">var text = &quot;java&quot;;
var regex = /\bjava\b|\bruby\b|\brails\b/;
text.match(regex);
</code></pre>
<p>Above code works. However notice the code duplication. This can be refactored to
the one given below.</p>
<pre><code class="language-javascript">var text = &quot;rails&quot;;
var regex = /\b(java|ruby|rails)\b/;
text.match(regex);
</code></pre>
<p>Above code works and there is no code duplication. However in this case I am
asking regular expression engine to create a captured group which I'll not be
using. Regex engines need to do extra work to keep track of captured groups. It
would be nice if I could say to regex engine do not capture this into a group
because I will not be using it.</p>
<p><code>?:</code> is a special symbol that tells regex engine to create non capturing group.
Above code can be refactored into the one given below.</p>
<pre><code class="language-javascript">var text = &quot;rails&quot;;
var regex = /\b(?:java|ruby|rails)\b/;
text.match(regex);
</code></pre>
<pre><code class="language-javascript">text = &quot;#container a.filter(.top).filter(.bottom).filter(.middle)&quot;;
matches = text.match(/^[^.]*|\.[^.]*(?=\))/g);
log(matches);
</code></pre>
]]></content>
    </entry>
  <entry>
      <title type="text"><![CDATA[Get started with nodejs in steps]]></title>
      <link rel="alternate" type="text/html" href="https://www.bigbinary.com/blog/getting-started-with-nodejs-in-steps"/>
      <link rel="enclosure" type="image/png" href="https://www.bigbinary.com/blog/images/social_preview_images/generated/getting-started-with-nodejs-in-steps.png"/>
      <id>https://www.bigbinary.com/blog/getting-started-with-nodejs-in-steps</id>
      <published>2010-03-25T00:00:00.000Z</published>
      <updated>2010-03-25T00:00:00.000Z</updated>
      <author>
        <name>Neeraj Singh</name>
        <uri>https://www.bigbinary.com/blog/authors/neerajsingh0101</uri>
      </author>
      <category term="JavaScript"/>
      <media:thumbnail url="https://www.bigbinary.com/blog/images/social_preview_images/generated/getting-started-with-nodejs-in-steps.png" width="1200" height="630"/>
      <summary type="text"><![CDATA[Sometimes the hardest thing is getting started with something. This blog will help you get started with nodejs.]]></summary>
      <content type="html" xml:base="https://www.bigbinary.com/blog/getting-started-with-nodejs-in-steps"><![CDATA[<p><a href="http://nodejs.org">nodejs</a> is awesome. To get people started with nodejs,
<a href="http://chat.nodejs.org">node-chat</a> has been developed. Source code for
node-chat app is here (Link is not available) .</p>
<p>When I looked at source code for the first time, it looked intimidating. In
order to get started with nodejs, I have developed a small portion of the
node-chat application in 13 incremental steps.</p>
<p>The first step is as simple as
<a href="http://github.com/neerajsingh0101/node-chat-in-steps/raw/step1/server.js">15 lines of code</a>
.</p>
<p>If you want to follow along then go through
<a href="http://github.com/neerajsingh0101/node-chat-in-steps">README</a> and you can get a
feel of nodejs very quickly. How to checkout each step and other information is
mentioned in README.</p>
<p>Enjoy nodejs.</p>
]]></content>
    </entry>
  <entry>
      <title type="text"><![CDATA[Two ways of declaring functions]]></title>
      <link rel="alternate" type="text/html" href="https://www.bigbinary.com/blog/two-ways-of-declaring-functions"/>
      <link rel="enclosure" type="image/png" href="https://www.bigbinary.com/blog/images/social_preview_images/generated/two-ways-of-declaring-functions.png"/>
      <id>https://www.bigbinary.com/blog/two-ways-of-declaring-functions</id>
      <published>2010-03-15T00:00:00.000Z</published>
      <updated>2010-03-15T00:00:00.000Z</updated>
      <author>
        <name>Neeraj Singh</name>
        <uri>https://www.bigbinary.com/blog/authors/neerajsingh0101</uri>
      </author>
      <category term="JavaScript"/>
      <media:thumbnail url="https://www.bigbinary.com/blog/images/social_preview_images/generated/two-ways-of-declaring-functions.png" width="1200" height="630"/>
      <summary type="text"><![CDATA[There are many ways of declaring a function. In this blog we will discuss two of those techniques.]]></summary>
      <content type="html" xml:base="https://www.bigbinary.com/blog/two-ways-of-declaring-functions"><![CDATA[<p>All the JavaScript books I read so far do not distinguish between following two
ways of declaring a function.</p>
<pre><code class="language-javascript">var foo = function () {};
function foo() {}
</code></pre>
<p>Thanks to <a href="http://www.adequatelygood.com">Ben</a> today I learned that
<a href="http://www.adequatelygood.com/2010/2/JavaScript-Scoping-and-Hoisting">there is a difference</a>
.</p>
<h2>When a var is used to declare a function then only the variable declaration gets hoisted up</h2>
<pre><code class="language-javascript">function test() {
  foo();
  var foo = function () {
    console.log(&quot;foo&quot;);
  };
}
test();
</code></pre>
<p>Above code is same as one given below.</p>
<pre><code class="language-javascript">function test() {
  var foo;
  foo();
  foo = function () {
    console.log(&quot;foo&quot;);
  };
}
test();
</code></pre>
<h2>When a function variable is declared without var then both variable declaration and body gets hoisted up</h2>
<pre><code class="language-javascript">function test() {
  foo();
  function foo() {
    console.log(&quot;foo&quot;);
  }
}
test();
</code></pre>
<p>Above code is same as one given below.</p>
<pre><code class="language-javascript">function test() {
  var foo;
  foo = function () {};
  console.log(foo());
}
test();
</code></pre>
<h2>Conclusion</h2>
<p>Now it will be clear why <code>foo()</code> does not work in the following case while
<code>bar()</code> does work.</p>
<pre><code class="language-javascript">function test() {
  foo(); // TypeError &quot;foo is not a function&quot;
  bar(); // &quot;this will run!&quot;
  var foo = function () {
    // function expression assigned to local variable 'foo'
    alert(&quot;this won't run!&quot;);
  };
  function bar() {
    // function declaration, given the name 'bar'
    alert(&quot;this will run!&quot;);
  }
}
test();
</code></pre>
]]></content>
    </entry>
  <entry>
      <title type="text"><![CDATA[Lessons learned from JavaScript quizzes]]></title>
      <link rel="alternate" type="text/html" href="https://www.bigbinary.com/blog/lessons-learned-from-javascript-quizzes"/>
      <link rel="enclosure" type="image/png" href="https://www.bigbinary.com/blog/images/social_preview_images/generated/lessons-learned-from-javascript-quizzes.png"/>
      <id>https://www.bigbinary.com/blog/lessons-learned-from-javascript-quizzes</id>
      <published>2010-03-15T00:00:00.000Z</published>
      <updated>2010-03-15T00:00:00.000Z</updated>
      <author>
        <name>Neeraj Singh</name>
        <uri>https://www.bigbinary.com/blog/authors/neerajsingh0101</uri>
      </author>
      <category term="JavaScript"/>
      <media:thumbnail url="https://www.bigbinary.com/blog/images/social_preview_images/generated/lessons-learned-from-javascript-quizzes.png" width="1200" height="630"/>
      <summary type="text"><![CDATA[Recently I tried to answer some JavaScript quizzes and in the process learned a bit. This blog discusses things that I learned.]]></summary>
      <content type="html" xml:base="https://www.bigbinary.com/blog/lessons-learned-from-javascript-quizzes"><![CDATA[<p>Nicholas answered three JavaScript quizzes in his blog. I am not interested in
quiz like the one given below</p>
<pre><code class="language-javascript">var num1 = 5,
  num2 = 10,
  result = num1++ + num2;
</code></pre>
<p>However some of the questions helped me learn a few things.</p>
<h2>Questions from quiz</h2>
<p>Recently there was a
<a href="http://www.nczonline.net/blog/2010/02/23/answering-soshnikovs-quiz">quiz</a> out.</p>
<p>This was question #5 in the original blog. I have modified the quiz a little bit
to suit my needs.</p>
<pre><code class="language-javascript">var x = 10;
var foo = {
  x: 20,
  bar: function () {
    var x = 30;
    return this.x;
  },
};

// 1
console.log(foo.bar());

// 2
console.log(foo.bar());

// 3
console.log(foo.bar.call());
</code></pre>
<p>I got the first two answers wrong. In JavaScript a variable and a property are
two different things. When <code>this.xyx</code> is invoked then JavaScript engine is
looking for property called <code>xyz</code>.</p>
<pre><code class="language-javascript">var bar = function () {
  var x = 30;
  return this.x;
};
console.log(bar()); //=&gt; undefined
</code></pre>
<p>In the above case output is <code>undefined</code>. This is because <code>this</code> refers to a
property named <code>x</code> and since no such property was found <code>undefined</code> is the
answer.</p>
<pre><code class="language-javascript">var foo = {
  x: 20,
  bar: function () {
    return x;
  },
};
console.log(foo.bar());
</code></pre>
<p>Above code causes <code>ReferenceError</code> because <code>x is not defined</code>. Same theory
applies here. In this case <code>x</code> is a variable and since no such variable was
found code failed.</p>
<p>Coming back to the third part of the original question. This one uses call.</p>
<pre><code class="language-javascript">console.log(foo.bar.call());
</code></pre>
<p>First argument of <code>call</code> or <code>apply</code> method determines what <code>this</code> would be
inside the function. If no argument is passed then JavaScript engine assumes
that <code>this</code> would be global scope which translates to <code>this</code> being <code>window</code>.
Hence the answer is <code>10</code> in this case.</p>
<h2>Questions from another quiz</h2>
<p>There was another
<a href="http://www.nczonline.net/blog/2010/02/18/my-javascript-quiz-answers">quiz</a> .</p>
<p>In the original blog this is question #2.</p>
<pre><code class="language-javascript">var x = 5,
  o = {
    x: 10,
    doIt: function doIt() {
      var x = 20;
      setTimeout(function () {
        alert(this.x);
      }, 10);
    },
  };
o.doIt();
</code></pre>
<p>The key thing to remember here is that
<code>All functions passed into setTimeout() are executed in the global scope</code> .</p>
<p>In the original blog this is question #5.</p>
<pre><code class="language-javascript">var o = {
    x: 8,

    valueOf: function () {
      return this.x + 2;
    },
    toString: function () {
      return this.x.toString();
    },
  },
  result = o &lt; &quot;9&quot;;

alert(o);
</code></pre>
<p>The thing to remember here is that when comparison is done then <code>valueOf</code> method
is called on the object.</p>
<h2>Questions from <a href="http://www.nczonline.net/blog/2010/01/26/answering-baranovskiys-javascript-quiz">quiz</a></h2>
<p>This is question #1 in the original blog.</p>
<pre><code class="language-javascript">if (!(&quot;a&quot; in window)) {
  var a = 1;
}
alert(a);
</code></pre>
<p>I knew that all the variable declarations are hoisted up but somehow failed to
apply that logic here. Please see the original blog for a detailed answer.</p>
<p>This is question #5 in the original blog.</p>
<pre><code class="language-javascript">function a() {
  alert(this);
}
a.call(null);
</code></pre>
<p>I knew that if nothing is passed to <code>call</code> method then <code>this</code> becomes global but
did not know that if <code>null</code> is passed then also <code>this</code> becomes global.</p>
]]></content>
    </entry>
  <entry>
      <title type="text"><![CDATA[Practical example of need for prototypal inheritance]]></title>
      <link rel="alternate" type="text/html" href="https://www.bigbinary.com/blog/pratical-example-of-need-for-prototypal-inheritance"/>
      <link rel="enclosure" type="image/png" href="https://www.bigbinary.com/blog/images/social_preview_images/generated/pratical-example-of-need-for-prototypal-inheritance.png"/>
      <id>https://www.bigbinary.com/blog/pratical-example-of-need-for-prototypal-inheritance</id>
      <published>2010-03-12T00:00:00.000Z</published>
      <updated>2010-03-12T00:00:00.000Z</updated>
      <author>
        <name>Neeraj Singh</name>
        <uri>https://www.bigbinary.com/blog/authors/neerajsingh0101</uri>
      </author>
      <category term="JavaScript"/>
      <media:thumbnail url="https://www.bigbinary.com/blog/images/social_preview_images/generated/pratical-example-of-need-for-prototypal-inheritance.png" width="1200" height="630"/>
      <summary type="text"><![CDATA[The BigBinary team's lesson on practical examples of need for Prototypal Inheritance]]></summary>
      <content type="html" xml:base="https://www.bigbinary.com/blog/pratical-example-of-need-for-prototypal-inheritance"><![CDATA[<p>Alex Sexton wrote <a href="http://alexsexton.com/?p=51">a wonderful article</a> on how to
use inheritance pattern to manage large piece of code. His code also has a
practical need for prototypal inheritance for writing modular code.</p>
<h2>Creating standard jQuery plugin</h2>
<p>Given below is code that does exactly what Alex's code does.</p>
<pre><code class="language-javascript">$(function () {
  $.fn.speaker = function (options) {
    if (this.length) {
      return this.each(function () {
        var defaultOptions = {
          name: &quot;No name&quot;,
        };
        options = $.extend({}, defaultOptions, options);

        var $this = $(this);

        $this.html(&quot;&lt;p&gt;&quot; + options.name + &quot;&lt;/p&gt;&quot;);

        var fn = {};
        fn.speak = function (msg) {
          $this.append(&quot;&lt;p&gt;&quot; + msg + &quot;&lt;/p&gt;&quot;);
        };

        $.data(this, &quot;speaker&quot;, fn);
      });
    }
  };
});
</code></pre>
<p>For smaller plugins this code is not too bad. However if the plugin is huge then
it presents one big problem. The code for business problem and the code that
deals with jQuery is all mixed in. What it means is that if tomorrow same
functionality needs to be implemented for Prototype framework then it is not
clear what part of code deals with framework and what part deals with business
logic.</p>
<h2>Separating business logic and framework code</h2>
<p>Given below is code that separates business logic and framework code.</p>
<pre><code class="language-javascript">var Speaker = function (opts, elem) {
  this._build = function () {
    this.$elem.html(&quot;&lt;h1&gt;&quot; + options.name + &quot;&lt;/h1&gt;&quot;);
  };

  this.speak = function (msg) {
    this.$elem.append(&quot;&lt;p&gt;&quot; + msg + &quot;&lt;/p&gt;&quot;);
  };

  var defaultOptions = {
    name: &quot;No name&quot;,
  };

  var options = $.extend({}, defaultOptions, this.opts);

  this.$elem = $(elem);

  this._build();
};

$(function () {
  $.fn.speaker = function (options) {
    if (this.length) {
      return this.each(function () {
        var mySpeaker = new Speaker(options, this);
        $.data(this, &quot;speaker&quot;, mySpeaker);
      });
    }
  };
});
</code></pre>
<p>This code is an improvement over first iteration. However the whole business
logic is captured inside a function. This code can be further improved by
embracing object literal style of coding.</p>
<h2>Final Improvement</h2>
<p>Third and final iteration of the code is the code presented by Alex.</p>
<pre><code class="language-javascript">var Speaker = {
	init: function(options, elem) {
		this.options = $.extend({},
		this.options, options);

		this.elem = elem;
		this.$elem = $(elem);

		this._build();
	},
	options: {
		name: &quot;No name&quot;
	},
	_build: function() {
		this.$elem.html('&lt;h1&gt;' + this.options.name + '&lt;/h1&gt;');
	},
	speak: function(msg) {
		this.$elem.append('&lt;p&gt;' + msg + '&lt;/p&gt;');
	}
};

// Make sure Object.create is available in the browser (for our prototypal inheritance)
if (typeof Object.create !== 'function') {
	Object.create = function(o) {
		function F() {}
		F.prototype = o;
		return new F();
	};
}

$(function() {
	$.fn.speaker = function(options) {
		if (this.length) {
			return this.each(function() {
				var mySpeaker = Object.create(Speaker);
				mySpeaker.init(options, this);
				$.data(this, 'speaker', mySpeaker);
			});
		}
	};
</code></pre>
<p>Notice the Object.create pattern Alex used. The business logic code was
converted from a function to a JavaScript object. However the problem is that
you can't create a new on that object. And you need to create new object so that
you could dole out new objects to each element. Object.create pattern comes to
rescue.</p>
<p>This pattern takes a standard Object and returns an instance of a function. This
function has the input object set as prototype. So you get a brand new object
for each element and you get to have all your business logic in object literal
way and not in a function. If you want to know more about prototypal inheritance
then you can read more about it in
<a href="https://www.bigbinary.com/blog/prototypal-inheritance-in-javascript">previous blog</a> .</p>
<p><code>Object.create</code> is now part of
<a href="http://www.ecma-international.org/publications/files/ECMA-ST/ECMA-262.pdf">ECMAScript 5</a>
.</p>
]]></content>
    </entry>
  <entry>
      <title type="text"><![CDATA[Prototypal inheritance in JavaScript]]></title>
      <link rel="alternate" type="text/html" href="https://www.bigbinary.com/blog/prototypal-inheritance-in-javascript"/>
      <link rel="enclosure" type="image/png" href="https://www.bigbinary.com/blog/images/social_preview_images/generated/prototypal-inheritance-in-javascript.png"/>
      <id>https://www.bigbinary.com/blog/prototypal-inheritance-in-javascript</id>
      <published>2010-03-11T00:00:00.000Z</published>
      <updated>2010-03-11T00:00:00.000Z</updated>
      <author>
        <name>Neeraj Singh</name>
        <uri>https://www.bigbinary.com/blog/authors/neerajsingh0101</uri>
      </author>
      <category term="JavaScript"/>
      <media:thumbnail url="https://www.bigbinary.com/blog/images/social_preview_images/generated/prototypal-inheritance-in-javascript.png" width="1200" height="630"/>
      <summary type="text"><![CDATA[The BigBinary team's lesson on prototypal inheritance in JavaScript]]></summary>
      <content type="html" xml:base="https://www.bigbinary.com/blog/prototypal-inheritance-in-javascript"><![CDATA[<p>One of the key features of JavaScript language is its support for prototype
method. This feature could be used to bring inheritance in JavaScript.</p>
<h2>In the beginning there was duplication</h2>
<pre><code class="language-javascript">function Person(dob) {
  this.dob = dob;
  this.votingAge = 21;
}
</code></pre>
<pre><code class="language-javascript">function Developer(dob, skills) {
  this.dob = dob;
  this.skills = skills || &quot;&quot;;
  this.votingAge = 21;
}
</code></pre>
<pre><code class="language-javascript">// create a Person instance
var person = new Person(&quot;02/02/1970&quot;);

//create a Developer instance
var developer = new Developer(&quot;02/02/1970&quot;, &quot;JavaScript&quot;);
</code></pre>
<p>As you can see both Person and Developer objects have votingAge property. This
is code duplication. This is an ideal case where inheritance can be used.</p>
<h2>prototype method</h2>
<p>Whenever you create a function, that function instantly gets a property called
prototype. The initial value of this prototype property is empty JavaScript
object <code>{}</code> .</p>
<pre><code class="language-javascript">var fn = function () {};
fn.prototype; //=&gt; {}
</code></pre>
<p>JavaScript engine while looking up for a method in a function first searches for
method in the function itself. Then the engine looks for that method in that
functions' prototype object.</p>
<p>Since prototype itself is a JavaScript object, more methods could be added to
this JavaScript object.</p>
<pre><code class="language-javascript">var fn = function () {};
fn.prototype.author_name = &quot;John&quot;;
var f = new fn();
f.author_name; //=&gt; John
</code></pre>
<h2>Refactoring code to make use of prototype method</h2>
<p>Currently Person function is defined like this.</p>
<pre><code class="language-javascript">function Person(dob) {
  this.dob = dob;
  this.votingAge = 21;
}
</code></pre>
<p>Problem with above code is that every time a new instance of Person is created,
two new properties are created and they take up memory. If a million objects are
created then all instances will have a property called <code>votingAge</code> even though
the value of votingAge is going to be same. All the million person instances can
refer to same votingAge method if that method is define in prototype. This will
save a lot of memory.</p>
<pre><code class="language-javascript">function Person(dob) {
  this.dob = dob;
}
Person.prototype.votingAge = 21;
</code></pre>
<p>The modified solutions will save memory if a lot of objects are created. However
notice that now it will a bit longer for JavaScript engine to look for
<code>votingAge</code> method. Previously JavaScript engine would have looked for property
named <code>votingAge</code> inside the person object and would have found it. Now the
engine will not find <code>votingAge</code> property inside the person object. Then engine
will look for person.prototype and will search for <code>votingAge</code> property there.
It means, in the modified code engine will find <code>votingAge</code> method in the second
hop instead of first hop.</p>
<h2>Bringing inheritance using prototype property</h2>
<p>Currently Person is defined like this.</p>
<pre><code class="language-javascript">function Person(dob) {
  this.dob = dob;
}
Person.prototype.votingAge = 21;
</code></pre>
<p>If Developer Object wants to extend Person then all that needs to be done is
this.</p>
<pre><code class="language-javascript">function Developer(dob, skills) {
  this.skills = skills || &quot;&quot;;
  this.dob = dob;
}
Developer.prototype = new Person();
</code></pre>
<p>Now Developer instance will have access to <code>votingAge</code> method. This is much
better. Now there is no code duplication between Developer and Person.</p>
<p>However notice that looking for <code>votingAge</code> method from a Developer instance
will take an extra hop.</p>
<ul>
<li>JavaScript engine will first look for votingAge property in the Developer
instance object.</li>
<li>Next engine will look for votingAge property in its prototype property of
Developer instance which is an instance of Person. votingAge method is not
declared in the Person instance.</li>
<li>Next engine will look for votingAge property in the prototype of Person
instance and this method would be found.</li>
</ul>
<p>Since only the methods that are common to both Developer and Person are present
in the Person.prototype there is nothing to be gained by looking for methods in
the Person instance. Next implementation will be removing the middle man.</p>
<h2>Remove the middle man</h2>
<p>Here is the revised implementation of Developer function.</p>
<pre><code class="language-javascript">function Developer(dob, skills) {
  this.skills = skills || &quot;&quot;;
  this.dob = dob;
}
Developer.prototype = Person.prototype;
</code></pre>
<p>In the above case Developer.prototype directly refers to Person.prototype. This
will reduce the number of hops needed to get to method <code>votingAge</code> by one
compared to previous case.</p>
<p>However there is a problem. If Developer changes the common property then
instances of person will see the change. Here is an example.</p>
<pre><code class="language-javascript">Developer.prototype.votingAge = 18;
var developer = new Developer(&quot;02/02/1970&quot;, &quot;JavaScript&quot;);
developer.votingAge; //=&gt; 18

var person = new Person();
person.votingAge; //=&gt; 18. Notice that votingAge for Person has changed from 21 to 18
</code></pre>
<p>In order to solve this problem Developer.prototype should point to an empty
object. And that empty object should refer to Person.prototype .</p>
<h2>Solving the problem by adding an empty object</h2>
<p>Here is revised implementation for Developer object.</p>
<pre><code class="language-javascript">function Developer(dob, skills) {
  this.dob = dob;
  this.skills = skills;
}
var F = function () {};
F.prototype = Person.prototype;
Developer.prototype = new F();
</code></pre>
<p>Let's test this code.</p>
<pre><code class="language-javascript">Developer.prototype.votingAge = 18;
var developer = new Developer(&quot;02/02/1970&quot;, &quot;JavaScript&quot;);
developer.votingAge; //=&gt; 18

var person = new Person();
person.votingAge; //=&gt; 21
</code></pre>
<p>As you can see with the introduction of empty object, Developer instance have
votingAge of 18 while Person instance have votingAge of 21.</p>
<h2>Accessing super</h2>
<p>If child wants to access super object then that should be allowed. That can be
accomplished like this.</p>
<pre><code class="language-javascript">function Person(dob) {
  this.dob = dob;
}
Person.prototype.votingAge = 21;

function Developer(dob, skills) {
  this.dob = dob;
  this.skills = skills;
}
var F = function () {};
F.prototype = Person.prototype;
Developer.prototype = new F();
Developer.prototype.__super = Person.prototype;
Developer.prototype.votingAge = 18;
</code></pre>
<h3>Capturing it as a pattern</h3>
<p>The whole thing can be captured in a helper method that would make it simple to
create inheritance.</p>
<pre><code class="language-javascript">var extend = function (parent, child) {
  var F = function () {};
  F.prototype = parent.prototype;
  child.prototype = new F();
  child.prototype.__super = parent.prototype;
};
</code></pre>
<h2>Pure prototypal inheritance</h2>
<p>A simpler form of pure prototypal inheritance can be structured like this.</p>
<pre><code class="language-javascript">if (typeof Object.create !== &quot;function&quot;) {
  Object.create = function (o) {
    function F() {}
    F.prototype = o;
    return new F();
  };
}
</code></pre>
<p>Before adding the create method to object, I checked if this method already
exists or not. That is important because <code>Object.create</code> is part of ECMAScript 5
and slowly more and more browsers will start adding that method natively to
JavaScript.</p>
<p>You can see that Object.create takes only one parameter. This method does not
necessarily create a parent child relationship . But it can be a very good tool
in converting an object literal to a function.</p>
]]></content>
    </entry>
  <entry>
      <title type="text"><![CDATA[JavaScript Basics Quiz]]></title>
      <link rel="alternate" type="text/html" href="https://www.bigbinary.com/blog/javascript-basics-quiz"/>
      <link rel="enclosure" type="image/png" href="https://www.bigbinary.com/blog/images/social_preview_images/generated/javascript-basics-quiz.png"/>
      <id>https://www.bigbinary.com/blog/javascript-basics-quiz</id>
      <published>2009-10-29T00:00:00.000Z</published>
      <updated>2009-10-29T00:00:00.000Z</updated>
      <author>
        <name>Neeraj Singh</name>
        <uri>https://www.bigbinary.com/blog/authors/neerajsingh0101</uri>
      </author>
      <category term="JavaScript"/>
      <media:thumbnail url="https://www.bigbinary.com/blog/images/social_preview_images/generated/javascript-basics-quiz.png" width="1200" height="630"/>
      <summary type="text"><![CDATA[A basic quiz about JavaScript.]]></summary>
      <content type="html" xml:base="https://www.bigbinary.com/blog/javascript-basics-quiz"><![CDATA[<p>Let's look at some JavaScript questions.</p>
<h2>Question 1</h2>
<p>What's the output.</p>
<pre><code class="language-javascript">x = 90;
function f() {
  console.log(x);
  var x = 100;
}
f();
</code></pre>
<h2>Answer 1</h2>
<p>The result is <code>undefined</code> . In JavaScript a variable exists in the scope of a
function and that variable can be defined anywhere in the function. To find out
more about lexical scope read
<a href="http://stackoverflow.com/questions/1047454/what-is-lexical-scope">here</a> and
<a href="http://en.wikipedia.org/wiki/Scope_(programming)">here</a> .</p>
<h2>Question 2</h2>
<p>Go to <a href="http://www.prototypejs.org">prototype homepage</a> open firebug and execute
following code.</p>
<pre><code class="language-javascript">var a = [&quot;a&quot;, &quot;b&quot;, &quot;c&quot;];
var result = &quot;\n&quot;;
for (i in a) {
  result += &quot;index: &quot; + i + &quot; value:&quot; + a[i] + &quot;\n&quot;;
}
</code></pre>
<p>Now go to <a href="http://jquery.com">jQuery</a> homepage and execute the same code. Notice
the difference in output. Why the difference?</p>
<h2>Answer 2</h2>
<p>Prototype adds additional methods to Array using <code>Array.prototype</code> . Those
methods show up when you iterate through them. If you want to ignore methods
added through <code>Array.prototype</code> then use this code.</p>
<pre><code class="language-javascript">var a = [&quot;a&quot;, &quot;b&quot;, &quot;c&quot;];
var result = &quot;\n&quot;;
for (i in a) {
  if (a.hasOwnProperty(i)) result += &quot;index: &quot; + i + &quot; value:&quot; + a[i] + &quot;\n&quot;;
}
</code></pre>
<h2>Question 3</h2>
<p>In order to find if an element with id <code>foo</code> is present, one can do</p>
<pre><code class="language-javascript">if ($(&quot;#foo&quot;).length &gt; 0) console.log(&quot;id foo is present&quot;);
</code></pre>
<p>How can you make the conditional statement shorter.</p>
<h2>Answer 3</h2>
<p>In JavaScript following items evaluate to false in a conditional statement:
undefined, null, false, empty string, NaN, 0</p>
<pre><code class="language-javascript">if ($(&quot;#foo&quot;)) console.log(&quot;id foo is present&quot;);
</code></pre>
<h2>Question 4</h2>
<p>What is the output in this case. Notice that function bar is defined after the
<code>return</code> statement.</p>
<pre><code class="language-javascript">function foo() {
  console.log(z);
  console.log(bar());
  return true;

  function bar() {
    return &quot;this is bar&quot;;
  }

  var z = &quot;zzz&quot;;
}

foo();
</code></pre>
<h2>Answer 4</h2>
<p>Output is</p>
<pre><code class="language-javascript">undefined
this is bar
true
</code></pre>
<h2>Question 5</h2>
<p>What's output in this case.</p>
<pre><code class="language-javascript">function logit(n) {
  console.log(n);
}

for (i = 1; i &lt; 5; i++) {
  setInterval(function () {
    logit(i);
  }, 2000);
}
</code></pre>
<h2>Answer 5</h2>
<p>The result would be output <code>5 5 5 5</code> and all the four output will appear
together in one shot. Then after 2 seconds another set of similar data would
appear. This would continue forever.</p>
<p>Question is why do I see the output in one single shot and why do I see value 5
for all four cases.</p>
<p>Browsers execute JavaScript in a single thread. While that thread is busy
executing 'for loop' the thread makes note of additional instructions like
setInterval. Since the thread is already running 'for loop', the same thread
can't run setInterval. So the thread finishes the 'for loop' and then looks up
additional tasks to be performed. It find setInterval task to be waiting. It
executes the function. While it is executing the function ,by virtue of closure,
the value of i is 5. Hence you see <code>5 5 5 5</code> and you see all that in one single
shot.</p>
<p>Correct implementation would be</p>
<pre><code class="language-javascript">function logit(n) {
  console.log(n);
}

var counter = 0;
var timer = setInterval(function () {
  logit(counter);
  counter++;
  if (counter == 5) {
    clearTimeout(timer);
  }
}, 2000);
</code></pre>
<p>Above code would print <code>0 1 2 3 4</code> at an interval of 2 seconds.</p>
<h2>Question 6</h2>
<p>What's the output in this case.</p>
<pre><code class="language-javascript">flight = { status: &quot;arrived&quot; };
console.log(typeof flight.status);
console.log(typeof flight.toString);
console.log(flight.hasOwnProperty(&quot;status&quot;));
console.log(flight.hasOwnProperty(&quot;toString&quot;));
</code></pre>
<h2>Answer 6</h2>
<pre><code class="language-plaintext">string
function
true
false
</code></pre>
<h2>Question 7</h2>
<p>What's output in this case.</p>
<pre><code class="language-javascript">function Person(name) {
  this.name = name;
}
Person.prototype.welcome = function () {
  return &quot;welcome &quot; + this.name;
};

p = new Person(&quot;John&quot;);

console.log(p.welcome.call(p));

o = { name: &quot;Mary&quot; };

console.log(Person.prototype.welcome.call(o));
</code></pre>
<h2>Answer 7</h2>
<pre><code class="language-plaintext">welcome John
welcome Mary
</code></pre>
<h2>Question 8</h2>
<p>JavaScript has <code>Math</code> library which can be used like this</p>
<pre><code class="language-javascript">Math.max(6, 7, 8); // result is 8
</code></pre>
<p>If I provide an array with certain values then how would you find the max value
for that array.</p>
<pre><code class="language-javascript">a = [1, 2, 3];
</code></pre>
<h2>Answer 8</h2>
<p>This answer builds up on the answer provided in #7 .</p>
<p>You can try this but it will fail.</p>
<pre><code class="language-javascript">Math.max(a); //output is NaN
</code></pre>
<p>You can try this but it will fail too.</p>
<pre><code class="language-javascript">Math.max.call(Math, a); // output is NaN
</code></pre>
<p>This will work</p>
<pre><code class="language-javascript">Math.max.apply(Math, a); //output is 3
</code></pre>
<p><code>apply</code> method works because it accepts an array as the argument. <code>call</code> method
passes the individual params to the called method directly and hence it does not
work. You can read more about JavaScript
<a href="http://odetocode.com/blogs/scott/archive/2007/07/04/function-apply-and-function-call-in-javascript.aspx">apply and call methods here</a>
.</p>
]]></content>
    </entry>
  <entry>
      <title type="text"><![CDATA[Encapsulation in JavaScript]]></title>
      <link rel="alternate" type="text/html" href="https://www.bigbinary.com/blog/encapsulation-in-javascript"/>
      <link rel="enclosure" type="image/png" href="https://www.bigbinary.com/blog/images/social_preview_images/generated/encapsulation-in-javascript.png"/>
      <id>https://www.bigbinary.com/blog/encapsulation-in-javascript</id>
      <published>2009-10-12T00:00:00.000Z</published>
      <updated>2009-10-12T00:00:00.000Z</updated>
      <author>
        <name>Neeraj Singh</name>
        <uri>https://www.bigbinary.com/blog/authors/neerajsingh0101</uri>
      </author>
      <category term="JavaScript"/>
      <media:thumbnail url="https://www.bigbinary.com/blog/images/social_preview_images/generated/encapsulation-in-javascript.png" width="1200" height="630"/>
      <summary type="text"><![CDATA[JavaScript does not allow you to define a method as public or private. This is a limitation users need to get around to, because in real life you don't want to expose all methods as public method.]]></summary>
      <content type="html" xml:base="https://www.bigbinary.com/blog/encapsulation-in-javascript"><![CDATA[<p>JavaScript does not allow you to define a method as public or private. This is a
limitation users need to get around to, because in real life you don't want to
expose all methods as public method.</p>
<p>Here is a simple implementation of the case where you want to verify input code.</p>
<pre><code class="language-javascript">function verifycode(code) {
  console.log(code.length);
  return code.length == 4 ? true : false;
}

function info(code) {
  if (verifycode(code)) {
    console.log(code + &quot; is valid&quot;);
  } else {
    console.log(code + &quot; is wrong&quot;);
  }
}

info(&quot;abcd&quot;);
info(&quot;rty&quot;);
</code></pre>
<p>In the above implementation anyone can call the method verifycode. Not good.
Here is one way to fix this problem.</p>
<pre><code class="language-javascript">var Lab = Lab || {};
Lab = (function () {
  var verifycode = function (code) {
    console.log(code.length);
    return code.length == 4 ? true : false;
  };
  return {
    info: function (code) {
      if (verifycode(code)) {
        console.log(code + &quot; is valid&quot;);
      } else {
        console.log(code + &quot; is wrong&quot;);
      }
    },
  };
})();

Lab.info(&quot;abcd&quot;);
Lab.info(&quot;rty&quot;);
Lab.verifycode(&quot;abcd&quot;); //verifycode is private
</code></pre>
<p>Another way to solve the same problem would be to create a constructor function.
Here is an implementation.</p>
<pre><code class="language-javascript">function Lab(code) {
  this.code = code;
  var verifycode = function () {
    return code.length == 4 ? true : false;
  };
  this.info = function () {
    if (verifycode()) {
      console.log(code + &quot; is valid&quot;);
    } else {
      console.log(code + &quot; is wrong&quot;);
    }
  };
}
new Lab(&quot;abcd&quot;).info();
</code></pre>
<p>Here is another way to solve the same problem. In this case I have moved all the
public methods to prototype.</p>
<pre><code class="language-javascript">function Lab(code) {
  this.code = code;
  this.verifycode = function () {
    l = code.length;
    return l == 4 ? true : false;
  };
}

Lab.prototype.info = function () {
  if (this.verifycode()) {
    console.log(this.code + &quot; is valid&quot;);
  } else {
    console.log(this.code + &quot; is wrong&quot;);
  }
};

new Lab(&quot;abcd&quot;).info();
</code></pre>
]]></content>
    </entry>
  <entry>
      <title type="text"><![CDATA[Integrating JavaScriptLint with mvim]]></title>
      <link rel="alternate" type="text/html" href="https://www.bigbinary.com/blog/integrating-javascriptlint-with-mvim-and-getting-rid-of-annoying-warnings"/>
      <link rel="enclosure" type="image/png" href="https://www.bigbinary.com/blog/images/social_preview_images/generated/integrating-javascriptlint-with-mvim-and-getting-rid-of-annoying-warnings.png"/>
      <id>https://www.bigbinary.com/blog/integrating-javascriptlint-with-mvim-and-getting-rid-of-annoying-warnings</id>
      <published>2009-09-08T00:00:00.000Z</published>
      <updated>2009-09-08T00:00:00.000Z</updated>
      <author>
        <name>Neeraj Singh</name>
        <uri>https://www.bigbinary.com/blog/authors/neerajsingh0101</uri>
      </author>
      <category term="JavaScript"/>
      <media:thumbnail url="https://www.bigbinary.com/blog/images/social_preview_images/generated/integrating-javascriptlint-with-mvim-and-getting-rid-of-annoying-warnings.png" width="1200" height="630"/>
      <summary type="text"><![CDATA[Use JavaScriptLin in mac vim.]]></summary>
      <content type="html" xml:base="https://www.bigbinary.com/blog/integrating-javascriptlint-with-mvim-and-getting-rid-of-annoying-warnings"><![CDATA[<p>I use <a href="http://www.javascriptlint.com">JavaScriptLint</a> along with
<a href="http://www.vim.org/scripts/script.php?script_id=2578">JavaScriptLint.vim</a> on
mvim to catch any JavaScript syntax error or missing semicolons. It works great
except in cases when I am chaining methods like this.</p>
<pre><code class="language-javascript">var select_col1 = $(&quot;&lt;select&gt;&lt;/select&gt;&quot;)
  .addClass(&quot;ram_drop_down&quot;)
  .addClass(&quot;ram_drop_down_col1&quot;)
  .attr(&quot;name&quot;, &quot;adv_search[&quot; + random_num + &quot;_row][col1]&quot;)
  .attr(&quot;id&quot;, random_num + &quot;_ram_drop_down_col1&quot;);
</code></pre>
<p>In such cases JavaScriptLint had warnings for me.</p>
<pre><code class="language-plaintext">unexpected end of line. It is ambiguous whether these lines are part of the same statement.
</code></pre>
<p>JavaScriptLint wants me to put the dot at the end of the line and not at the
beginning of the line. Well, I like having dots at the beginning of lines and I
wanted to turn off such warning.</p>
<p>JavaScriptLint comes with a default config file. I copied the config file to a
personal directory and disabled the warning.</p>
<pre><code class="language-plaintext">before: +ambiguous_newline
after: -ambiguous_newline
</code></pre>
<p>Also I had to comment out <code>+process jsl-test.js</code> at the very bottom. Now tell
your plugin to use this configuration file rather than the default one. Add the
following line to your vimrc file.</p>
<pre><code class="language-plaintext">let jslint_command_options = '-conf &quot;/Users/neeraj/vim/plugin/jslint/jsl.custom.conf&quot; -nofilelisting -nocontext -nosummary -nologo -process'
</code></pre>
<p><a href="http://github.com/neerajsingh0101/vim/tree/master">This is the vim settings</a> I
use and it has been configured to take care of it. Just go to <code>vimrc.local</code> and
change the path to your config file. Also don't forget to remove <code>&quot;</code> at the
beginning of the line to uncomment it.</p>
]]></content>
    </entry>
  <entry>
      <title type="text"><![CDATA[What is JSONP?]]></title>
      <link rel="alternate" type="text/html" href="https://www.bigbinary.com/blog/what-is-jsonp"/>
      <link rel="enclosure" type="image/png" href="https://www.bigbinary.com/blog/images/social_preview_images/generated/what-is-jsonp.png"/>
      <id>https://www.bigbinary.com/blog/what-is-jsonp</id>
      <published>2009-07-16T00:00:00.000Z</published>
      <updated>2009-07-16T00:00:00.000Z</updated>
      <author>
        <name>Neeraj Singh</name>
        <uri>https://www.bigbinary.com/blog/authors/neerajsingh0101</uri>
      </author>
      <category term="JavaScript"/>
      <media:thumbnail url="https://www.bigbinary.com/blog/images/social_preview_images/generated/what-is-jsonp.png" width="1200" height="630"/>
      <summary type="text"><![CDATA[Browsers do not allow cross domain AJAX request. JSONP can be used to get around this issue. This blog discusses what JSONP is and how to use it.]]></summary>
      <content type="html" xml:base="https://www.bigbinary.com/blog/what-is-jsonp"><![CDATA[<p><em>This is part II of How to create dynamic javascript widget( Link is not
available).</em></p>
<h2>What problem JSONP solves?</h2>
<p>Browsers do not allow cross-domain Ajax requests. For example if you try to make
Ajax request to http://www.eventsinindia.com/events/14633.js to get event data
you will get following error.</p>
<pre><code class="language-plaintext">Access to restricted URL denied.
</code></pre>
<p>In order to get around this security problem you can do any number of things
including sending the Ajax request to your server which will get the JSON data
from the eventsinindia.com API. Or use iframe. Both of these solutions are
implemented and discussed in
<a href="http://www.neeraj.name/blog/articles/846">this article</a> .</p>
<p>However in some cases JSONP solves this problem much more elegantly.</p>
<h2>Before we discuss JSONP some basics ?</h2>
<p>Before looking at JSONP let's cover some basics. When a html page includes a
javascript file then the html code looks something like this.</p>
<pre><code class="language-plaintext">&lt;script src=&quot;http://neeraj.name/javascripts/color.js&quot; type=&quot;text/javascript&quot;&gt;&lt;/script&gt;
</code></pre>
<p>There are two things to notice here. First is that the source of the javascript
file could be cross-domain. It means your html page can point the source of your
javascript file to <code>http://neeraj.name/javascripts/cache/all.js</code> and all.js will
be loaded by the browser. This feature which allows cross-domain loading of
javascript file is the basis of JSONP.</p>
<p>The second thing to notice is that the javascript written in color.js is
immediately evaluated after the source file has been loaded. For example the
content of color.js could be this.</p>
<pre><code class="language-javascript">alert(&quot;hello&quot;);
</code></pre>
<p>When the html page is loaded you will get an alert.</p>
<p>Let's recap: In the above section I showed you how you can point the source of
your javascript file to a domain that is not yours (cross-domain) and the code
loaded from the domain is immediately evaluated.</p>
<h2>What is JSONP?</h2>
<p>From the above section it is clear that if by some means we could dynamically
create a <code>script node</code> and point the source of that node to cross-domain and if
the remote site returns a javascript function then that function will be
evaluated.</p>
<p>However in the world of JSON we only get JSON data from the remote server. If we
want to stick the returned JSON data on our page then that data needs be used by
a javascript function. And that's where JSONP comes in handy.</p>
<p>Let's take an example. If you make a call to
http://www.eventsinindia.com/events/14633.js you will get JSON data back.</p>
<pre><code class="language-ruby">{&quot;name&quot;: &quot;Craft Classes&quot; , &quot;start_date&quot;: &quot;2009-05-01&quot; , ....}
</code></pre>
<p>However what you really want is to do is to stick this data on your html page by
invoking a javascript function like this</p>
<pre><code class="language-ruby">AddThisDataToPage({&quot;name&quot;: &quot;Craft Classes&quot; , &quot;start_date&quot;: &quot;2009-05-01&quot; , ....});
</code></pre>
<p>What needs to be done is while making a call to
http://www.eventsinindia.com/events/14633.js pass a parameter called <code>callback</code>
. So in this case the full url would look something like this</p>
<pre><code class="language-ruby">http://www.eventsinindia.com/events/14633.js?callback=AddThisDataToPage
</code></pre>
<p>Remember callback is a special word here. By using callback we are telling API
to wrap the response JSON data with a call to function named AddThisDataToPage.</p>
<p>Click on following two links to see the difference. The first link is returning
pure JSON data while the second link will return a javascript function.</p>
<p>http://www.eventsinindia.com/events/14633.js</p>
<p>http://www.eventsinindia.com/events/14633.js?callback=AddThisDataToPage</p>
<h2>Using JSONP with jQuery</h2>
<p>jQuery makes it easy to use JSONP. Look for documentation on how to use JSONP
with jquery <a href="http://docs.jquery.com/Ajax/jQuery.getJSON#overview">here</a> .</p>
<h2>Callback is not the name everyone uses</h2>
<p>Most of the people use <code>callback</code> as the key word to identify client is asking
for JSONP data. However some people use a different keyword. For example flickr
uses the keyword <code>jsoncallback</code></p>
<p>This returns JSON data</p>
<p><a href="http://api.flickr.com/services/feeds/photos_public.gne?tags=cat&amp;tagmode=any&amp;format=json">http://api.flickr.com/services/feeds/photos_public.gne?tags=cat&amp;tagmode=any&amp;format=json</a></p>
<p>In this case callback is being passed but flickr ignores it.</p>
<p><a href="http://api.flickr.com/services/feeds/photos_public.gne?tags=cat&amp;tagmode=any&amp;format=json&amp;callback=show">http://api.flickr.com/services/feeds/photos_public.gne?tags=cat&amp;tagmode=any&amp;format=json&amp;callback=show</a></p>
<p>In this case callback is being passed but the name is jsoncallback.</p>
<p><a href="http://api.flickr.com/services/feeds/photos_public.gne?tags=cat&amp;tagmode=any&amp;format=json&amp;jsoncallback=show">http://api.flickr.com/services/feeds/photos_public.gne?tags=cat&amp;tagmode=any&amp;format=json&amp;jsoncallback=show</a></p>
<h2>Providing support for JSONP</h2>
<p>All the APIs should provide support for JSONP. Enabling JSONP support is easy if
you are using Rails 2.3 or any Rack compliant framework. In Rails 2.3 all you
need to do is stick this file in lib as jsonp.rb (Link is not available) and
then add one line to the environment.rb .</p>
<pre><code class="language-ruby">#environment.rb
Rails::Initializer.run do |config|
  .....
  config.middleware.use 'Jsonp'
end
</code></pre>
<p>That's it. Now you are providing support of JSONP with the keyword being
<code>callback</code>.</p>
<h2>Security</h2>
<p>Since the data from external source is read and then that data is evaluated on
run time by Javascript, there is potential for security breach. So be careful
when you are using JSONP. Only load data from a trusted source.</p>
]]></content>
    </entry>
  <entry>
      <title type="text"><![CDATA[Usage of Closure in Javascript]]></title>
      <link rel="alternate" type="text/html" href="https://www.bigbinary.com/blog/usage-of-closure-in-javascript"/>
      <link rel="enclosure" type="image/png" href="https://www.bigbinary.com/blog/images/social_preview_images/generated/usage-of-closure-in-javascript.png"/>
      <id>https://www.bigbinary.com/blog/usage-of-closure-in-javascript</id>
      <published>2009-03-13T00:00:00.000Z</published>
      <updated>2009-03-13T00:00:00.000Z</updated>
      <author>
        <name>Neeraj Singh</name>
        <uri>https://www.bigbinary.com/blog/authors/neerajsingh0101</uri>
      </author>
      <category term="JavaScript"/>
      <media:thumbnail url="https://www.bigbinary.com/blog/images/social_preview_images/generated/usage-of-closure-in-javascript.png" width="1200" height="630"/>
      <summary type="text"><![CDATA[In this article you are going to see what you can do with the power of Closure in Javascript. This not an article about what Closure is. This is an article about what Closure can do. I see a lot of people asking the question what's the big deal with Closure. They want more real world cases where Closure will make sense.]]></summary>
      <content type="html" xml:base="https://www.bigbinary.com/blog/usage-of-closure-in-javascript"><![CDATA[<p>In this article you are going to see what you can do with the power of Closure
in Javascript. This not an article about what Closure is. This is an article
about what Closure can do. I see a lot of people asking the question what's the
big deal with Closure. They want more real world cases where Closure will make
sense.</p>
<h2>Example 1: Getting digit name</h2>
<p>The goal is to read from an array and display the result. The first
implementation is to put everything in Global namespace.</p>
<pre><code class="language-javascript">var names = [&quot;zero&quot;, &quot;one&quot;, &quot;two&quot;, &quot;three&quot;, &quot;four&quot;, &quot;five&quot;];

var digit_name = function (n) {
  return names[n];
};

alert(digit_name(3)); // 'three'
</code></pre>
<p>Above solution works. However creating a global variable <code>names</code> is not a good
thing. You should create as less global variables as possible.</p>
<h2>Moving to a function</h2>
<p>Next step is to move the code to a function. In this case we will not have any
global variable.</p>
<pre><code class="language-javascript">var digit_name = function (n) {
  var names = [&quot;zero&quot;, &quot;one&quot;, &quot;two&quot;, &quot;three&quot;, &quot;four&quot;, &quot;five&quot;];
  return names[n];
};
alert(digit_name(3));
</code></pre>
<p>The above solution is very slow. Every single time the function is called the
whole array is loaded. This solution works and most of the developers will
settle with this one. However Closure can provide a better solution.</p>
<h2>Better solution with Closure</h2>
<pre><code class="language-javascript">var digit_name = (function () {
  var names = [&quot;zero&quot;, &quot;one&quot;, &quot;two&quot;, &quot;three&quot;, &quot;four&quot;, &quot;five&quot;];

  return function (n) {
    return names[n];
  };
})();
alert(digit_name(3));
</code></pre>
<p>Note that after declaring, the function is also getting invoked. This is a case
of self invoking function. You can find out more about self invoking function
<a href="https://www.bigbinary.com/blog/understanding-jquery-plugin-pattern-and-self-invoking-javascript-function">here</a>
.</p>
<h2>Example 2: Getters and Setters</h2>
<p>Developers deal with getters and setters all the time. However creating a good
getter and setter could be a little tricky. Here is one implementation</p>
<pre><code class="language-javascript">function Field(val) {
  var value = val;

  this.getValue = function () {
    return value;
  };

  this.setValue = function (val) {
    value = val;
  };
}

var field = new Field(&quot;test&quot;);
field.value;
// =&gt; undefined
field.setValue(&quot;test2&quot;);
field.getValue();
// =&gt; &quot;test2&quot;
</code></pre>
<p>Above solution works and it's nicely done.</p>
<p>Let's look at another implementation.</p>
<pre><code class="language-javascript">var getValue, setValue;
(function () {
  var secret = 0;
  getValue = function () {
    return secret;
  };
  setValue = function (v) {
    secret = v;
  };
})();

setValue(&quot;foo&quot;);
getValue(); // foo
</code></pre>
<h2>Example 3: Building an iterator using Javascript</h2>
<pre><code class="language-javascript">function custome_iterator(x) {
  var i = 0;
  return function () {
    return x[i++];
  };
}

var next = setup([&quot;one&quot;, &quot;two&quot;, &quot;three&quot;, &quot;four&quot;]);

next();
next();
next();
</code></pre>
<p>This is a simple case of serially iterating through the items provided but the
logic of deciding next element can be complex and it can be private.</p>
<p>Closure is a big topic and a lot of people have written a lot about it. Just
search for Closure and you will get tons of links. I refer to this article time
to time to see what pattern to use to make best usage of Javascript Closure.</p>
<p>This article was inspired by
<a href="http://www.amazon.com/Object-Oriented-JavaScript-high-quality-applications-libraries/dp/1847194141">this book</a>,
<a href="http://www.youtube.com/watch?v=hQVTIJBZook">this video</a> and
<a href="http://ejohn.org/blog/javascript-getters-and-setters">this article</a> .</p>
]]></content>
    </entry>
</feed>