Optimizing NeetoDeploy's Cluster Autoscaler
October 10, 2023
Once we configured the Cluster Autoscaler to scale NeetoDeploy according to the load, the next challenge was how to do this efficiently. The primary issue we had to solve was to reduce the time we had to wait for the nodes to scale up.
Challenges faced
The Cluster Autoscaler works by monitoring the pods and checking if they are
waiting to get scheduled. If no nodes are available to schedule the waiting
pods, they will be in Pending state, until the kube-scheduler finds a
suitable node.
With our default Cluster Autoscaler setup, if a pod is provisioned when the
cluster is at maximum capacity, the pod will go into Pending state and remain
there until the cluster has scaled up. This entire flow consists of the
following steps:
- The Cluster Autoscaler scans the pods and identifies the un-schedulable pods.
- The Cluster Autoscaler provisions a new node. We have configured the autoscaler deployment with the necessary permissions for the autoscaling groups in EC2, with which the autoscaler can provision new EC2 machines.
- Kubernetes adds the newly provisioned node to the cluster’s control plane, and the cluster is “scaled up.”
- The pending pod gets scheduled to the newly added node.
From the perspective of a user who wants to get their application deployed, a
considerable amount of time is taken to complete all these steps in addition to
the time taken to build and release their code. We can only optimize it so much
by decreasing the scan interval of the Cluster Autoscaler. We need a mechanism
by which we can always have some buffer nodes ready so that the users’
deployments never go into Pending state and wait for the nodes to be
provisioned.
Pod Priority, Preemption and Overprovisioning
Kubernetes allows us to assign different priorities to pods. By default, all the
pods have a priority of 0. When a pod is scheduled, it can preempt or evict
other pods with lower priority than itself and take its place. We will use this
feature of pod preemption to reserve resources for incoming deployments.
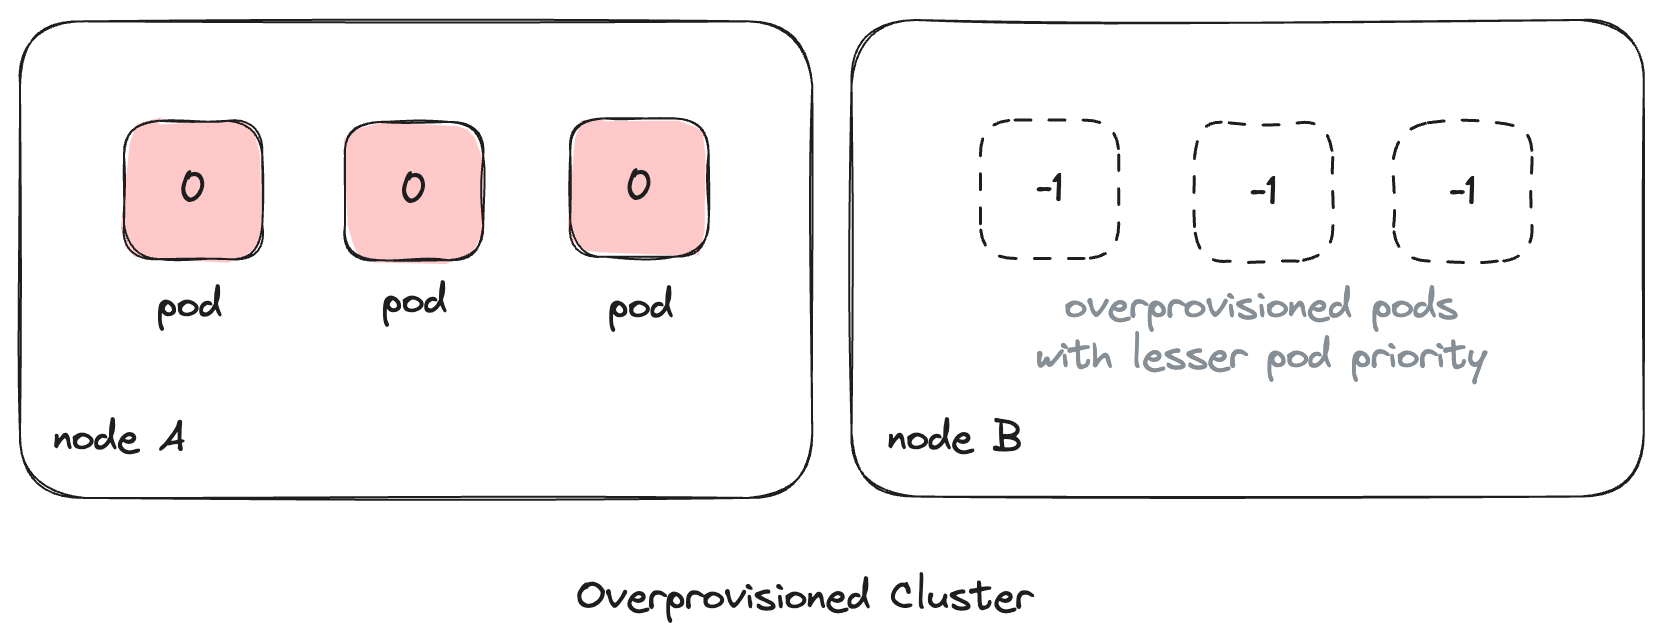
We created a new pod priority class with a priority of -1 and used this to
“overprovision”
pause pods. We allocated
a fixed amount of CPU and memory resources to these pause pods. The pause
container is a placeholder container used by Kubernetes internally and doesn’t
do anything by itself.

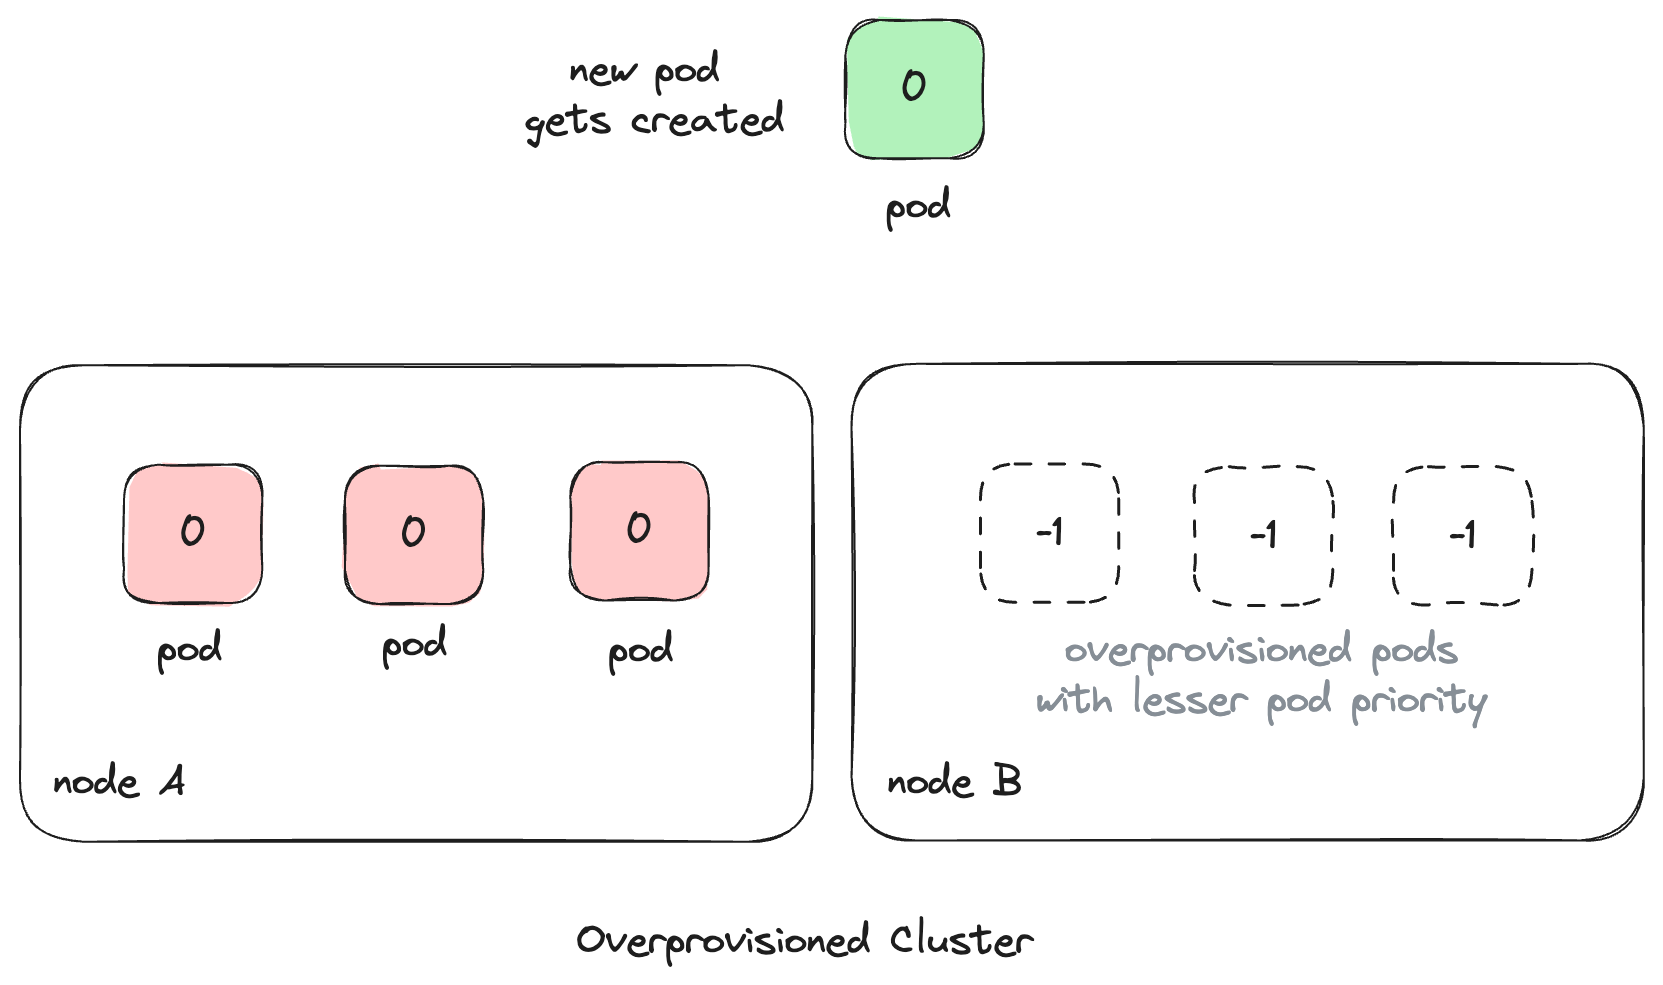
Now if the cluster is at full capacity and a new deployment is created,
technically the newly created pod doesn't have space to be scheduled in the
cluster. In normal cases, this would warrant a scale-up to be triggered by the
Cluster Autoscaler and the pod would be Pending until the new node is
provisioned and attached to the cluster.

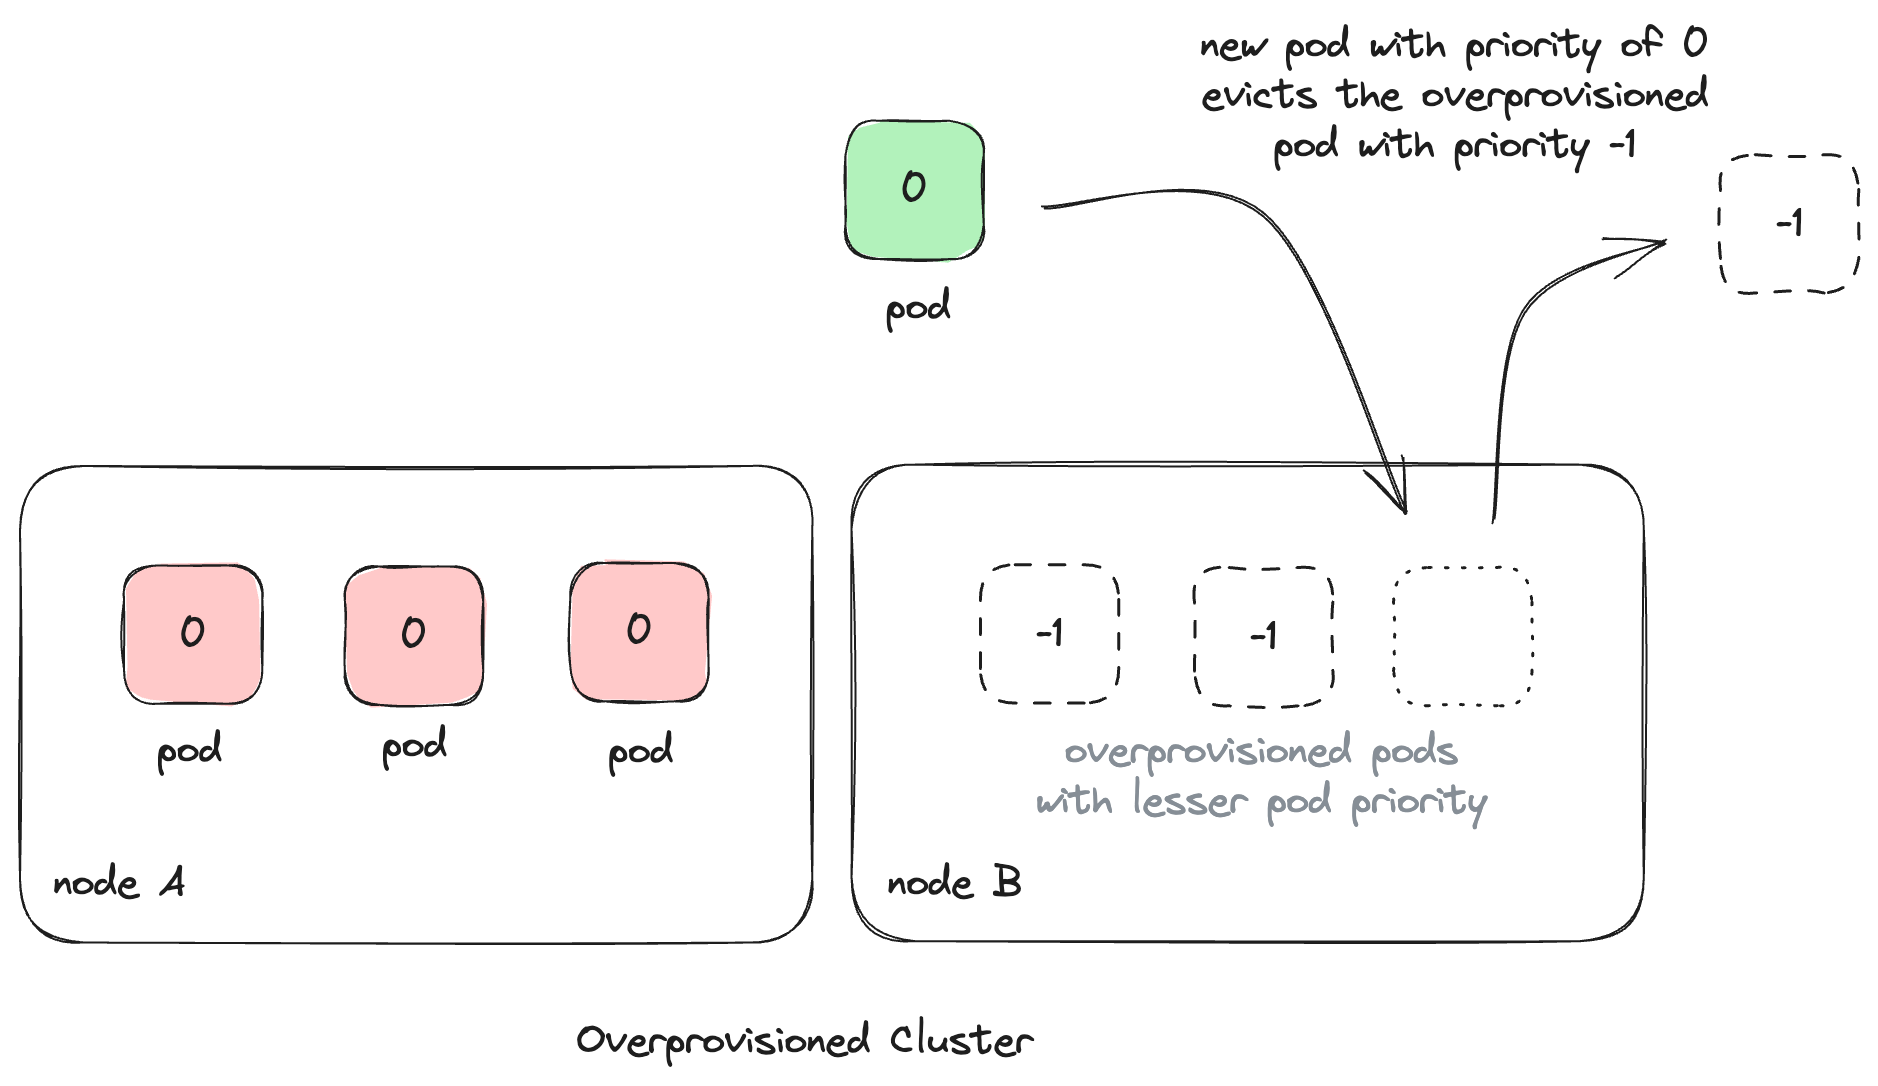
We can save a lot of time from this process since we have the overprovisioned
pods with a lower pod priority. The newly created deployment would have a pod
priority of 0 by default, and our placeholder pause pods with a priority of
-1 would be evicted in favor of this application pod. This means that new pods
can be scheduled without having to wait for the Cluster Autoscaler to do its
magic. Some space would always be reserved in our cluster.

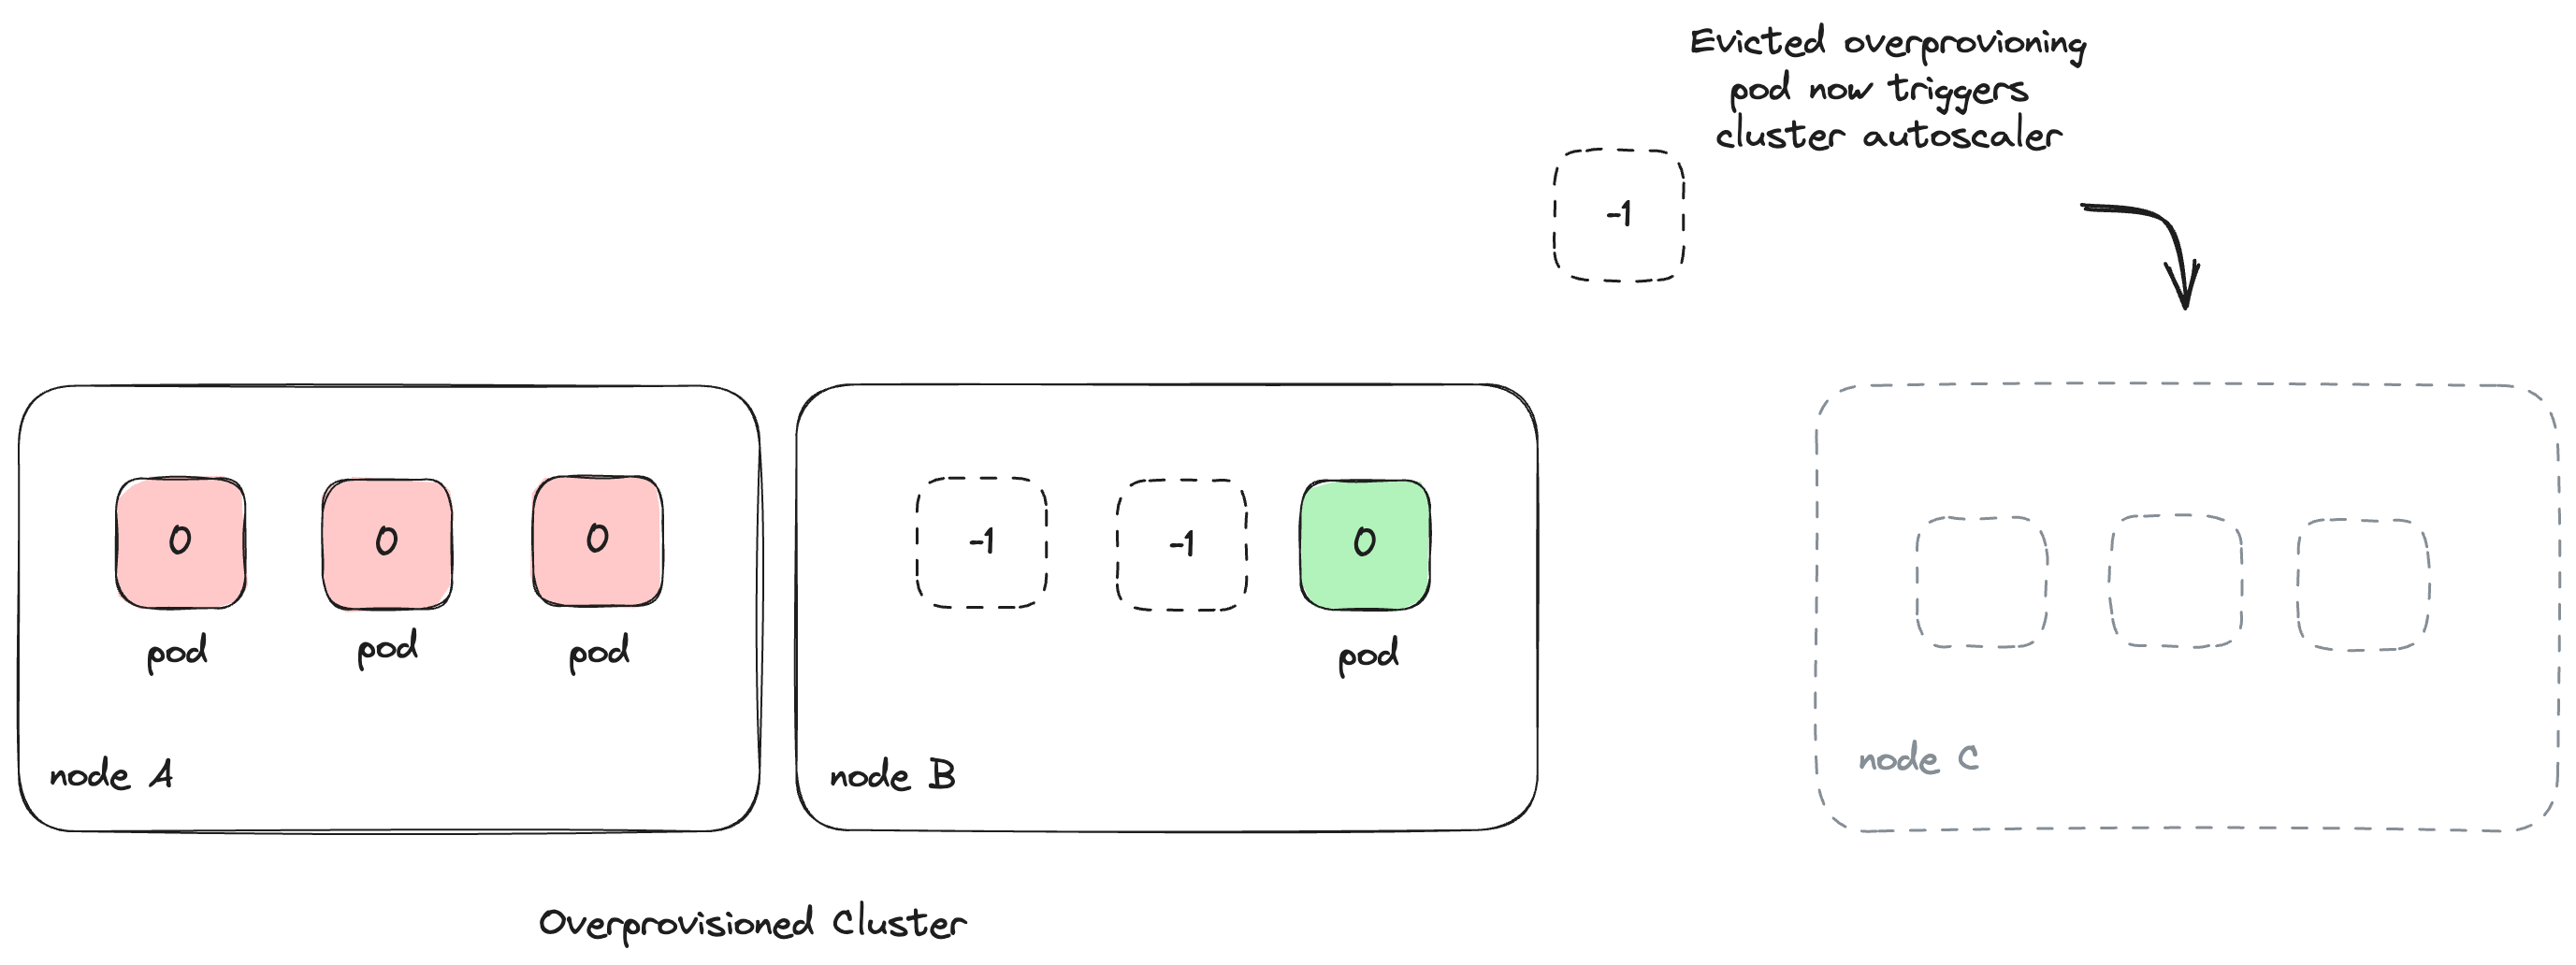
The pause pods would now move to Pending state after being evicted, which the
Cluster Autoscaler will pick up, and it will start provisioning a new node. This
way, the autoscaler doesn’t have to wait for a user to create a new deployment
to scale up the cluster. Instead, it would do it in advance to reserve some
space for potential deployments.

Trade-offs
Now that we have the overprovisioning deployments configured to reserve some space in NeetoDeploy's cluster, we had to decide how much space to reserve. If we increase the CPU and memory limit for the overprovisioning pods or their number of replicas, we will have more space reserved in our cluster. This means that we can handle more user deployments concurrently, but we will incur the cost of keeping the extra buffer running. The trade-off here is between the cost we are willing to pay and the load we want to handle.
For running NeetoDeploy, we started with three copies of overprovisioning pods with 500 milli vCPUs, and later scaled it to 10 replicas after we moved the review apps of all the Neeto products to NeetoDeploy. We have been running all our internal staging deployments and review apps for the past eleven months, and this configuration has been working pretty well for us so far.
If your application runs on Heroku, you can deploy it on NeetoDeploy without any change. If you want to give NeetoDeploy a try, then please send us an email at [email protected].
If you have questions about NeetoDeploy or want to see the journey, follow NeetoDeploy on Twitter. You can also join our community Slack to chat with us about any Neeto product.
Follow @bigbinary on X. Check out our full blog archive.