Solving scaling challenges in NeetoDeploy using Cluster Autoscaler

August 29, 2023
We are building NeetoDeploy. It's a Heroku alternative. Check out our previous blog to see how we started building NeetoDeploy.
We started using NeetoDeploy internally for all our staging applications and the "pull request review" applications. Very soon, we ran into scaling challenges. Some days, we have too many pull requests, and some days, very few pull requests. Some days, the staging sites have an extra load.
Scaling is a fundamental problem in container orchestration. We need to ensure that we have enough computing resources to handle the load, and at the same time, we need to make sure we are not spending money on resources that are not being utilized. If we need to run 10 applications, we should only have to pay for as much computing as is required for running 10 applications. But if this number increases to 100 one day, our system should be able to provision new computing resources.
Understanding Kubernetes Autoscalers
When we need to scale, we can manually allocate resources. This is time-consuming and repetitive. Kubernetes excels in autoscaling. It provides many different options to meet our scaling needs.
We can define autoscalers of different types to make our cluster and our deployments scale up or down based on various parameters and handle traffic gracefully. Kubernetes has three kinds of autoscalers operating at different levels.
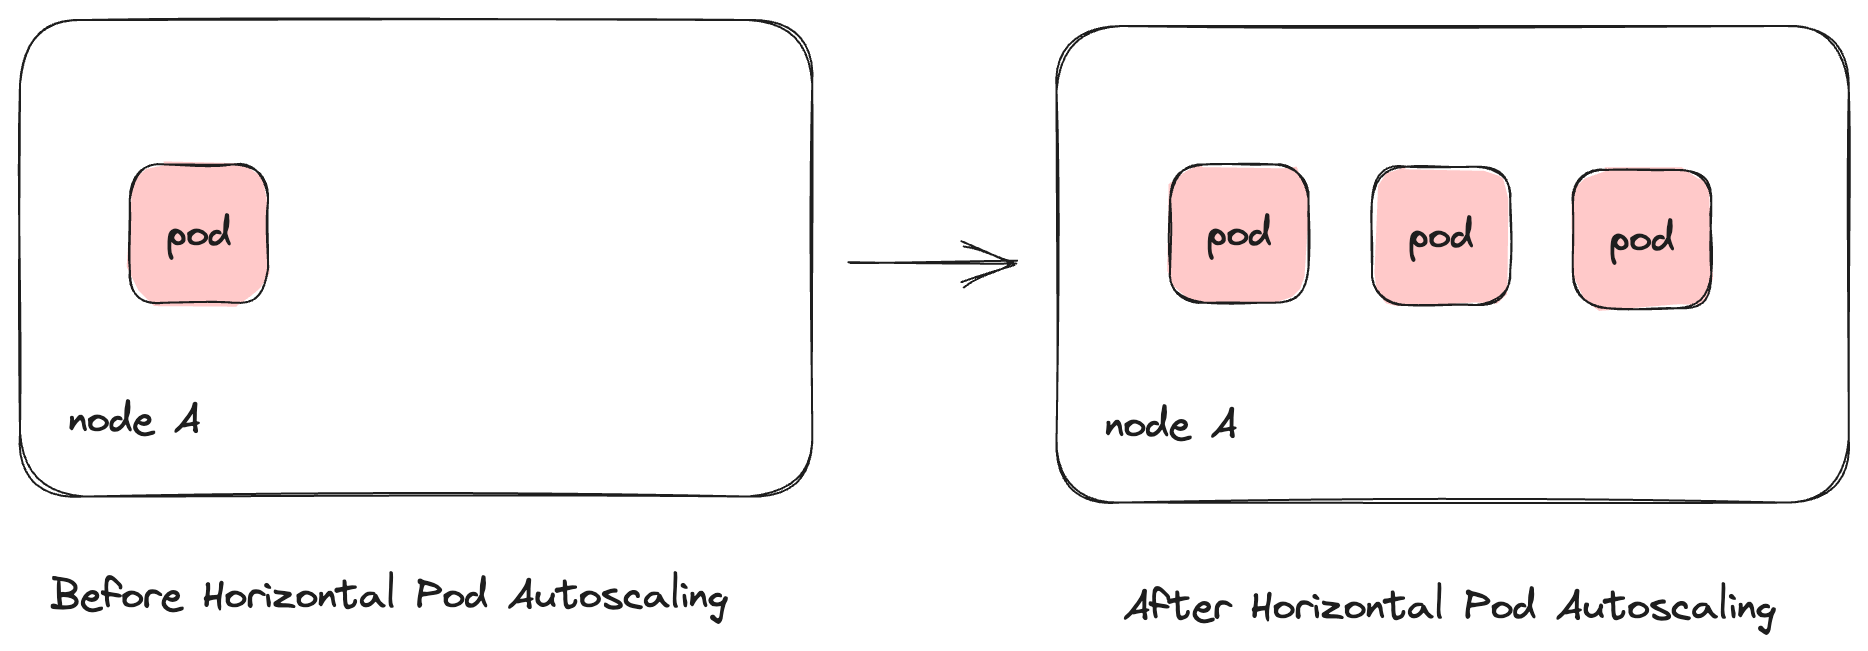
Horizontal Pod Autoscaler (HPA)
The Horizontal Pod Autoscaler can scale up our Kubernetes deployments by increasing the number of copies of our app's container, known as replicas. We can configure our Horizontal Pod Autoscaler to scale up our apps based on metrics like increased memory usage, network load, or even the time of the day when we expect more traffic. Incoming traffic would be redirected to any of the replicas and Kubernetes takes care of this.
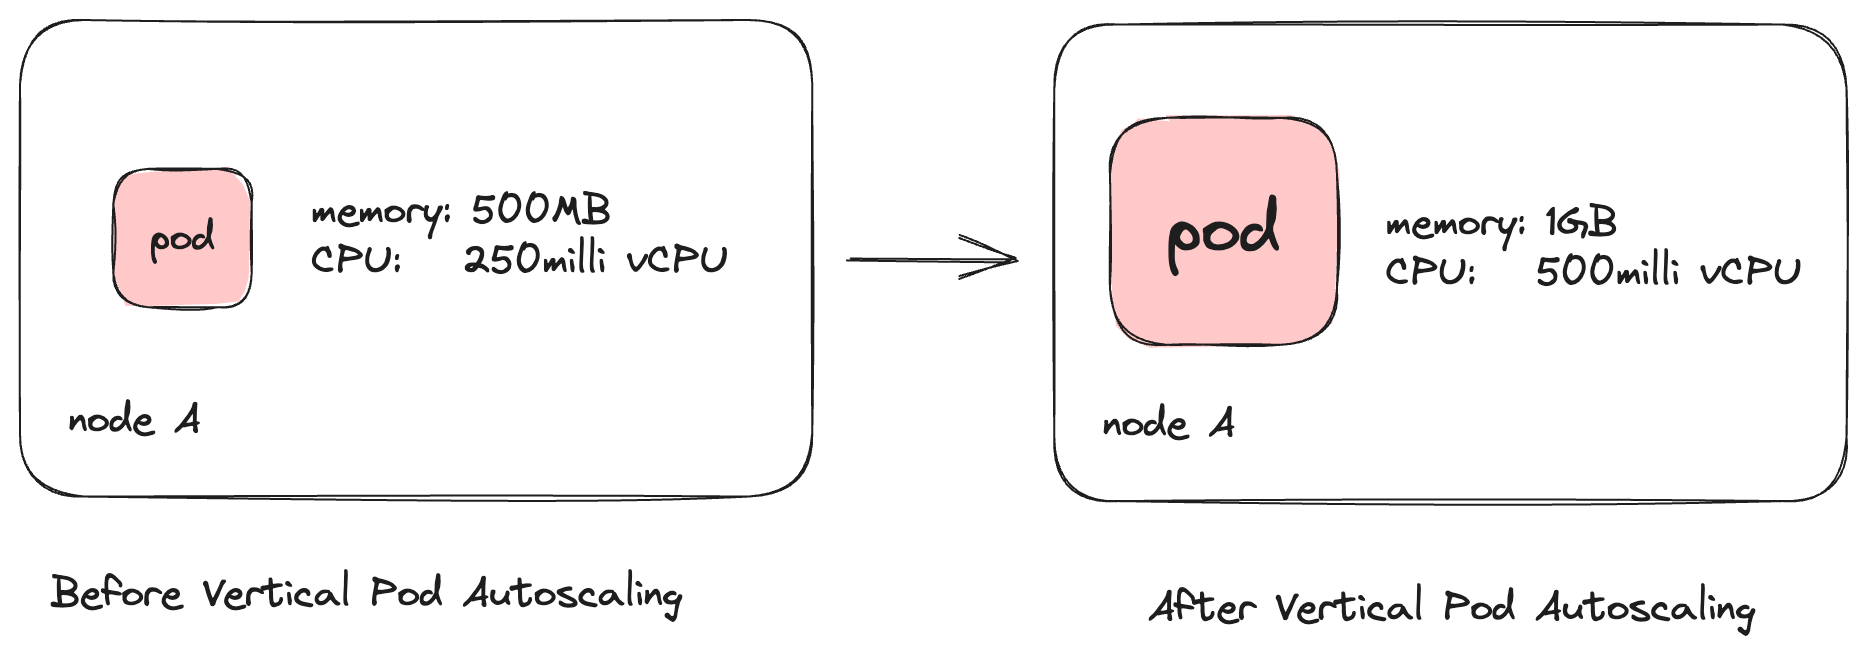
Vertical Pod Autoscaler (VPA)
The Vertical Pod Autoscaler takes a different approach to the same problem solved by the Horizontal Pod Autoscaler. The Vertical Pod Autoscaler increases the CPU and memory resources allocated to our pod based on the load. The number of containers running would remain the same, but they would have more resources to work with and, hence, would be able to handle increased loads.
Cluster Autoscaler
While horizontal and vertical pod autoscaling operate on the level of individual deployments, the Cluster Autoscaler scales in the context of the entire cluster. It increases or decreases the number of nodes in the cluster, making space for more deployments.
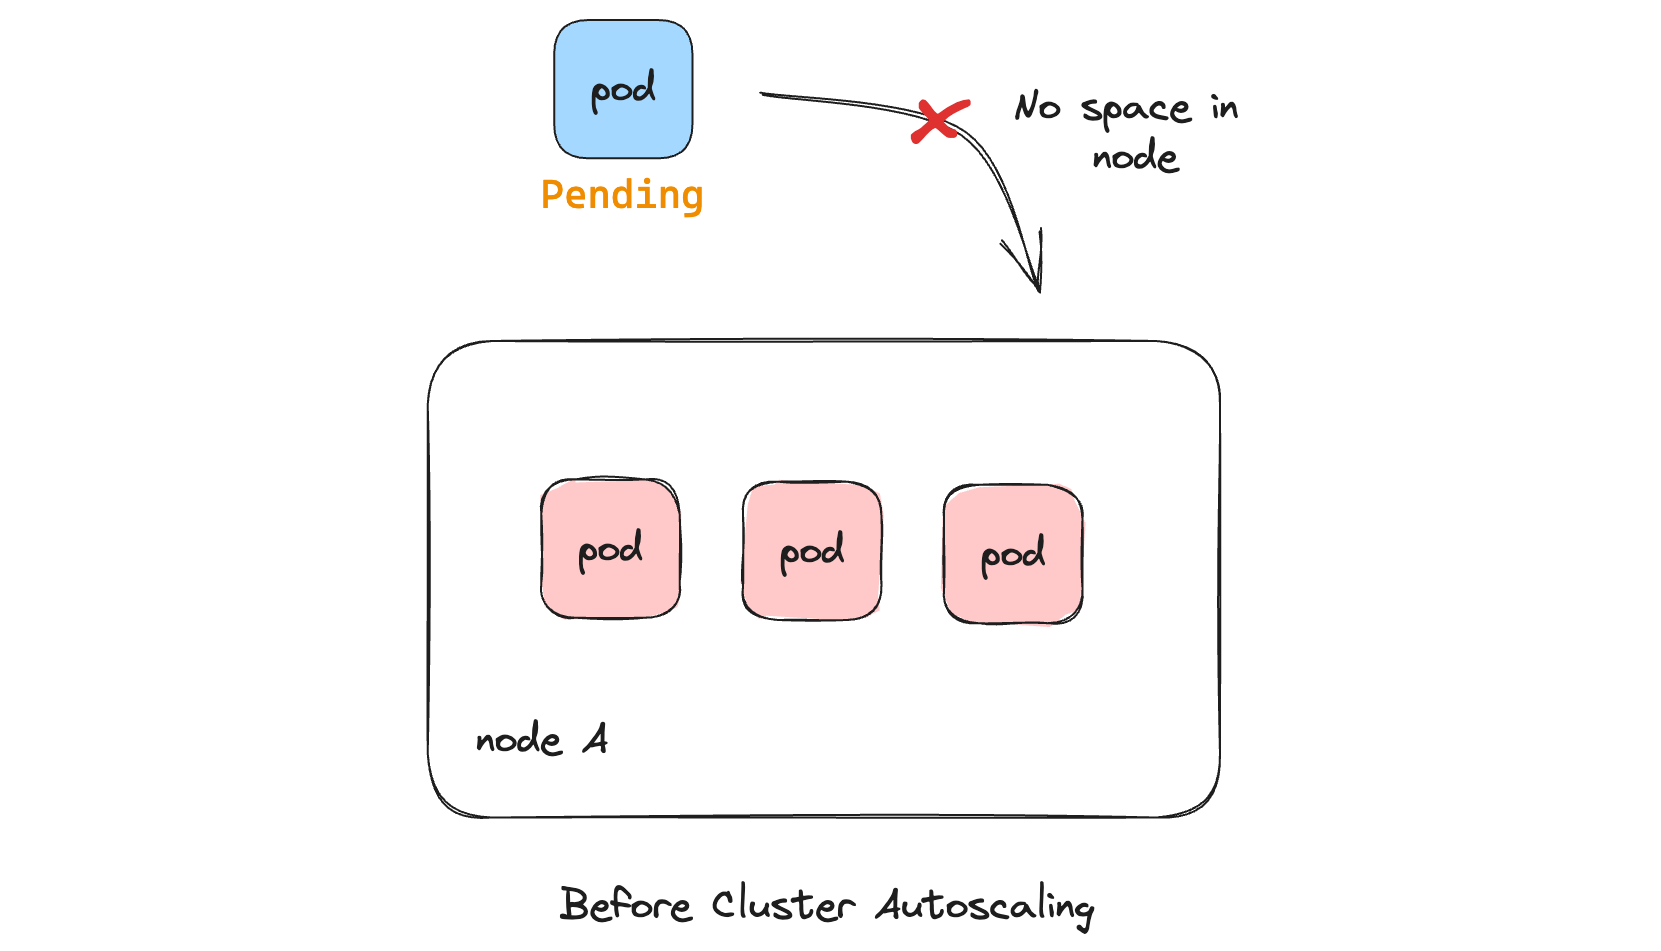
The need for Cluster Autoscaler
Suppose our Kubernetes cluster has three nodes. When we create deployments, our applications will be deployed to any of these three nodes based on the resource availability in the nodes. Without the Cluster Autoscaler, the number of machines running in our cluster will be fixed at 3.
If there is a sudden surge in traffic and we have to deploy 100 apps instead of
10, the resources needed would overflow the three nodes' combined CPU and memory
resources. Essentially, our cluster will not have enough resources to
accommodate all the deployments, and the pods for our deployments will be stuck
in the Pending state.
How Cluster Autoscaler works
The Cluster Autoscaler increases and decreases the number of nodes in our
cluster based on the number of deployments created. So in the above example, if
we had the Cluster Autoscaler running, it would check if any pods are stuck in a
Pending state, and if so, it'll spawn a new node in the cluster. If three
nodes are not enough to accommodate all our deployments, the Cluster Autoscaler
would detect this and scale the cluster to four nodes.
Let us see step by step how cluster autoscaler would work:
- If our Kubernetes cluster is running at full capacity, the pods of a newly
created deployment would have no space to fit in the cluster. In this case,
the pod would be stuck in the
Pendingstate and wouldn't be "scheduled" to any node.
- The Cluster Autoscaler keeps checking if there are unscheduled pods. If so, the Cluster Autoscaler triggers a scale-up by provisioning a new node and attaching it to the cluster.
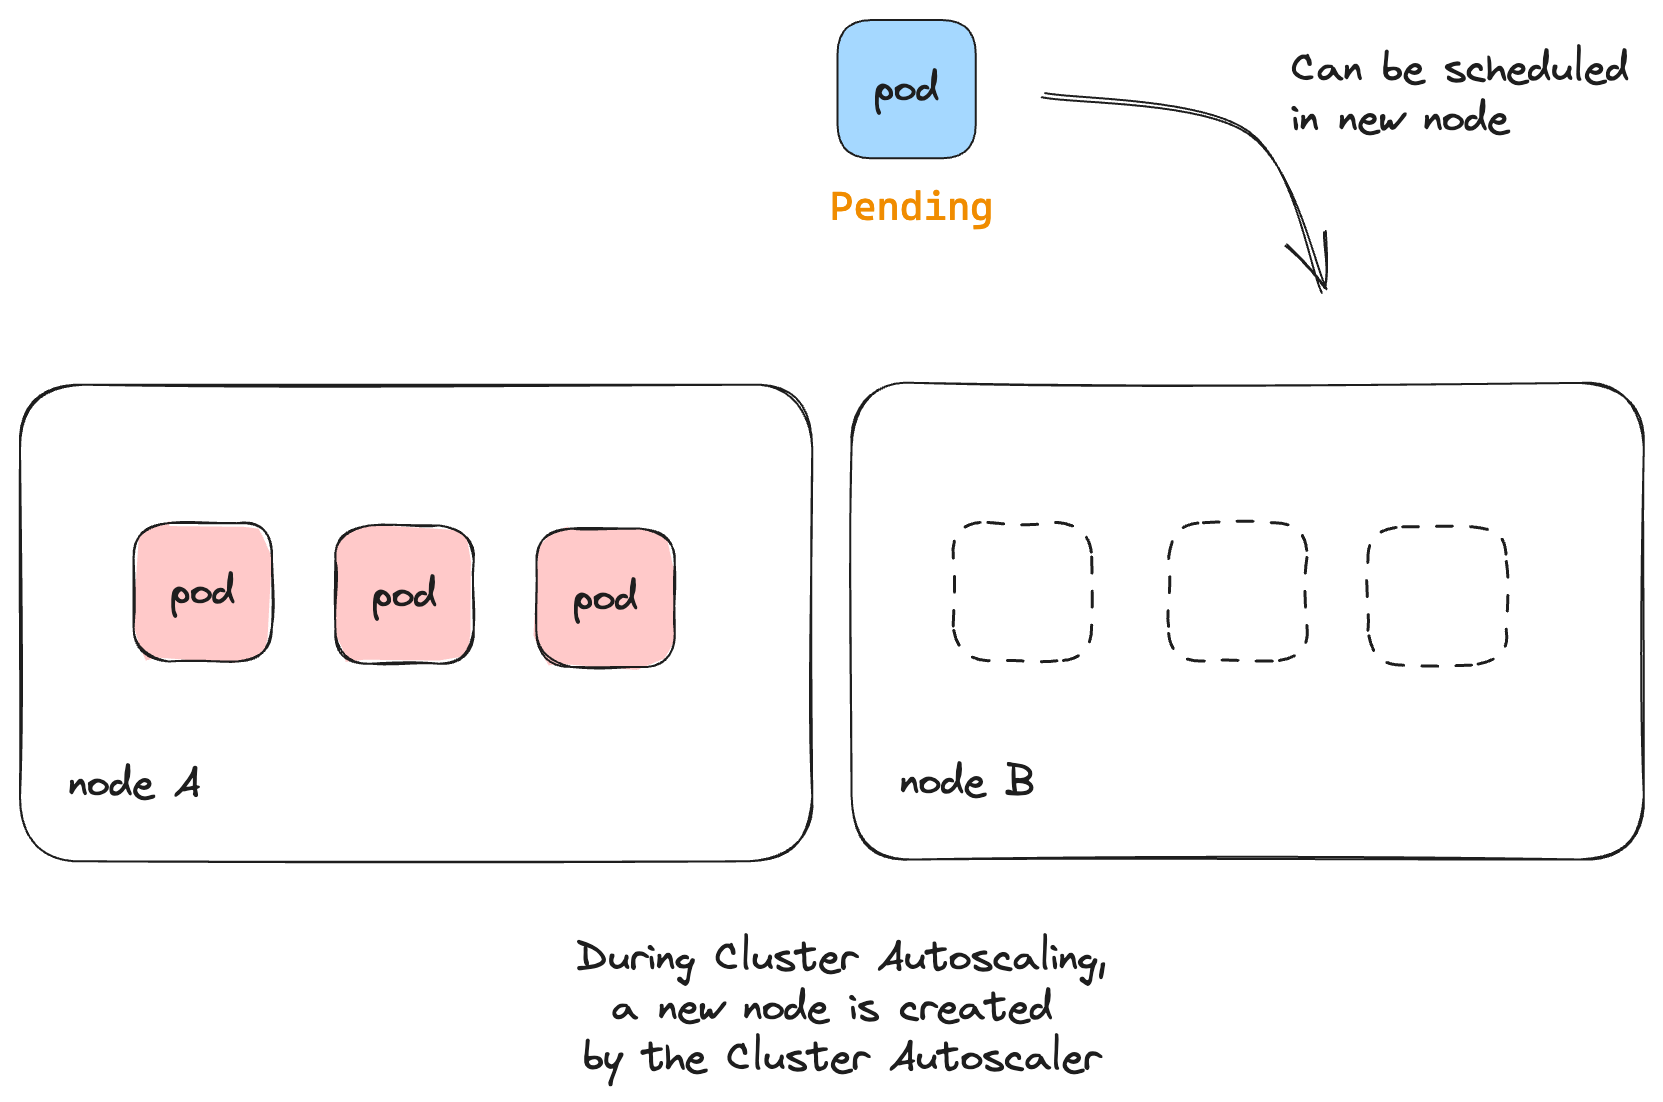
- Once the new node has been provisioned, the capacity of the cluster has
increased, and the pod, which was previously in the
Pendingstate, will be scheduled to the newly created node.

The same thing can happen in reverse as well. Consider the case where deployments are deleted or scaled down, and our nodes are not utilized completely.
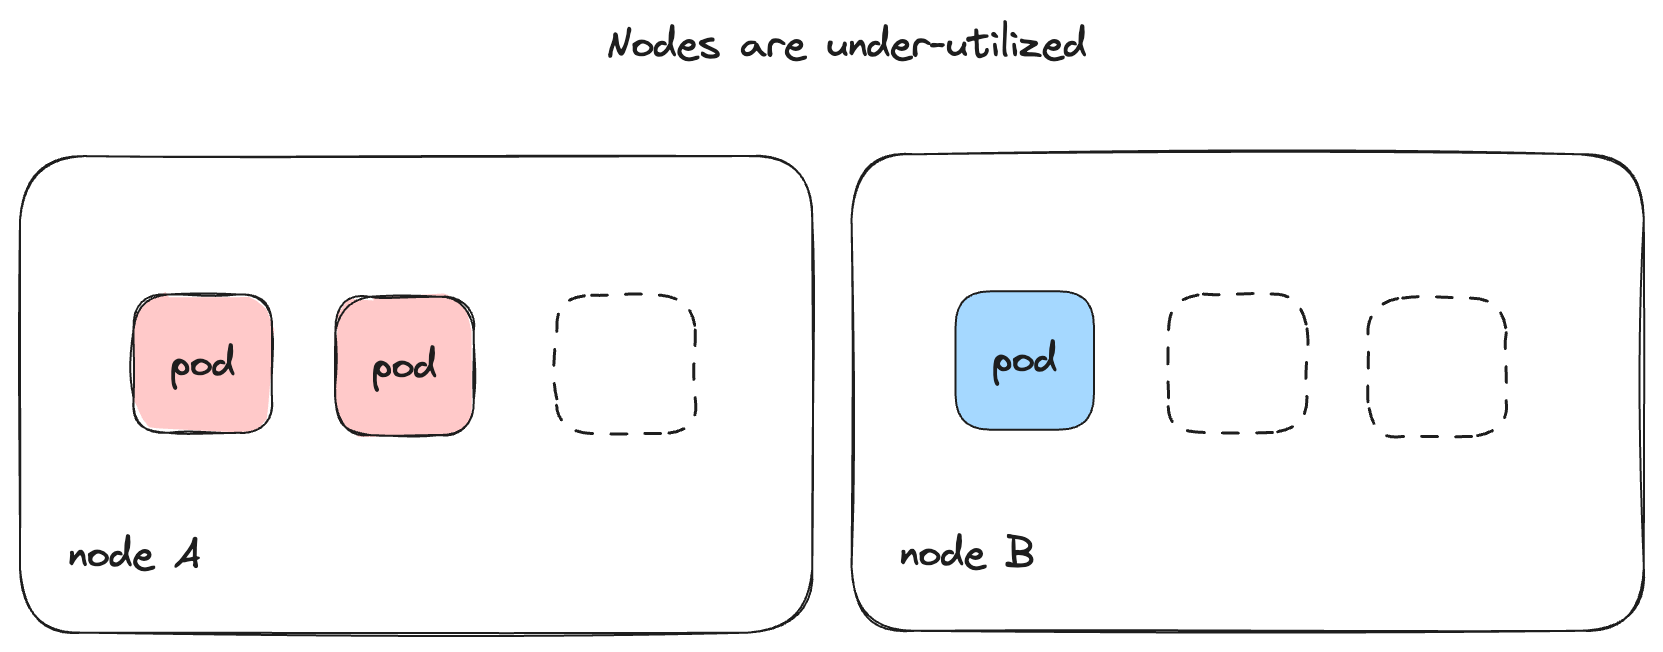
In such a scenario, the Cluster Autoscaler would scale down the nodes so that
only the minimum required resources are running. Existing deployments from
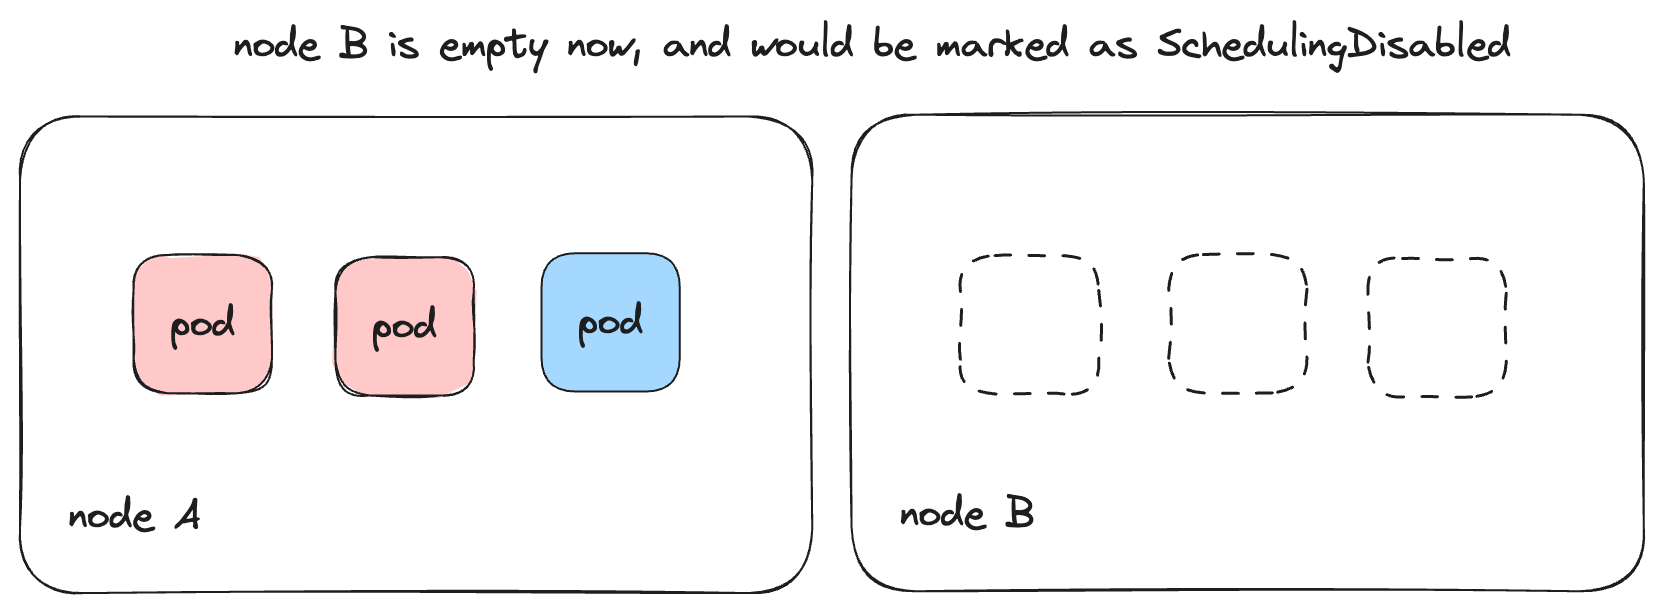
different nodes would be rescheduled and "packed" into a smaller number of nodes
before the unwanted machines are terminated. The Cluster Autoscaler marks unused
nodes as SchedulingDisabled so that no pods are scheduled or moved into this
node.
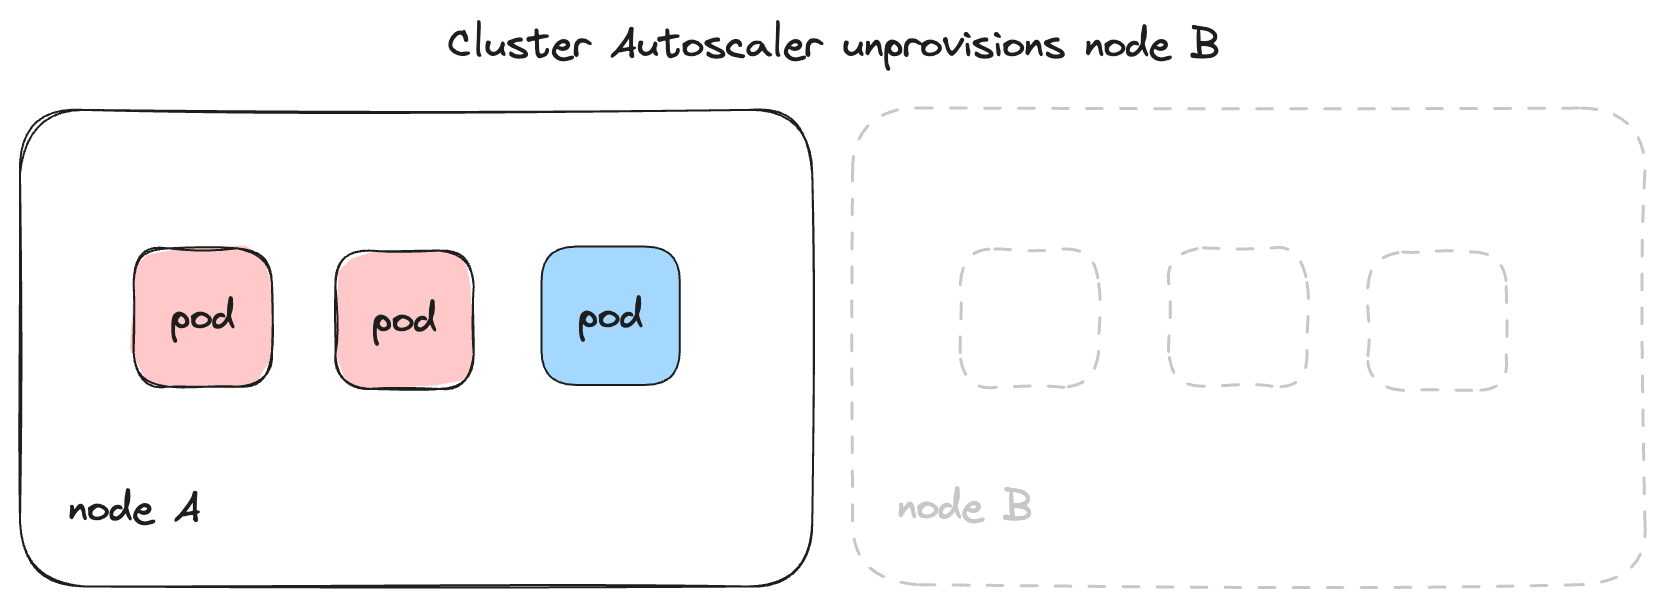
The Cluster Autoscaler then unprovisions the unused node.
The Cluster Autoscaler ensures that the cluster is in a stable state where no
pods are stuck in the Pending state, and no under-utilized resources are kept
running. By default, the Cluster Autoscaler checks for pending pods and scales
down candidates every 10 seconds, but we can configure this to increase or
decrease the speed at which the cluster autoscales.
Deploying the Cluster Autoscaler
The code for Cluster Autoscaler is available at kubernetes/autoscaler, and this can be used to set up Cluster Autoscaler with any Kubernetes cluster.
All major cloud platforms like AWS, GCP, Azure, and DigitalOcean have Cluster Autoscaler support in their managed Kubernetes services. For example, if the Cluster Autoscaler is deployed on Amazon’s Elastic Kubernetes Service (EKS). It would spawn new EC2 instances as needed and attach them to the EKS cluster’s control plane. The complete list of all cloud providers is here.
Since we are running NeetoDeploy on EKS, we referred to the documentation for
setting up autoscaler with EKS and created an OIDC identity provider in IAM. We
then created an IAM policy for using the autoscaler with the necessary
permissions, such as DescribeAutoScalingGroups for describing autoscaling
groups in AWS and setDesiredCapacity to change the desired limit of nodes in
the cluster, etc.
We then created an IAM role with the IAM policy and OIDC provider created earlier and used this role to set up RBAC in the cluster, along with the Cluster Autoscaler deployment. This ensures that the Cluster Autoscaler deployment has all the permissions it needs for inspecting pending pods and working with nodes.
Seeing the autoscaler in action
Once all of this was done, we tried creating multiple deployments with more
significant memory and CPU limits consecutively to see if the cluster could
handle the increased load. Even though the autoscaler took some time to react to
the increased load, the cluster was getting scaled up according to the
requirement, and none of the pods were stuck in the Pending state for long.
Once we deleted our test deployments, the cluster automatically scaled back
down.
If your application runs on Heroku, you can deploy it on NeetoDeploy without any change. If you want to give NeetoDeploy a try, then please send us an email at [email protected].
If you have questions about NeetoDeploy or want to see the journey, follow NeetoDeploy on Twitter. You can also join our community Slack to chat with us about any Neeto product.
Follow @bigbinary on X. Check out our full blog archive.